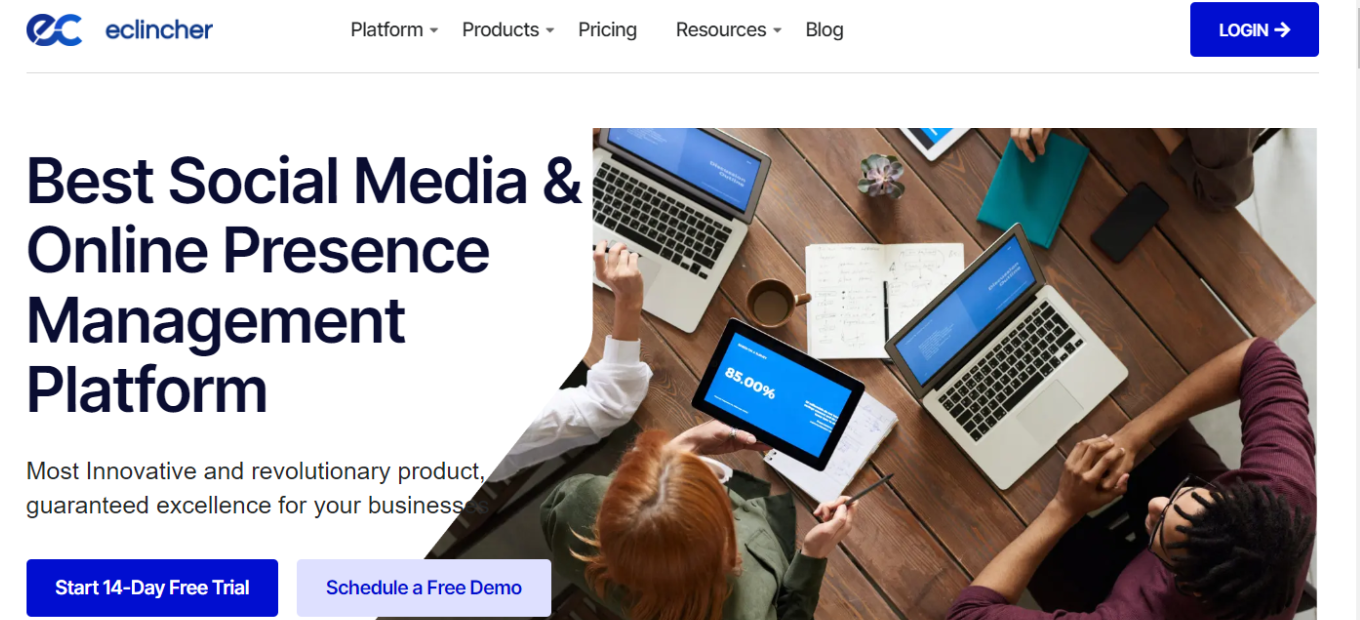
eClincher: Your All-in-One Social Media Management Solution

πŸ† Our Verdict

eClincher is a comprehensive social media management platform that caters to businesses seeking an integrated approach to social media scheduling, monitoring, and engagement. Its user-friendly interface and extensive feature set make it a top choice for companies of all sizes.

βœ… Pros & ❌ Cons

Pros:

  • πŸ”„ Integration with major social media platforms.
  • πŸ“Š Advanced analytics and reporting tools.
  • 🌐 Extensive third-party integrations.
  • πŸ§‘β€πŸ’Ό User-friendly interface with robust training resources.

Cons:

  • πŸ’² Premium features may come at an additional cost.
  • πŸ“ Limited customization in lower-tier plans.
  • πŸ“š Steeper learning curve for advanced features.

πŸ“– About eClincher

Founded to simplify social media management, eClincher has evolved into a leader in the field. It provides a comprehensive suite of tools designed to streamline social media posting, monitoring, and engagement across multiple platforms.

🎯 What’s In It For You?

eClincher offers an all-in-one solution for managing your social media presence, with features that include scheduling posts, social media monitoring, and analytics.

πŸš€ How It Works

Signing Up for eClincher

  1. Visit the eClincher Website
    • Navigate to eClincher: Go to the eClincher website.
    • Find the Sign-Up Option: Look for a sign-up button or link, typically located on the top right corner of the website.
  2. Choose a Plan
    • Review the Plans: eClincher offers various plans, including tiered pricing for additional features.
    • Select a Plan: Choose a plan that suits your business needs. You can start with the basic version or select a paid plan for more advanced features.
  3. Create an Account
    • Enter Your Information: Provide your email address, create a password, and complete the required details.
    • Business Information: You may need to enter information about your business, such as its size and industry.
  4. Account Verification
    • Check Your Email: After registering, you’ll receive an email from eClincher.
    • Verify Your Account: Open the email and click on the verification link to activate your account.
  5. Set Up Your Account
    • Complete the Setup: Once your account is verified, follow the prompts to finalize your account setup.
    • Onboarding Process: eClincher may guide you through an onboarding process to help you get started.
  6. Integrate Your Tools
    • Connect Your Social Media Accounts: Integrate your social media accounts with eClincher to start managing them.
    • Authorization: Authorize eClincher to connect to your social media profiles.
  7. Explore eClincher Features
    • Familiarize Yourself: Begin exploring the various features of eClincher, such as post scheduling, monitoring, and engagement.
    • Use Helpful Resources: eClincher provides tutorials and guides to assist you in maximizing the platform.
  8. Start Using eClincher
    • Begin Managing Your Social Media: You can now start using eClincher to enhance your social media management efforts.

πŸ”— Helpful Tips

  • Take Advantage of Training: eClincher offers training resources to help you make the most of the platform.
  • Utilize Customer Support: If you need assistance, eClincher’s customer support team is available to help.

πŸ’² eClincher Pricing Overview

🌟 Pricing Tiers

eClincher offers various pricing tiers, each designed to cater to different business needs and scales. These tiers typically range from basic free options to more advanced, feature-rich paid plans.

  • Free Tools
    • Overview: eClincher provides a range of free tools, particularly in its basic offering.
    • Included Features: Basic features such as social media scheduling and basic analytics are typically included.
  • Starter Plans
    • Target Audience: Ideal for small businesses or startups looking to enhance their social media presence.
    • Key Features: Enhanced functionalities over the free tier, including additional scheduling options.
  • Professional Plans
    • Designed For: Medium-sized businesses looking for more advanced capabilities.
    • Advanced Features: Includes advanced analytics and reporting, team collaboration, and social inbox management.
  • Agency Plans
    • Suited For: Agencies and enterprises requiring extensive, scalable solutions.
    • Premium Offerings: Advanced features like team management, white-labeling, and client reporting.

πŸ€” Competition

Here are the Pros and Cons of eClincher compared to Buffer:

eClincher

Pros:

  1. πŸ”„ Integration with major social media platforms: eClincher provides robust integration options with various social media networks, making it easy to manage all your accounts in one place.
  2. πŸ“Š Advanced analytics and reporting tools: eClincher offers in-depth analytics and reporting features to help you track the performance of your social media campaigns.
  3. 🌐 Extensive third-party integrations: It supports a wide range of third-party integrations, enhancing its functionality and adaptability.
  4. πŸ§‘β€πŸ’Ό User-friendly interface with robust training resources: eClincher offers a user-friendly interface that is easy to navigate, and it provides training resources to help users make the most of the platform.

Cons:

  1. πŸ’² Premium features may come at an additional cost: Some advanced features in eClincher may require a higher-tier subscription, leading to potential extra expenses.
  2. πŸ“ Limited customization in lower-tier plans: Lower-tier plans may have limitations when it comes to customization options.
  3. πŸ“š Steeper learning curve for advanced features: Mastering some of the more advanced features in eClincher may take time and effort.

Buffer

Pros:

  1. πŸ‘ User-friendly interface: Buffer is known for its intuitive and user-friendly interface, making it easy for users to schedule and manage social media posts.
  2. πŸ”— All-in-One Platform: Buffer offers a comprehensive suite of social media management tools, including scheduling, analytics, and engagement.
  3. 🎯 Inbound Marketing Focus: It excels in content marketing, SEO, and lead nurturing, making it a valuable choice for inbound marketing strategies.
  4. πŸ†“ Free CRM Offering: Buffer provides a free version with basic features, making it suitable for small businesses or startups.
  5. πŸ“š Educational Resources: Buffer offers extensive learning resources through the Buffer Academy.

Cons:

  1. πŸ”§ Limited Customization in Lower Tiers: Advanced customization options are mainly available in higher-tier plans.
  2. πŸ’Έ Cost Escalation: Costs can increase significantly as you move to higher-tier plans or add advanced features.
  3. πŸ“‰ Less Advanced Analytics: Some users may find that Buffer’s analytics capabilities are less comprehensive compared to other platforms like Salesforce.

Please note that the pros and cons listed here are subject to change as these platforms continue to evolve and update their features and pricing structures. It’s essential to evaluate both platforms based on your specific business needs and preferences before making a decision.

πŸ“Œ Conclusion

eClincher is an all-in-one social media management platform suitable for businesses of all sizes. With its comprehensive feature set and user-friendly interface, it offers an efficient solution for managing your social media presence.

“Enhance Your Social Media Management with eClincher.”
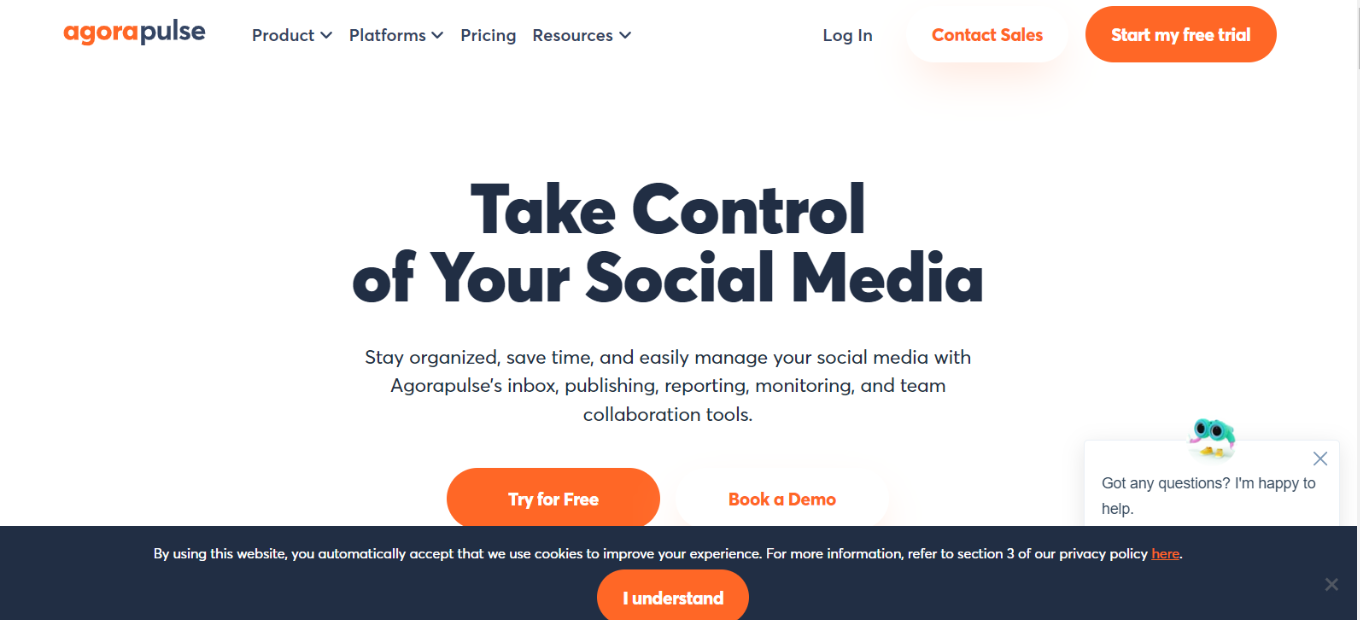
Agorapulse: Streamline Your Social Media Management

πŸ† Our Verdict

Agorapulse is a versatile social media management platform that excels in simplifying the complexities of online engagement. With its user-friendly interface and a range of features, it’s a solid choice for businesses of all sizes.

βœ… Pros & ❌ Cons Pros:

Pros:

  • πŸ”„ Seamless Social Media Management: Agorapulse offers integration across multiple social media platforms.
  • πŸ“Š Advanced Analytics: Robust reporting tools for data-driven insights.
  • 🌐 Broad Third-party Integrations: Connects with various third-party apps. πŸ§‘β€πŸ’Ό User-friendly Interface: Easy navigation with helpful training resources.

Cons:

  • πŸ’² Premium Features Cost: Access to advanced features may require higher-tier subscriptions.
  • πŸ“ Limited Customization: Some lower-tier plans might have customization limitations.
  • πŸ“š Learning Curve: Users may experience a learning curve with advanced features.

πŸ“– About Agorapulse

Founded to simplify social media management, Agorapulse has become a prominent player in the industry. It offers a suite of tools to streamline social media activities, enhance engagement, and drive results.

🎯 What’s In It For You?

Agorapulse offers a comprehensive approach to social media management, covering scheduling, publishing, analytics, and audience engagement.

πŸš€ How It Works

Getting Started with Agorapulse

  1. Visit the Agorapulse Website
    • Go to Agorapulse’s website.
    • Find the Sign-Up Option.
  2. Choose a Plan
    • Review available plans, including free trials and tiered pricing for advanced features.
    • Select a plan aligning with your social media management needs.
  3. Create an Account
    • Provide your email, create a password, and enter necessary details.
    • Optionally, input information about your business and social media accounts.
  4. Account Verification
    • Check your email for a verification link sent by Agorapulse.
    • Click the link to activate your account.
  5. Set Up Your Account
    • Complete onboarding, customizing your Agorapulse experience.
    • Explore training materials and tutorials.
  6. Connect Your Social Media Platforms
    • Integrate your social media accounts with Agorapulse.
    • Authorize Agorapulse to access and manage your accounts.
  7. Explore Agorapulse Features
    • Familiarize yourself with Agorapulse’s social media management capabilities.
    • Utilize available resources for efficiency.
  8. Start Managing Your Social Media
    • Begin scheduling posts, engaging with your audience, and analyzing social media performance.

πŸ”— Helpful Tips

  • Make use of Agorapulse’s training resources and guides.
  • Reach out to Agorapulse’s customer support for assistance.

πŸ’² Agorapulse Pricing Overview

🌟 Pricing Tiers

Agorapulse offers various pricing tiers to suit different business needs and scales.

βœ… Basic Plans

  • Foundational features for social media management.
  • Suitable for businesses starting with social media management.

πŸ’Ό Pro Plans

  • Enhanced functionalities over the basic tier.
  • Designed for businesses seeking more advanced social media management.

πŸš€ Premium Plans

  • Ideal for larger businesses or agencies requiring extensive social media solutions.
  • Offers advanced features, team collaboration, and in-depth analytics.

🏒 Enterprise Plans

  • Tailored for enterprises and agencies with complex social media requirements.
  • Premium offerings include advanced customization, API access, and priority support.

πŸ€” Considerations

  • Agorapulse’s pricing scales with your social media management needs.
  • It integrates seamlessly with various social media platforms, allowing for a personalized experience.

πŸ₯Š Competition

Agorapulse vs. Hootsuite

βœ… Pros

  • Both Agorapulse and Hootsuite offer user-friendly interfaces.
  • Comprehensive social media management tools for scheduling, publishing, and reporting.

❌ Cons

  • Costs may increase for access to premium features in both platforms.

πŸ—£οΈ Testimonials

“Agorapulse has transformed our social media management, helping us engage with our audience effectively.” – Emily Davis, Social Media Manager.

“As a growing business, Agorapulse has been instrumental in managing our social media accounts efficiently.” – Mark Johnson, Founder, Digital Solutions.

πŸ“Œ Conclusion

Agorapulse is a reliable social media management platform that can streamline your online engagement. Whether you’re a marketer, social media manager, or business owner, Agorapulse’s user-friendly interface and social media enhancements can simplify your social media journey.

“Simplify Social Media with Agorapulse.”

Related read: Agorapulse and Hootsuite overlap on the inbox and the publishing calendar. Our Hootsuite review sets out where the two part company on listening and on which tier unlocks approvals.

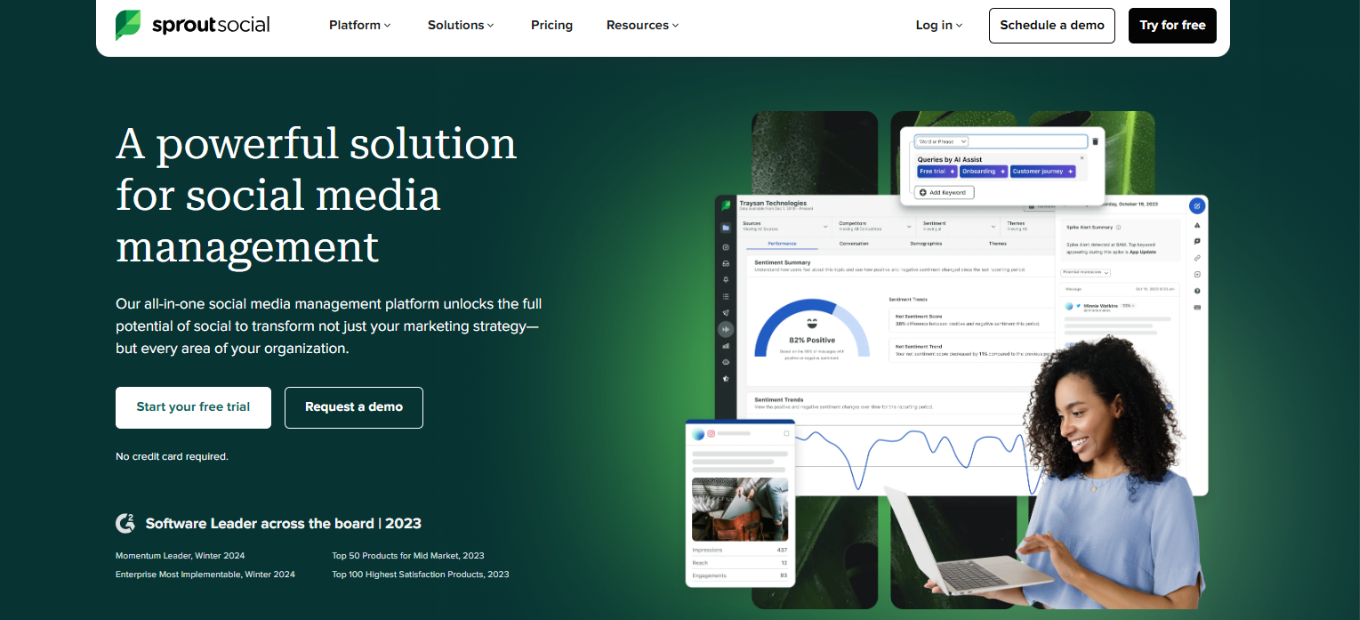
Sprout Social: Elevate Your Social Media Management

πŸ† Our Verdict

Sprout Social is a comprehensive social media management platform that excels in helping businesses enhance their online presence. With a user-friendly interface and a wealth of features, it’s an excellent choice for companies of all sizes.

βœ… Pros & ❌ Cons Pros:

Pros:

  • πŸ”„ Seamless Social Media Management: Sprout Social offers integration across various social media platforms.
  • πŸ“Š Advanced Analytics: Detailed reporting tools empower data-driven decision-making.
  • 🌐 Extensive Integrations: Connects with a wide range of third-party apps and tools.
  • πŸ§‘β€πŸ’Ό User-Friendly Interface: Easy-to-navigate design with comprehensive training resources.

Cons:

  • πŸ’² Premium Features Cost: Access to some advanced features may require a higher-tier subscription.
  • πŸ“ Limited Customization: Lower-tier plans may have limitations in terms of customization.
  • πŸ“š Learning Curve: Users might face a learning curve with advanced features.

πŸ“– About Sprout Social

Founded to revolutionize social media management, Sprout Social has become a leader in the industry. It provides a suite of tools to streamline social media activities, enhance engagement, and drive growth.

🎯 What’s In It For You?

Sprout Social offers a holistic approach to managing social media, with features catering to scheduling, content publishing, analytics, and engagement.

πŸš€ How It Works

Getting Started with Sprout Social

  1. Visit the Sprout Social Website
    • Go to Sprout Social’s website.
    • Locate the Sign-Up Option.
  2. Choose a Plan
    • Review the available plans, including a free trial and tiered pricing for advanced features.
    • Select a plan that aligns with your social media management needs.
  3. Create an Account
    • Provide your email, create a password, and enter necessary details.
    • Optionally, input information about your business, industry, and social media accounts.
  4. Account Verification
    • Check your email for a verification link sent by Sprout Social.
    • Click the link to activate your account.
  5. Set Up Your Account
    • Complete the onboarding process, customizing your Sprout Social experience.
    • Explore training materials and tutorials.
  6. Connect Your Social Media Platforms
    • Integrate your social media accounts with Sprout Social.
    • Authorize Sprout Social to access and manage your accounts.
  7. Explore Sprout Social Features
    • Familiarize yourself with Sprout Social’s social media management capabilities.
    • Utilize available resources for maximum efficiency.
  8. Start Managing Your Social Media
    • Begin scheduling posts, engaging with your audience, and analyzing your social media performance.

πŸ”— Helpful Tips

  • Take advantage of Sprout Social’s training resources and guides.
  • Reach out to Sprout Social’s customer support for any assistance.

πŸ’² Sprout Social Pricing Overview

🌟 Pricing Tiers Sprout Social offers various pricing tiers to suit different business needs and scales.

βœ… Standard Plans

  • Basic features for social media management.
  • Suitable for businesses starting with social media management.

πŸ’Ό Professional Plans

  • Enhanced functionalities over the standard tier.
  • Designed for businesses seeking more advanced social media management.

πŸš€ Advanced Plans

  • Ideal for larger businesses or agencies requiring extensive social media solutions.
  • Offers advanced features, team collaboration, and in-depth analytics.

🏒 Enterprise Plans

  • Tailored for enterprises and agencies with complex social media requirements.
  • Premium offerings include advanced customization, API access, and priority support.

πŸ€” Considerations

  • Sprout Social’s pricing scales with your social media management needs.
  • It integrates seamlessly with various social media platforms, allowing for a personalized experience.

πŸ₯Š Competition

Sprout Social vs. Hootsuite

βœ… Pros

  • Both Sprout Social and Hootsuite offer user-friendly interfaces.
  • Comprehensive social media management tools for scheduling, publishing, and reporting.

❌ Cons

  • Costs may increase for access to premium features in both platforms.

πŸ“Œ Conclusion

Sprout Social is a robust social media management platform that can empower your business’s online presence. Whether you’re a marketer, social media manager, or business owner, Sprout Social’s user-friendly interface and social media enhancements can elevate your social media game.

“Elevate Your Social Media with Sprout Social.”

Related read: weighing enterprise social suites? Our guide to Hootsuite covers where it fits for teams that manage several accounts.

Quillbot: Your Ultimate Writing Assistant

πŸ† Our Verdict

Quillbot shines as a versatile writing assistant, catering to individuals seeking to enhance their writing and grammar skills. Its user-friendly interface and extensive features make it an excellent choice for writers, students, and professionals alike.

βœ… Pros & ❌ Cons Pros:

Pros:

  • πŸ”„ Seamless Writing Assistance: Quillbot offers comprehensive writing support, including grammar correction, sentence rewriting, and vocabulary enhancement.
  • πŸ“Š In-Depth Analysis: Advanced analytics and reporting tools help users track their writing progress.
  • 🌐 Integration-Friendly: Quillbot easily integrates with various writing platforms, making it a valuable addition to any writing toolkit.
  • πŸ§‘β€πŸ’Ό User-Friendly Design: Its intuitive interface is complemented by robust training resources and guides.

Cons:

  • πŸ’² Premium Features Cost: Access to some advanced features may require a paid subscription.
  • πŸ“ Limited Customization: Lower-tier plans have limited customization options for more specific writing needs.
  • πŸ“š Learning Curve: Users may experience a slight learning curve when exploring the more advanced features.

πŸ“– About Quillbot

Quillbot, established to empower writers in 2017, has evolved into a prominent writing assistance tool, focusing on improving grammar, sentence structure, and overall writing quality.

🎯 What’s In It For You?

Quillbot offers a comprehensive suite of features to enhance your writing endeavors, including sentence rewriting, grammar correction, and vocabulary enrichment.

πŸš€ How It Works

Signing Up for Quillbot

  1. Visit the Quillbot Website
    • Go to Quillbot’s website.
    • Locate the Sign-Up Option.
  2. Choose a Plan
    • Review the available plans, including free and premium options.
    • Select the plan that aligns with your writing needs.
  3. Create an Account
    • Provide your email, create a password, and enter necessary details.
    • Optionally, input information about your writing preferences.
  4. Account Verification
    • Check your email for a verification link sent by Quillbot.
    • Click the link to activate your account.
  5. Set Up Your Account
    • Complete the onboarding process, customizing your Quillbot experience.
    • Explore training materials and tutorials.
  6. Integrate Your Writing Tools
    • Connect Quillbot with your preferred writing platforms, granting authorization.
  7. Explore Quillbot Features
    • Familiarize yourself with Quillbot’s writing and editing capabilities.
    • Utilize available resources for maximum efficiency.
  8. Start Using Quillbot
    • Begin enhancing your writing with Quillbot’s assistance.

πŸ”— Helpful Tips

  • Take advantage of Quillbot’s free training resources and guides.
  • Reach out to Quillbot’s customer support for any assistance.

πŸ’² Quillbot Pricing Overview

🌟 Pricing Tiers Quillbot offers a range of pricing tiers, catering to various writing needs and budgets.

βœ… Free Tools

  • Basic features for grammar correction and sentence rewriting.
  • Suitable for casual writers and students.

πŸ’Ό Starter Plans

  • Designed for writers seeking enhanced writing support.
  • Includes additional features for more productive writing.

πŸš€ Professional Plans

  • Ideal for writers and professionals with advanced writing needs.
  • Offers automation, detailed analytics, and customization options.

🏒 Enterprise Plans

  • Tailored for businesses and enterprises with extensive writing requirements.
  • Premium features, scalability, and customization are the highlights.

πŸ€” Considerations

  • Quillbot’s pricing scales with your writing needs, providing more features as your requirements grow.
  • The ecosystem of integrations and add-ons allows for a personalized experience.

πŸ₯Š Competition Quillbot vs. Grammarly

βœ… Pros

  • Quillbot offers an accessible and user-friendly interface.
  • Comprehensive writing assistance, including grammar correction and sentence rewriting.
  • Emphasis on improving content quality through writing.

❌ Cons

  • Limited customization options in lower-tier plans.
  • Costs may increase for access to premium features.

πŸ“Œ Conclusion

Quillbot emerges as a robust writing assistant, catering to a diverse range of users. Whether you’re a writer, student, or professional, Quillbot’s user-friendly interface and writing enhancements can empower your writing journey.

“Enhance Your Writing with Quillbot.”

ProWritingAid: Enhance Your Writing with Advanced Editing Tools

πŸ† Our Verdict

ProWritingAid is a comprehensive writing assistant designed to improve the accuracy, readability, and overall quality of your writing. It’s an essential tool for writers, editors, and students alike.

Key Features πŸ”‘

Advanced Grammar Checker

ProWritingAid’s grammar checker goes beyond basic spell checks, offering detailed feedback to enhance your writing.

Style and Strength Analysis

It provides in-depth analysis of writing style, helping you strengthen your prose and maintain a consistent voice.

Readability Reports

The tool offers readability reports, ensuring your writing is accessible and engaging for your target audience.

βœ… Pros & ❌ Cons

Pros

  • Comprehensive writing feedback
  • Integrates with various platforms
  • User-friendly interface

Cons

  • Some features might be overwhelming for new users
  • Limited free version compared to paid plans

🎯 What’s In It For You?

Using ProWritingAid offers several advantages that can significantly enhance your writing skills and process:

  1. Improved Writing Quality: ProWritingAid’s comprehensive grammar, style, and readability checks help you produce clear, error-free, and engaging content.
  2. Enhanced Efficiency: With its advanced editing tools, you can save time on proofreading and editing, allowing for a quicker writing process.
  3. Learning and Development: The detailed explanations and suggestions provided by ProWritingAid offer a learning opportunity to understand and avoid common writing mistakes.
  4. Versatility: Whether you’re writing a novel, an academic paper, a business report, or a simple email, ProWritingAid’s diverse features cater to a wide range of writing needs.
  5. Integration with Other Platforms: The tool integrates with various writing platforms and tools, streamlining your writing process across different applications.
  6. Customization: You can tailor ProWritingAid to suit your specific writing style and preferences, making it a personalized writing assistant.
  7. Confidence in Your Writing: With the assurance that your work is grammatically sound and stylistically polished, you can write with greater confidence.

Overall, ProWritingAid offers a comprehensive suite of tools that not only improve the quality of your writing but also enhance your understanding and efficiency as a writer.

πŸš€ How to Get Started on ProWritingAid

Starting with ProWritingAid is a straightforward process. Here’s how you can begin enhancing your writing with this tool:

  1. Visit the ProWritingAid Website: Go to ProWritingAid’s website to get an overview of what the tool offers.
  2. Create an Account: Sign up for an account. You can usually start with a free version to try out basic features.
  3. Choose Your Plan: Decide if the free version suffices or if you need more advanced features available in the premium plans. Consider factors like word count limits, full-text checks, and integrations with other platforms.
  4. Download and Install: Depending on your preference, download the ProWritingAid application for your desktop or add it as an extension to your preferred browser or word processor.
  5. Explore the Interface: Familiarize yourself with the ProWritingAid interface. Spend some time understanding how to navigate through the various features like the editing tool, reports, and settings.
  6. Input Your Text: Start by inputting your text into ProWritingAid. You can either write directly in the tool, copy-paste text, or upload a document.
  7. Run Analysis: Use the analysis feature to check your writing. ProWritingAid will provide reports on grammar, style, readability, and more.
  8. Review Suggestions: Carefully review the suggestions made by ProWritingAid. It offers explanations for each suggestion, which is helpful for learning and improving your writing skills.
  9. Make Edits: Apply the suggested changes to your text. You can accept suggestions with a click or edit manually based on the feedback.
  10. Learn and Adapt: Use ProWritingAid’s feedback not just for immediate edits but also to learn common mistakes and improve your overall writing style.
  11. Integrate with Other Tools: If you prefer writing in other software like Microsoft Word, Google Docs, or Scrivener, integrate ProWritingAid with these tools for a seamless writing experience.
  12. Stay Updated: Keep an eye on updates and new features from ProWritingAid to continually enhance your writing experience.

By following these steps, you can make the most out of ProWritingAid and improve your writing skills significantly. Whether you’re working on a novel, an academic paper, a blog post, or any other written content, ProWritingAid can help you refine your work to perfection.

πŸ’° ProWritingAid Pricing Overview

ProWritingAid’s pricing is structured as follows:

  • Monthly Plans:
    • Premium: $30/month
    • Premium Pro: $36/month
  • Yearly Plans:
    • Premium: $120/year
    • Premium Pro: $144/year
  • Lifetime Access:
    • Premium: $399 (one-time payment)
    • Premium Pro: $699 (one-time payment)

πŸ₯Š Competition

ProWritingAid:

  • Pros: Offers in-depth reports for style and strengths analysis, good for long-form content, and integrates with various platforms.
  • Cons: Can have a steeper learning curve for new users, and the free version is limited compared to paid plans.

Grammarly:

  • Pros: Known for its user-friendly interface and broad appeal. Offers real-time grammar and spelling checks, and is suitable for both short and long-form content.
  • Cons: May lack some advanced stylistic suggestions compared to ProWritingAid, and some features are only available in the premium version.

Both tools are excellent for grammar checking and improving writing quality, with ProWritingAid being more detailed and Grammarly more user-friendly.

Conclusion

ProWritingAid stands out for its depth of analysis and versatility, catering to a wide range of writing needs. Whether you’re a novelist, a student, or a professional writer, ProWritingAid offers the tools to refine your writing, ensuring clarity, correctness, and impact.

“Publish without self-doubt.”

Webflow: Your Comprehensive Website Building Platform

πŸ†Overview

Webflow is a cutting-edge web design tool that combines the functionalities of a website builder with advanced design features. It’s designed for professionals and novices alike, offering a no-code solution for creating high-quality websites.

Key Features πŸ”‘

Intuitive Visual Editor

Webflow’s visual editor provides a seamless interface for designing websites without the need for coding. It’s user-friendly and highly customizable.

Responsive Design

Create websites that automatically adjust to fit any screen size, ensuring a consistent experience across all devices.

CMS & E-commerce

Webflow integrates a content management system and e-commerce capabilities, allowing you to manage content and online sales efficiently.

Integrations & SEO

It offers robust SEO tools and integrates with various third-party applications to enhance your website’s performance.

Pros and Cons βš–οΈ

Pros

  • Highly customizable design options
  • User-friendly interface with drag-and-drop features
  • Advanced SEO tools

Cons

  • Steeper learning curve for beginners
  • Higher cost compared to some competitors

🎯 What’s In It For You?

Choosing Webflow as your web design platform offers numerous benefits:

  1. Intuitive Visual Editor: Webflow provides a user-friendly interface with a drag-and-drop editor, making it easy for both beginners and experienced designers to create stunning websites without coding knowledg​​e.
  2. Seamless Hosting and Fast Performance: The platform includes web hosting services, ensuring speed and reliability with a global CDN, which is crucial for a good user experienc​​e.
  3. Advanced SEO Tools: Webflow aids in optimizing your website for search engines with features like automatically generated sitemaps and customizable 301 redirects, enhancing your site’s online visibilit​​y.
  4. Diverse Templates and Design Flexibility: With over 1500 templates, you can create various types of sites, including e-commerce, blogs, or portfolios, without needing to learn codin​​g.
  5. CMS and Blogging Platform: The integrated CMS allows for efficient content management, and the built-in blogging platform simplifies adding and managing blog post​​.
  6. Cost-Effective Solution: Webflow’s visual editor reduces the need for expensive design software or plugins, thus lowering overall development cost​​.
  7. Easy E-commerce Integration: You can easily add products, set up payment methods, and start processing orders with Webflow’s straightforward e-commerce tool​​.
  8. Wide Range of Third-Party Integrations: Webflow supports seamless integration with various apps and services, enhancing your website’s functionality and efficienc​​e.
  9. Scalable and Secure Hosting: The platform offers hosting on Amazon Web Servers and Fastly Network, ensuring scalability and security for your websit​​e.
  10. Responsive Customer Support: Webflow provides 24/7 customer support to assist with any issues or queries, ensuring continuous smooth operation of your website​.
  11. Free Starter Plan: For those unsure about the platform, Webflow offers a free starter plan to build and test up to two website​​.

While Webflow offers many advantages, it’s important to note some limitations, such as a learning curve for new users and a relative lack of functionality compared to some other platforms. However, for many, the benefits of an intuitive, flexible, and comprehensive web design solution far outweigh these drawbacks.


πŸš€ How to Get Started on Webflow

Embarking on your Webflow journey? Here’s a step-by-step guide to get you started:

  1. Sign Up and Explore Plans: Begin by visiting the Webflow website and signing up for an account. Explore the different pricing plans to find one that suits your needs, considering factors like site traffic, number of pages, and CMS capabilities.
  2. Familiarize Yourself with the Dashboard: Once registered, take some time to explore the Webflow dashboard. This is where you’ll manage your sites, access templates, and find resources.
  3. Choose a Template or Start from Scratch: You can start your website design either by choosing from over 1500 templates or starting from scratch for a completely custom design. Templates can be a great starting point for beginners.
  4. Learn the Basics: Before diving into design, it’s beneficial to understand the basics of Webflow’s interface. Utilize Webflow University, a comprehensive learning resource with tutorials and guides on every aspect of the platform.
  5. Start Designing Your Site: Use the drag-and-drop editor to start building your site. Here, you can add elements like text, images, and videos, and customize the layout, style, and interaction of these elements.
  6. Set Up Your CMS: If your site requires a content management system, set up Webflow’s CMS to manage and update your content easily. This is especially useful for blogs or sites with dynamic content.
  7. Optimize for SEO: Utilize Webflow’s SEO tools to optimize your site. This includes setting meta titles and descriptions, optimizing images, and ensuring that your site structure is search-engine friendly.
  8. Add E-commerce Features (If Required): If you’re building an online store, use Webflow’s e-commerce tools to add products, set up categories, configure payment methods, and manage orders.
  9. Test Your Site: Before going live, thoroughly test your site for any errors or issues. Check the responsiveness on different devices, load times, and the overall user experience.
  10. Publish Your Site: Once you’re satisfied with the design and functionality, connect your domain (if you have one) and publish your site. Webflow hosting ensures fast and reliable performance.
  11. Monitor and Update Regularly: After your site is live, continue to monitor its performance and make updates as necessary. Keep your content fresh, and don’t forget to leverage Webflow’s continuous updates and new features.
  12. Seek Support When Needed: If you encounter any challenges, Webflow’s customer support and the community forums are great resources for assistance and advice.

Embarking on your Webflow journey involves a blend of creativity, strategic planning, and learning. By following these steps, you can effectively harness the power of Webflow to create a stunning and functional website tailored to your needs.

πŸ’° Cisco Webex Pricing Overview

Webflow offers several pricing plans for different needs:

  1. Site Plans: Includes Starter (Free for basic use), Basic ($14/mo), CMS ($23/mo), Business ($39/mo), and Enterprise (custom pricing). Features vary by plan, with increases in pages, CMS items, form submissions, bandwidth, and visitor limits as you move to higher plans.
  2. Ecommerce Plans: Standard ($29/mo), Plus ($74/mo), and Advanced ($212/mo). These plans are tailored for online stores with varying numbers of ecommerce items, CMS items, and transaction fees.
  3. Workspace Plans: Starter (Free), Core ($19/mo per seat), Growth ($49/mo per seat), and Enterprise (custom pricing). These plans are designed for teams and vary in team size, staging sites, and other collaborative features.

Competitors 🏁

Cisco Webex and Wix are fundamentally different platforms, each with its own set of pros and cons:

Cisco Webex :

  • Pros: Offers comprehensive video conferencing and collaboration tools, including meetings, calling, messaging, webinars, and event management. Known for its reliability and security, it’s widely used in professional settings.
  • Cons: May be more complex than necessary for simple meeting needs; can be costlier compared to basic communication platforms.

Wix :

  • Pros: A user-friendly website builder with a drag-and-drop interface, suitable for individuals and small businesses. Offers a range of templates and design flexibility, as well as e-commerce capabilities.
  • Cons: While easy to use, it may lack some advanced features desired by professional web developers; customization can be limited compared to fully coding a website.

It’s important to note that while Webex focuses on communication and collaboration, Wix is centered around website building and design.

Conclusion 🎬

Webflow stands out for its combination of design flexibility, advanced features, and user-friendly interface, making it a top choice for website building. Whether you’re a designer, marketer, or business owner, Webflow offers the tools needed to create stunning, functional websites.

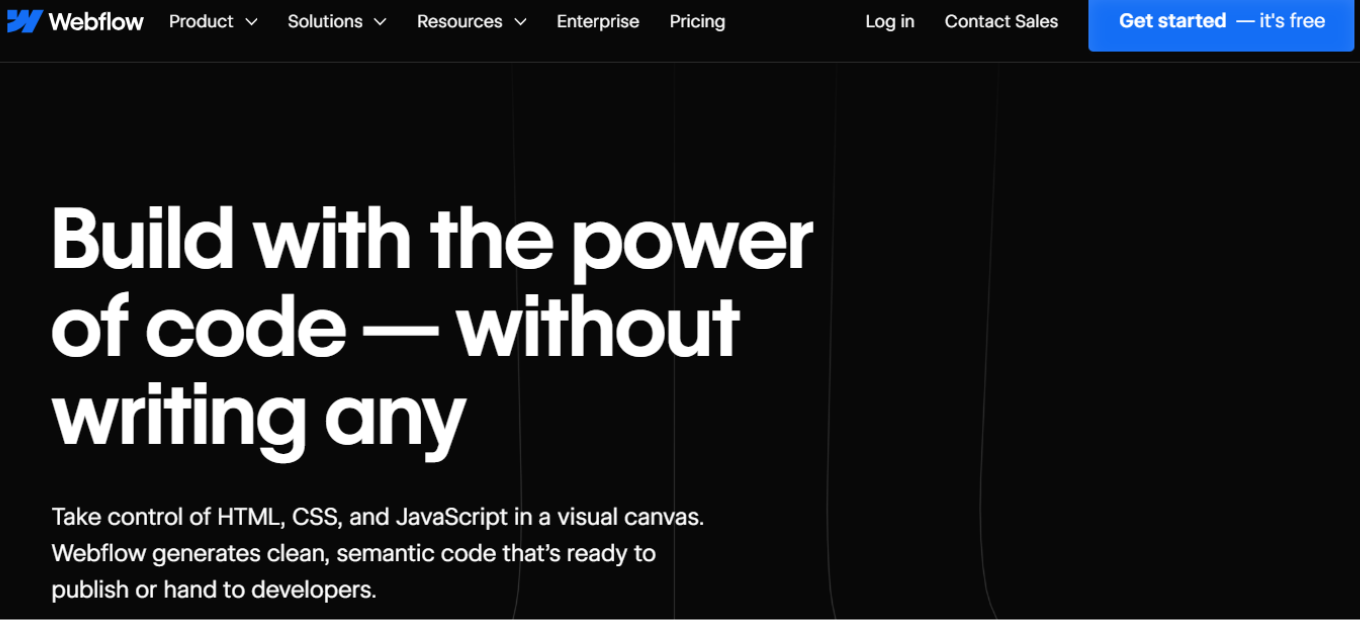
“Build with the power of code β€” without writing any.”

Cisco Webex: Your Go-To for Professional Video Conferencing and Collaboration

πŸ† Our Verdict

Cisco Webex stands as a powerful, secure platform for professional video conferencing, well-suited for enterprises needing robust collaboration tools.

βœ… Pros & ❌ Cons

Pros:

  • High-quality video and audio conferencing.
  • Comprehensive security features.
  • Integrations with various business tools.

Cons:

  • Can be complex for new users.
  • Some features may require additional setup.
  • Higher cost compared to some competitors.

🌐 About Cisco Webex

Cisco Webex is a leading name in enterprise-level video conferencing and collaboration tools, offering a range of services from webinars to team collaboration.

🎯 What’s In It For You?

Webex delivers reliable, high-quality video meetings, collaboration tools, and advanced security, catering to all types of professional communication needs.

πŸš€ How It Works

Getting Started with Cisco Webex

1️⃣ Visit Cisco Webex’s Website

2️⃣ Sign Up for an Account

  • Click the β€˜Sign Up’ button and create your account.

3️⃣ Download the Webex Application

  • After signing up, download the Webex application for your desktop or mobile device.

4️⃣ Set Up Your Profile

  • Customize your profile settings, including your audio and video preferences.

5️⃣ Schedule or Join a Meeting

  • Use the app to schedule a new meeting or join an existing one.

6️⃣ Explore Webex Features

  • Familiarize yourself with features like screen sharing, meeting recording, and virtual backgrounds.

7️⃣ Host or Participate in Meetings

  • Start hosting or participating in meetings to experience Webex’s capabilities.

8️⃣ Utilize Advanced Options

  • Explore advanced features such as Webex Teams for collaboration, or Webex Events for larger audiences.

πŸ“Œ Helpful Tips

  • Explore Webex integrations to enhance productivity.
  • Utilize training resources for a smoother onboarding process.

πŸ’° Cisco Webex Pricing Overview

Cisco Webex offers various pricing plans:

  1. Webex Free: This plan is free and includes features such as meetings with up to 100 participants, 40-minute meeting duration, unlimited messaging, screen sharing, and local meeting recordings.
  2. Webex Enterprise: Aimed at larger organizations, this plan offers more advanced features. Specific details and pricing are available upon contacting sales.

Both plans provide core functionalities like HD video, audio, and web conferencing. The Enterprise plan includes additional features such as increased attendees, cloud recording, and enhanced security options.

πŸ₯Š Competition

Cisco Webex vs Zoom

Cisco Webex Pros:

  • Strong security features.
  • High-quality video and audio.
  • Advanced collaboration tools for enterprises.

Cisco Webex Cons:

  • Can be more complex to set up and use.
  • Sometimes requires software installation.
  • Potentially higher cost for premium features.

Zoom Pros:

  • User-friendly interface.
  • Popular for its ease of joining meetings.
  • Affordable pricing with a generous free tier.

Zoom Cons:

  • Faced security concerns (though many have been addressed).
  • Limited advanced features in the free version.
  • Some reports of video quality issues with large meetings.

Both platforms are strong contenders in video conferencing, with Webex focusing more on enterprise needs and Zoom known for its user-friendliness and broader appeal.

πŸ”š Conclusion

Cisco Webex offers a comprehensive solution for professional-grade video conferencing and collaboration, ideal for businesses seeking reliable and secure communication tools.

“The most trusted platform for secure, hybrid work.”

Zapier: Automating Workflows with Ease and Efficiency

πŸ† Our Verdict

Zapier is a leading platform in workflow automation, seamlessly connecting various apps to automate tasks and save valuable time.

βœ… Pros & ❌ Cons

Pros:

  • Supports integration with over 3,000 apps.
  • User-friendly interface with easy setup.
  • Free tier available for basic use.

Cons:

  • Complex workflows might require a higher-tier plan.
  • Limited control over timing of automated tasks.
  • Dependency on third-party app’s API stability.

🌐 About Zapier

Zapier, founded in 2011, revolutionizes how we approach task automation by linking different web applications to perform coordinated functions.

🎯 What’s In It For You?

Zapier offers a range of automation solutions, from simple to complex workflows, catering to individual and business needs alike.

πŸš€ How It Works

Getting Started with Zapier

1️⃣ Visit Zapier’s Website

2️⃣ Create an Account

  • Sign up for a new account using your email, Google, or Facebook credentials.

3️⃣ Explore the Dashboard

  • Familiarize yourself with the Zapier dashboard layout and features.

4️⃣ Choose Apps to Connect

  • Select the apps you want to integrate from Zapier’s vast app directory.

5️⃣ Create Your First β€˜Zap’

  • Set up a Zap by choosing a trigger from one app and an action in another.

6️⃣ Customize Your Zap

  • Define specific details for how your Zap will function.

7️⃣ Test Your Zap

  • Run a test to ensure your Zap works as intended.

8️⃣ Activate Your Zap

  • Once tested, activate your Zap to automate your workflow.

πŸ“Œ Helpful Tips

  • Start with simple Zaps and gradually explore more complex automations.
  • Use the Zapier community and help center for insights and support.

πŸ’° Zapier Pricing Overview

Zapier’s pricing plans include:

  • Free Plan: Ideal for basics of automation with 100 tasks per month, single-step Zaps, and a no-code editor.
  • Starter Plan: $19.99/month, billed annually for 750 tasks per month, multi-step Zaps, filters, and formatter.
  • Professional Plan: $49/month, billed annually for 2,000 tasks per month, unlimited premium apps, and custom logic with paths.
  • Team Plan: $69/month, billed annually for 2,000 tasks per month, unlimited users, and premier support.
  • Company Plan: Custom pricing for advanced admin permissions, SAML single sign-on, and custom data retention.

πŸ₯Š Competition

Zapier vs Microsoft Power Automate

Zapier Pros:

  • Broad app integration with over 3,000 apps.
  • User-friendly, no-code interface.
  • Flexible, with simple to complex automation possibilities.

Zapier Cons:

  • Can be expensive for high-volume tasks.
  • Limited deep integration with Microsoft products.
  • Relies on third-party APIs, affecting stability.

Microsoft Power Automate Pros:

  • Deep integration with Microsoft ecosystem.
  • Advanced workflow automation capabilities.
  • Part of Microsoft 365 suite, offering extensive enterprise features.

Microsoft Power Automate Cons:

  • Less intuitive for beginners.
  • Fewer third-party app integrations than Zapier.
  • Potentially complex for simple automation needs.

πŸ”š Conclusion

Zapier stands out as a versatile and powerful tool for automating tasks across various applications, making it indispensable for individuals and businesses looking to optimize their workflows.

“The easiest way to automate your work.”

Basecamp: Streamlining Project Management for Teams

πŸ† Our Verdict

Basecamp stands as a robust and user-friendly project management tool, ideal for teams seeking a simple yet effective way to coordinate tasks and communication.

βœ… Pros & ❌ Cons

Pros:

  • Streamlined user interface, easy to navigate.
  • Integrates task lists, schedules, and file sharing in one platform.
  • Effective communication tools like message boards and Campfire chat.

Cons:

  • Lacks the granularity of some more complex project management tools.
  • Limited customization options.
  • May not suit very large teams with complex project management needs.

🌐 About Basecamp

Founded in 2004, Basecamp has evolved into a go-to solution for straightforward, no-fuss project management. With a focus on simplicity and clarity, it has garnered a loyal user base.

🎯 What’s In It For You?

Basecamp consolidates project tasks, communication, schedules, and files, fostering a central space for team collaboration.

πŸš€ How It Works

Getting Started with Basecamp

1️⃣ Visit Basecamp’s Website

2️⃣ Sign Up

  • Click on the β€˜Sign Up’ button to create a new account.

3️⃣ Choose Your Plan

  • Select a plan that best fits your team’s needs.

4️⃣ Set Up Your Workspace

  • Customize your workspace with your company details.

5️⃣ Create Your First Project

  • Start a new project and set up the project name and details.

6️⃣ Add Team Members

  • Invite team members to join the project workspace.

7️⃣ Utilize Features

  • Begin using Basecamp’s features like to-do lists, message boards, and schedules.

8️⃣ Collaborate and Communicate

  • Use the discussion boards and Campfire chat for team communication.

πŸ“Œ Helpful Tips

  • Regularly update your to-do lists and schedules to keep your team on track.
  • Utilize the file storage feature for easy access to project documents.

πŸ’° Basecamp Pricing Overview

Basecamp’s pricing includes:

  • Basecamp Per User Plan:
    • Cost: $15/user per month.
    • Features: Full feature access, 500 GB storage.
    • Suitable for freelancers, startups, small teams.
  • Basecamp Pro Unlimited Plan:
    • Cost: $299/month (annual billing) or $349/month (monthly billing).
    • Features: Full feature access, 1:1 onboarding, 5 TB storage, priority support.
    • Ideal for larger teams and growing businesses.

Both plans offer a 30-day free trial, unlimited projects, and free guests. Discounts are available for non-profits and educational institutions.

πŸ₯Š Competition

Basecamp vs Trello


Basecamp Pros:

  • Simplified project management with a centralized dashboard.
  • Strong focus on team communication and collaboration.
  • Flat-rate pricing structure, good for large teams.

Basecamp Cons:

  • Limited task management features compared to Trello.
  • Less flexibility in project visualization.
  • Fewer integration options.

Trello Pros:

  • Highly customizable boards and cards for task management.
  • Visual and intuitive interface, great for managing complex projects.
  • Extensive integration options with other apps and tools.

Trello Cons:

  • Can become cluttered with large numbers of cards and boards.
  • Pricing per user may get expensive for larger teams.
  • Less focus on broader project management features like team communication tools.

πŸ”š Conclusion

Basecamp offers an accessible and effective solution for team project management, particularly valued for its simplicity and focus on essential features.

“The All-In-One Toolkit for Working Remotely.”

ActiveCampaign: Your Comprehensive Email Marketing and Automation Tool

πŸ† Our Verdict

ActiveCampaign stands out as an all-in-one solution for email marketing, automation, and CRM, perfect for businesses aiming to optimize customer engagement and marketing efficiency. Its blend of power and user-friendliness makes it a favorite among small to medium-sized businesses.

βœ… Pros & ❌ Cons

Pros:

  • Advanced email marketing and automation features.
  • User-friendly interface with a range of templates.
  • Robust CRM capabilities.
  • Affordable pricing for small to medium businesses.

Cons:

  • Can have a steep learning curve for beginners.
  • Limited customization in lower-tier plans.
  • Sometimes complex integrations with third-party services.

🌐 About ActiveCampaign

ActiveCampaign has become a leader in email marketing and CRM solutions. It offers a rich suite of tools designed for effective customer engagement, lead nurturing, and marketing automation.

🎯 What’s In It For You?

ActiveCampaign provides tools for email marketing, automation, CRM, and sales tracking, focusing on increasing conversion rates and personalizing customer interactions.

πŸš€ How It Works

Getting Started with ActiveCampaign

To start with ActiveCampaign, follow these steps:

  1. Visit ActiveCampaign’s Website: Go to ActiveCampaign’s website and explore the available features and tools.
  2. Sign Up: Click on the ‘Sign Up’ button to create an account.
  3. Choose a Plan: Select a pricing plan that suits your business needs.
  4. Set Up Your Account: Fill in the necessary details to set up your account.
  5. Import Contacts: Import your contact list into the platform.
  6. Create Campaigns: Utilize the platform’s tools to create email marketing campaigns.
  7. Set Up Automations: Implement automation workflows to streamline your marketing process.
  8. Monitor and Optimize: Regularly monitor the performance of your campaigns and optimize them for better results.

πŸ“Œ Helpful Tips

  • Utilize the platform’s resources and customer support.
  • Explore automation and CRM functionalities to maximize your marketing strategies.

πŸ’° ActiveCampaign Pricing Overview

ActiveCampaign offers various pricing plans for their email marketing and automation services:

  1. Lite Plan: Designed for solopreneurs, includes essential features like email marketing, automation, chat support, forms, and tracking.
  2. Plus Plan: Targeted at small teams, offering additional features such as landing pages, Facebook integrations, lead scoring, and more advanced form options.
  3. Professional Plan: Aimed at teams focusing on marketing optimization, it includes advanced features like predictive sending AI, Salesforce integration, site messages, and attribution reporting.
  4. Enterprise Plan: Suitable for larger organizations seeking personalized marketing at scale, offering custom reporting, custom objects, single sign-on, HIPAA support, and more.

Pricing for each plan varies based on the number of users and contacts, with options for monthly or annual billing.

πŸ₯Š Competition

ActiveCampaign vs HubSpot


ActiveCampaign Pros:

  • Superior email marketing and automation capabilities.
  • More affordable pricing, especially for small businesses.
  • User-friendly interface, easier for beginners.

ActiveCampaign Cons:

  • Limited CRM functionality compared to HubSpot.
  • Fewer third-party integrations.
  • Less comprehensive in inbound marketing tools.

HubSpot Pros:

  • All-in-one platform for CRM, marketing, sales, and service.
  • Extensive inbound marketing tools.
  • Stronger CRM capabilities and analytics.

HubSpot Cons:

  • More expensive, particularly for advanced features.
  • Can have a steeper learning curve due to its extensive features.
  • Potentially more than needed for businesses focused solely on email marketing.

These comparisons highlight the platforms’ unique strengths, with ActiveCampaign excelling in email marketing and affordability, while HubSpot offers a more comprehensive suite of tools, especially in CRM and inbound marketing.

πŸ”š Conclusion

ActiveCampaign is a versatile platform excelling in email marketing, automation, and CRM. It’s particularly effective for small to medium businesses looking to enhance their marketing strategies and customer relations.

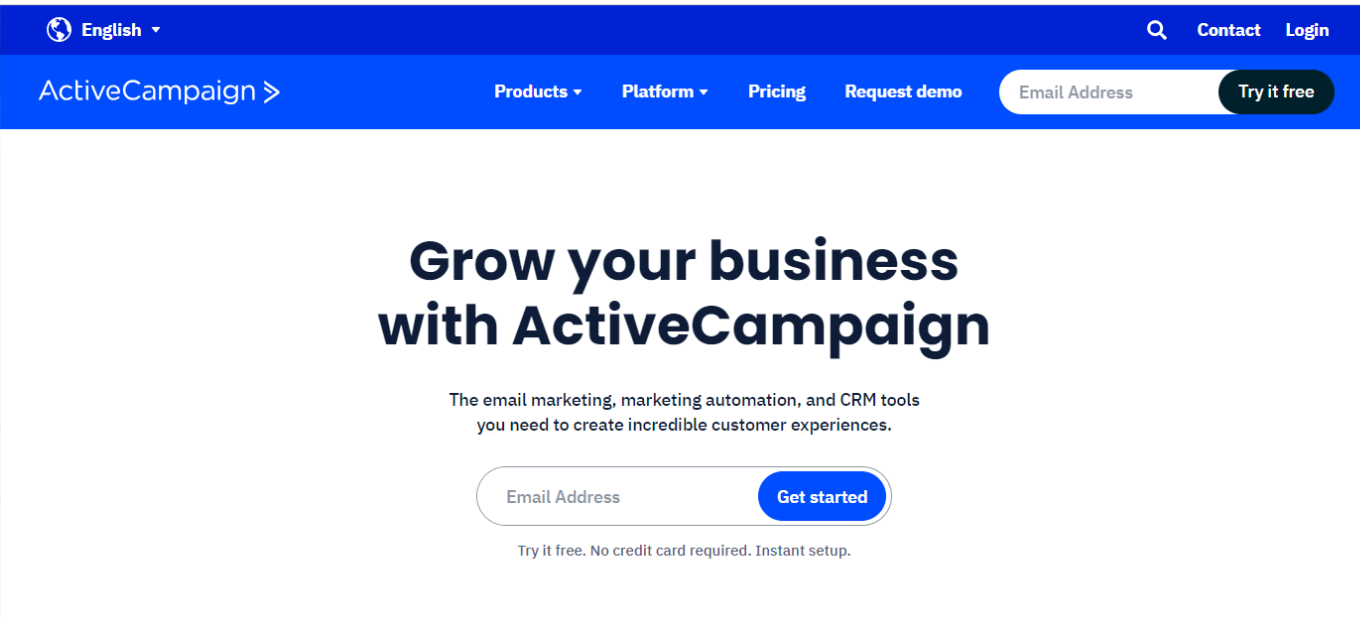
“Customer Experience Automation.”