Avid: Revolutionizing Video Editing

πŸ† Our Verdict

Avid stands as an industry leader in professional video editing, providing robust tools suitable for filmmakers, editors, and production teams. With its comprehensive feature set, seamless workflow integration, and extensive collaboration capabilities, Avid empowers users to create high-quality content efficiently. While it may require a higher initial investment and involve a learning curve, its innovative solutions make it indispensable for those striving for excellence in video production.


βœ… Pros & ❌ Cons

Pros:

  • 🎬 Professional-Grade Editing: Avid offers robust tools suitable for professional video editing, catering to the needs of filmmakers, editors, and production teams.
  • πŸ”— Seamless Workflow Integration: Integrates smoothly with other Avid products and third-party software, ensuring a seamless workflow from editing to final production.
  • 🎨 Advanced Feature Set: Provides a comprehensive set of features, including advanced audio editing, color correction, and special effects capabilities.
  • πŸ“Š Extensive Collaboration Tools: Offers collaborative editing features, allowing multiple users to work on the same project simultaneously, enhancing teamwork efficiency.

Cons:

  • πŸ’² Higher Initial Investment: Some users may find the initial cost of Avid software and hardware relatively higher compared to competitors, especially for professional-grade setups.
  • πŸ“‰ Learning Curve: New users may experience a learning curve while mastering the intricacies of Avid’s professional-level tools and workflows.
  • πŸ“š Limited Accessibility: Avid’s software and hardware requirements may limit accessibility for individual users or small production teams with budget constraints.

πŸ“– About Avid

Avid has established itself as a leading provider of professional video editing solutions in the film, television, and media industries. Its innovative products and technologies have been instrumental in shaping the way media content is created and produced.

πŸ—“οΈ How to Get Started with Avid

  1. Visit Avid Website: Navigate to the Avid website at www.avid.com to explore their offerings and software solutions.
  2. Select Product: Choose the Avid product that best suits your needs. Whether you’re a professional filmmaker, video editor, or audio engineer, Avid offers a range of software solutions tailored to different aspects of media production.
  3. Explore Features: Familiarize yourself with the features and capabilities of the selected Avid product. Avid’s software suite encompasses a wide range of tools for video editing, audio production, collaboration, and more.
  4. Download Software: Once you’ve decided on the appropriate Avid product, proceed to download the software from the Avid website. Follow the on-screen instructions to complete the download and installation process.
  5. Create Account: If required, create an account on the Avid website to access additional features, resources, and support. Provide the necessary information, such as your email address and password, to set up your account.
  6. License Activation: After installing the software, activate your license to unlock full access to its features. Follow the prompts within the application or on the Avid website to activate your license using the provided activation key.
  7. Explore Tutorials: Take advantage of Avid’s extensive library of tutorials, guides, and documentation to learn how to use the software effectively. Avid offers resources for users of all skill levels, from beginners to experienced professionals.
  8. Start Creating: With the software installed and activated, you’re ready to start creating! Begin by importing your media files, organizing your project, and exploring the various editing tools and features available within the Avid software.
  9. Join Community: Join the Avid community to connect with other users, share tips and tricks, and stay updated on the latest developments in media production. Avid’s community forums, social media channels, and events provide valuable networking opportunities for professionals in the industry.
  10. Continue Learning: Media production is a constantly evolving field, so continue learning and expanding your skills with Avid. Explore advanced techniques, experiment with new features, and stay curious to enhance your creativity and productivity with the software.

πŸ₯Š Competition

AvidAdobe Premiere Pro
ProsPros
– Professional-grade editing tools– Comprehensive feature set
– Seamless workflow integration– Extensive collaboration capabilities
ConsCons
– Higher initial investment– Higher learning curve
– Limited accessibility– Subscription-based pricing model

πŸ“Œ Conclusion

Avid continues to lead the industry with its professional-grade editing solutions, offering a comprehensive feature set and seamless workflow integration. While it may require a higher initial investment and have a steeper learning curve, its capabilities make it indispensable for professional filmmakers and production teams striving for excellence.

“Experience the Power of Avid for Your Creative Projects.”

Related read: Avid handles the cut. The paperwork that gets footage as far as the edit, breakdowns, stripboards and call sheets, sits upstream in StudioBinder, which is built for the scheduling and crew side rather than the timeline.
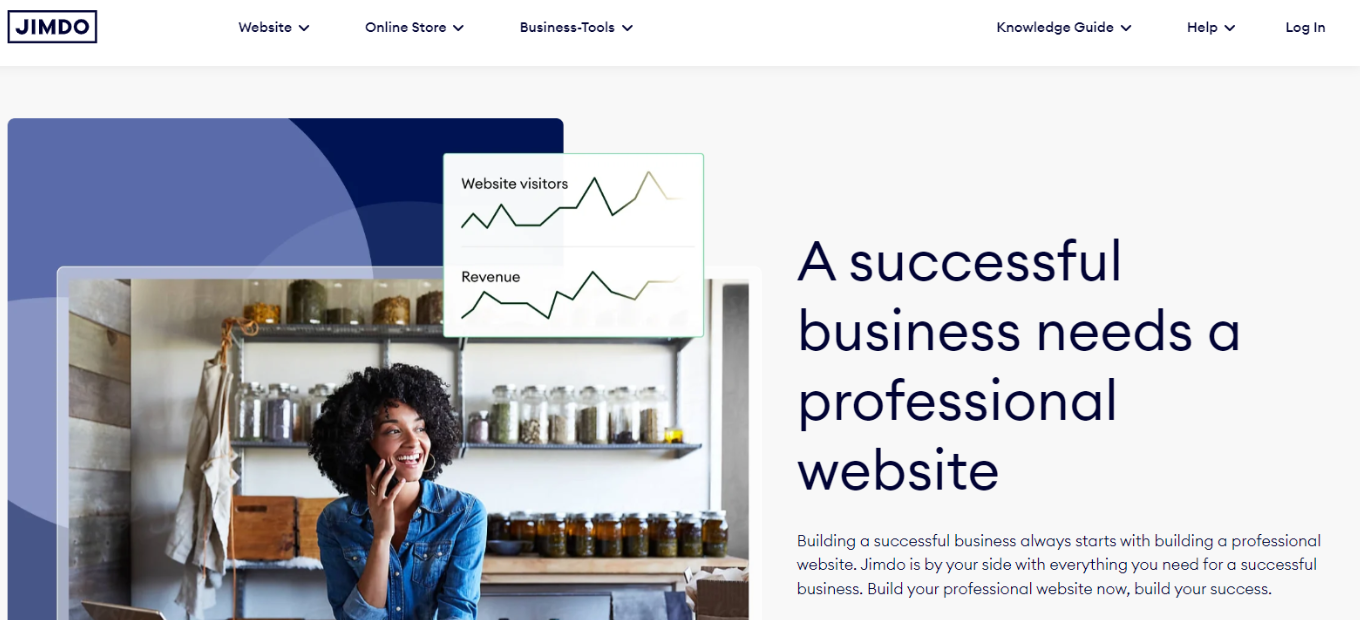
Jimdo: Your Website Building Solution

πŸ† Our Verdict

Jimdo emerges as a user-friendly website building platform, offering intuitive tools for individuals and small businesses to create and manage their online presence. With its simplicity and versatility, Jimdo is a solid choice for those seeking an easy-to-use website builder.

βœ… Pros & ❌ Cons

Pros:

  • πŸ› οΈ Easy-to-use interface for building websites.
  • 🌐 Customizable templates for various industries.
  • πŸ’Ό E-commerce functionality for online stores.
  • πŸ”„ Mobile-responsive designs for seamless viewing on all devices.

Cons:

  • πŸ’² Limited customization compared to other platforms.
  • πŸ“ Some advanced features may be lacking.

πŸ“– About Jimdo

Established with a mission to make website creation accessible to everyone, Jimdo provides a platform where users can effortlessly build and manage their websites without needing technical expertise. It offers a range of templates and features to suit different needs.

🎯 What’s In It For You?

Jimdo offers:

  • Easy website creation with drag-and-drop functionality.
  • E-commerce capabilities for selling products online.
  • Mobile-responsive designs for optimal viewing on smartphones and tablets.
  • SEO tools to improve website visibility on search engines.

πŸš€ How It Works

Getting started with Jimdo:

  1. Visit the Jimdo Website.
  2. Choose a Plan.
  3. Select a Template.
  4. Customize Your Website.
  5. Add Content and Features.
  6. Preview and Publish.

πŸ”— Helpful Tips

  • Explore Jimdo’s Help Center for tutorials and guides.
  • Utilize Jimdo’s customer support for assistance.

πŸ’² Jimdo Pricing Overview

Jimdo offers various pricing plans, including free and premium options, tailored to different user needs and budgets.

  1. PLAY: Free
    • Includes all base features
    • .jimdosite.com subdomain
    • Suitable for personal websites
  2. START: $9 per month
    • All PLAY features
    • Domain included
    • Ad-free
    • Ideal for personal websites
  3. GROW: $15 per month
    • All START features
    • Search Engine Optimization (SEO)
    • Visitor statistics
    • Personalized support within 4 hours
    • Designed for business websites
  4. UNLIMITED: $39 per month
    • Everything plus plan
    • Unlimited storage
    • Professional design analysis
    • Premium support within an hour
    • Recommended for extensive business needs

πŸ₯Š Jimdo vs. Wix

FeatureJimdoWix
Ease of UseSimple interface for quick website building.Intuitive drag-and-drop editor with extensive customization options.
TemplatesCustomizable templates for various industries.Extensive collection of templates with advanced design options.
E-commerceBasic e-commerce functionality available.Robust e-commerce features with advanced selling tools.
CustomizationLimited customization compared to Wix.Extensive customization options for personalized websites.

πŸ“Œ Conclusion

Jimdo offers a straightforward solution for individuals and small businesses to create and manage their websites. While it may have some limitations compared to other platforms, its ease of use and affordability make it a compelling choice for those looking to establish an online presence.

“Build Your Website Effortlessly with Jimdo.”

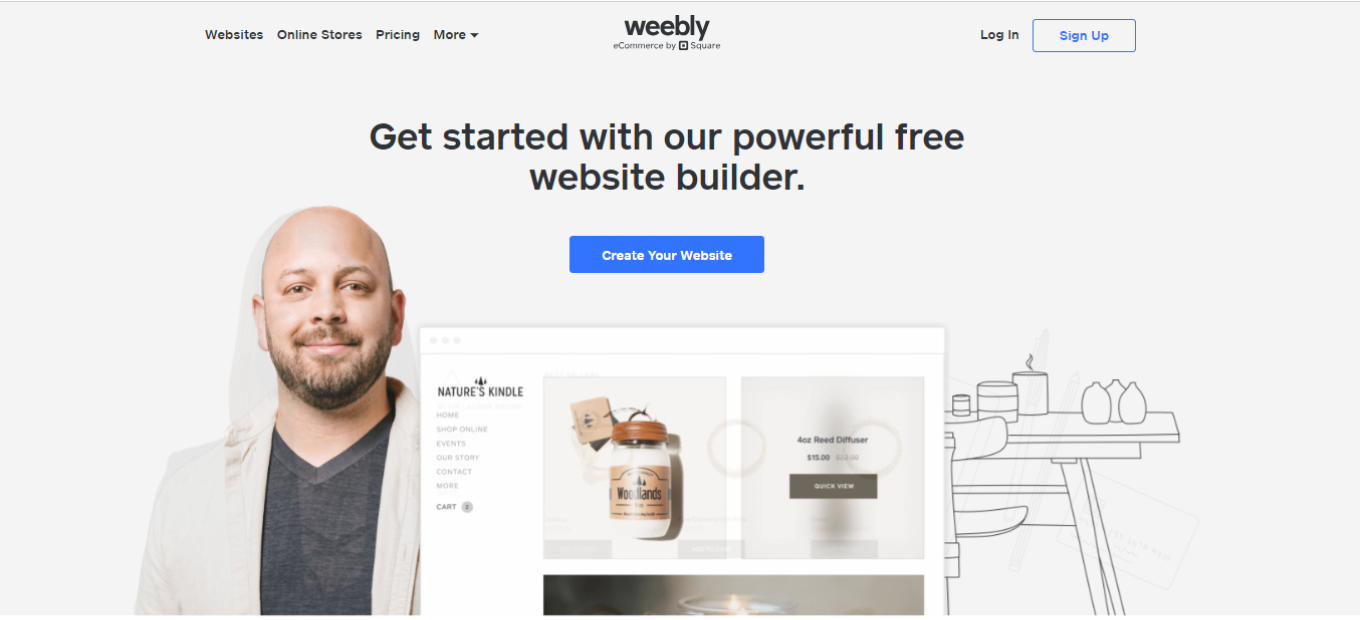
Weebly: Your Simple Solution for Building Websites

πŸ† Our Verdict

Weebly emerges as an intuitive website builder, offering easy-to-use tools for creating professional-looking websites without the need for extensive technical expertise. With its straightforward interface and versatile features, Weebly is an excellent choice for individuals and small businesses looking to establish an online presence quickly.

βœ… Pros & ❌ Cons

Pros:

  • πŸ› οΈ User-friendly drag-and-drop website builder.
  • πŸ’² Competitive pricing plans, including a free option.
  • 🌟 Wide range of customizable templates.
  • πŸš€ Built-in eCommerce functionality for online stores.

Cons:

  • πŸ“± Limited scalability compared to more robust platforms.
  • πŸ”„ Less flexibility in design compared to some competitors.
  • πŸ“Š Basic analytics and reporting features.

πŸ“– About Weebly

Weebly is a website building platform founded in 2006, offering users the ability to create websites and online stores with ease. Acquired by Square in 2018, Weebly continues to provide accessible tools for individuals and businesses to establish their online presence.

🎯 What’s In It For You?

Weebly offers:

  • πŸ—οΈ Intuitive website building tools for beginners.
  • πŸ’Ό Seamless integration with Square for eCommerce.
  • 🎨 Customizable templates to suit various industries and styles.
  • πŸ“ˆ Scalable solutions for growing businesses.

πŸš€ How It Works

Getting started with Weebly:

  1. Visit the Weebly Website.
  2. Choose a Plan.
  3. Create Your Account.
  4. Select a Template.
  5. Customize Your Website.
  6. Add Content and Features.
  7. Preview and Publish Your Site.

πŸ’² Weebly Pricing Overview

Weebly offers several pricing tiers:

  • Free: Basic features with Weebly branding.
  • Personal: Affordable plan for individuals.
  • Professional: Ideal for entrepreneurs and small businesses.
  • Performance: Advanced features for growing businesses.
  • eCommerce: Comprehensive solution for online stores.

πŸ₯Š Weebly vs. Wix

FeatureWeeblyWix
Ease of UseπŸ› οΈ Intuitive drag-and-drop builder.πŸ”„ Flexible design options.
PricingπŸ’² Competitive pricing plans.πŸ’Έ Various pricing tiers with additional features.
Templates🌟 Wide range of customizable templates.🎨 Extensive template library.
eCommerceπŸš€ Built-in eCommerce functionality.πŸ’Ό eCommerce-focused features.
ScalabilityπŸ“ˆ Limited scalability for larger businesses.πŸš€ Scalable solutions for growing businesses.

πŸ“Œ Conclusion

Weebly offers a straightforward solution for building websites and online stores, making it an ideal choice for individuals and small businesses looking to establish their online presence without the complexity of more advanced platforms.

“Build Your Online Presence with Ease with Weebly.”

Webflow: Your Comprehensive Website Building Platform

πŸ†Overview

Webflow is a cutting-edge web design tool that combines the functionalities of a website builder with advanced design features. It’s designed for professionals and novices alike, offering a no-code solution for creating high-quality websites.

Key Features πŸ”‘

Intuitive Visual Editor

Webflow’s visual editor provides a seamless interface for designing websites without the need for coding. It’s user-friendly and highly customizable.

Responsive Design

Create websites that automatically adjust to fit any screen size, ensuring a consistent experience across all devices.

CMS & E-commerce

Webflow integrates a content management system and e-commerce capabilities, allowing you to manage content and online sales efficiently.

Integrations & SEO

It offers robust SEO tools and integrates with various third-party applications to enhance your website’s performance.

Pros and Cons βš–οΈ

Pros

  • Highly customizable design options
  • User-friendly interface with drag-and-drop features
  • Advanced SEO tools

Cons

  • Steeper learning curve for beginners
  • Higher cost compared to some competitors

🎯 What’s In It For You?

Choosing Webflow as your web design platform offers numerous benefits:

  1. Intuitive Visual Editor: Webflow provides a user-friendly interface with a drag-and-drop editor, making it easy for both beginners and experienced designers to create stunning websites without coding knowledg​​e.
  2. Seamless Hosting and Fast Performance: The platform includes web hosting services, ensuring speed and reliability with a global CDN, which is crucial for a good user experienc​​e.
  3. Advanced SEO Tools: Webflow aids in optimizing your website for search engines with features like automatically generated sitemaps and customizable 301 redirects, enhancing your site’s online visibilit​​y.
  4. Diverse Templates and Design Flexibility: With over 1500 templates, you can create various types of sites, including e-commerce, blogs, or portfolios, without needing to learn codin​​g.
  5. CMS and Blogging Platform: The integrated CMS allows for efficient content management, and the built-in blogging platform simplifies adding and managing blog post​​.
  6. Cost-Effective Solution: Webflow’s visual editor reduces the need for expensive design software or plugins, thus lowering overall development cost​​.
  7. Easy E-commerce Integration: You can easily add products, set up payment methods, and start processing orders with Webflow’s straightforward e-commerce tool​​.
  8. Wide Range of Third-Party Integrations: Webflow supports seamless integration with various apps and services, enhancing your website’s functionality and efficienc​​e.
  9. Scalable and Secure Hosting: The platform offers hosting on Amazon Web Servers and Fastly Network, ensuring scalability and security for your websit​​e.
  10. Responsive Customer Support: Webflow provides 24/7 customer support to assist with any issues or queries, ensuring continuous smooth operation of your website​.
  11. Free Starter Plan: For those unsure about the platform, Webflow offers a free starter plan to build and test up to two website​​.

While Webflow offers many advantages, it’s important to note some limitations, such as a learning curve for new users and a relative lack of functionality compared to some other platforms. However, for many, the benefits of an intuitive, flexible, and comprehensive web design solution far outweigh these drawbacks.


πŸš€ How to Get Started on Webflow

Embarking on your Webflow journey? Here’s a step-by-step guide to get you started:

  1. Sign Up and Explore Plans: Begin by visiting the Webflow website and signing up for an account. Explore the different pricing plans to find one that suits your needs, considering factors like site traffic, number of pages, and CMS capabilities.
  2. Familiarize Yourself with the Dashboard: Once registered, take some time to explore the Webflow dashboard. This is where you’ll manage your sites, access templates, and find resources.
  3. Choose a Template or Start from Scratch: You can start your website design either by choosing from over 1500 templates or starting from scratch for a completely custom design. Templates can be a great starting point for beginners.
  4. Learn the Basics: Before diving into design, it’s beneficial to understand the basics of Webflow’s interface. Utilize Webflow University, a comprehensive learning resource with tutorials and guides on every aspect of the platform.
  5. Start Designing Your Site: Use the drag-and-drop editor to start building your site. Here, you can add elements like text, images, and videos, and customize the layout, style, and interaction of these elements.
  6. Set Up Your CMS: If your site requires a content management system, set up Webflow’s CMS to manage and update your content easily. This is especially useful for blogs or sites with dynamic content.
  7. Optimize for SEO: Utilize Webflow’s SEO tools to optimize your site. This includes setting meta titles and descriptions, optimizing images, and ensuring that your site structure is search-engine friendly.
  8. Add E-commerce Features (If Required): If you’re building an online store, use Webflow’s e-commerce tools to add products, set up categories, configure payment methods, and manage orders.
  9. Test Your Site: Before going live, thoroughly test your site for any errors or issues. Check the responsiveness on different devices, load times, and the overall user experience.
  10. Publish Your Site: Once you’re satisfied with the design and functionality, connect your domain (if you have one) and publish your site. Webflow hosting ensures fast and reliable performance.
  11. Monitor and Update Regularly: After your site is live, continue to monitor its performance and make updates as necessary. Keep your content fresh, and don’t forget to leverage Webflow’s continuous updates and new features.
  12. Seek Support When Needed: If you encounter any challenges, Webflow’s customer support and the community forums are great resources for assistance and advice.

Embarking on your Webflow journey involves a blend of creativity, strategic planning, and learning. By following these steps, you can effectively harness the power of Webflow to create a stunning and functional website tailored to your needs.

πŸ’° Cisco Webex Pricing Overview

Webflow offers several pricing plans for different needs:

  1. Site Plans: Includes Starter (Free for basic use), Basic ($14/mo), CMS ($23/mo), Business ($39/mo), and Enterprise (custom pricing). Features vary by plan, with increases in pages, CMS items, form submissions, bandwidth, and visitor limits as you move to higher plans.
  2. Ecommerce Plans: Standard ($29/mo), Plus ($74/mo), and Advanced ($212/mo). These plans are tailored for online stores with varying numbers of ecommerce items, CMS items, and transaction fees.
  3. Workspace Plans: Starter (Free), Core ($19/mo per seat), Growth ($49/mo per seat), and Enterprise (custom pricing). These plans are designed for teams and vary in team size, staging sites, and other collaborative features.

Competitors 🏁

Cisco Webex and Wix are fundamentally different platforms, each with its own set of pros and cons:

Cisco Webex :

  • Pros: Offers comprehensive video conferencing and collaboration tools, including meetings, calling, messaging, webinars, and event management. Known for its reliability and security, it’s widely used in professional settings.
  • Cons: May be more complex than necessary for simple meeting needs; can be costlier compared to basic communication platforms.

Wix :

  • Pros: A user-friendly website builder with a drag-and-drop interface, suitable for individuals and small businesses. Offers a range of templates and design flexibility, as well as e-commerce capabilities.
  • Cons: While easy to use, it may lack some advanced features desired by professional web developers; customization can be limited compared to fully coding a website.

It’s important to note that while Webex focuses on communication and collaboration, Wix is centered around website building and design.

Conclusion 🎬

Webflow stands out for its combination of design flexibility, advanced features, and user-friendly interface, making it a top choice for website building. Whether you’re a designer, marketer, or business owner, Webflow offers the tools needed to create stunning, functional websites.

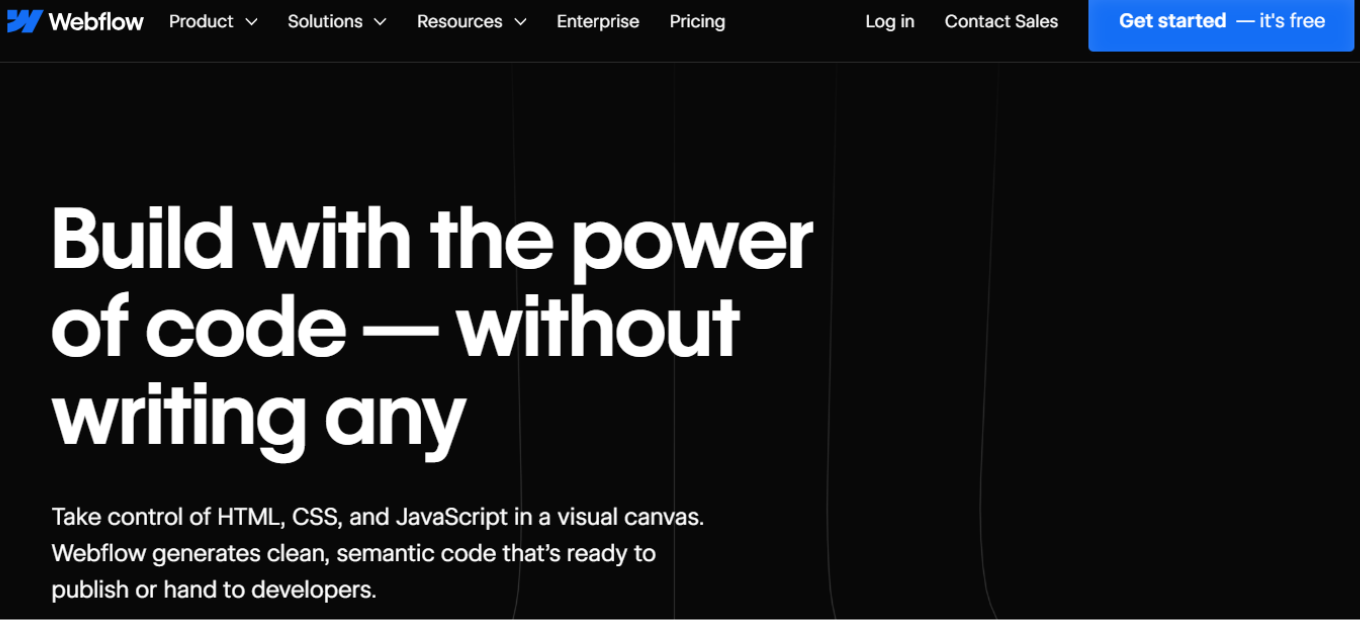
“Build with the power of code β€” without writing any.”

Figma: Transforming Digital Design Collaboration

πŸ† Our Verdict

Figma emerges as a revolutionary web-based UI/UX design tool, essential for teams seeking seamless collaboration and advanced prototyping. Its platform-agnostic approach and comprehensive feature set make it a favorite in the digital design community.

βœ… Pros & ❌ Cons

Pros:

  • 🌐 Web-based platform for universal access.
  • πŸ‘₯ Real-time collaboration capabilities.
  • πŸ› οΈ Advanced prototyping and animation tools.

Cons:

  • πŸ“Ά Dependence on internet connectivity.
  • πŸ–₯️ May lack the responsiveness of desktop applications.

πŸ“– About Figma

Founded in 2012, Figma took the digital design world by storm by offering a fully-featured, browser-based UI/UX design tool. Figma facilitates a collaborative environment for design teams, streamlining the design process from ideation to prototype.

🎯 What’s In It For You?

Figma offers an inclusive design platform with tools for vector editing, prototyping, and real-time collaboration, making it ideal for design teams and individual professionals in UI/UX and graphic design.

πŸš€ How It Works

  1. Sign Up for Figma: Visit Figma’s website and sign up for a free account. You can use your email address or directly sign in with a Google account.
  2. Download Figma App (Optional): While Figma is primarily web-based, you can download a desktop app for macOS or Windows for a smoother experience.
  3. Explore the Interface: Once logged in, take some time to familiarize yourself with the Figma interface. You’ll find various tools and features on the left-hand side, a canvas in the center, and property panels on the right.
  4. Start a New Project: Click on the ‘New File’ button to start a new design project. You can choose from various templates or start with a blank canvas.
  5. Learn Basic Tools: Learn how to use basic tools like shapes, text, and images. Figma’s interface is user-friendly, making it easy to explore and experiment with different design elements.
  6. Try Prototyping: Explore Figma’s prototyping features to create interactive designs. You can link different frames and add interactions to simulate how your design would work in a real-world application.
  7. Invite Team Members: If you’re working in a team, invite your colleagues to collaborate. Figma allows multiple people to work on the same project simultaneously.
  8. Use Figma Community: Access the Figma community for templates, plugins, and inspiration. You can use community-created assets to enhance your designs.
  9. Practice and Explore: The best way to learn Figma is by practicing. Start with small projects, experiment with different features, and gradually take on more complex designs.

For more information, visit Figma’s official website.

πŸ’² Figma Pricing Overview

  • Starter (Free): Includes 3 Figma and FigJam files, unlimited personal files, collaborators, plugins, templates, and mobile app access.
  • Professional ($12/editor/month): Billed annually or $15 month-to-month. Offers everything in Starter plus unlimited Figma files, version history, team libraries, and advanced prototyping. Free for students and educators.
  • Organization ($45/editor/month): Annual billing only. Adds design system analytics, branching, centralized file management, and single sign-on to Professional features.
  • Enterprise ($75/editor/month): Annual billing only. Expands on Organization features with dedicated workspaces, advanced design systems, guest access controls, and comprehensive support.

πŸ₯Š Competition

Figma Pros:

  • Web-based, accessible on multiple platforms.
  • Real-time collaboration features.
  • Strong community and plugin ecosystem.

Figma Cons:

  • May require stronger internet connectivity.
  • Limited offline capabilities.

Adobe XD Pros:

  • Seamless integration with Adobe Creative Cloud.
  • Strong prototyping and animation tools.
  • Offline functionality and performance.

Adobe XD Cons:

  • Less focused on real-time collaboration.
  • Limited third-party integrations compared to Figma.

These comparisons highlight Figma’s strength in collaboration and platform accessibility, while Adobe XD excels in integration with other Adobe tools and offline capabilities.

πŸ“Œ Conclusion

Figma is a standout choice for web-based UI/UX design, offering unparalleled collaboration tools and flexibility. It is particularly beneficial for teams and designers seeking an efficient and inclusive design platform.

“A better way to design.”

Sketch: Revolutionizing Digital Design on macOS

πŸ† Our Verdict

Sketch stands out as a premier tool for vector graphics and UI/UX design, exclusively on macOS. Its intuitive interface and advanced features make it a top choice for professionals in the digital design industry.

βœ… Pros & ❌ Cons

Pros:

  • Innovative vector editing capabilities.
  • Optimized for macOS, offering smooth performance.
  • Sketch Cloud enhances collaboration.

Cons:

  • Only available on macOS, limiting accessibility.
  • Lacks some advanced prototyping features.

πŸ“– About Sketch

Sketch, established in 2010, has become a key player in the digital design realm, offering a comprehensive toolkit for macOS users focused on UI/UX and graphic design.

🎯 What’s In It For You?

Sketch provides a seamless design experience with tools tailored for vector editing, UI elements creation, and efficient design workflow, making it ideal for professionals in the digital design space.

πŸš€ How To Get Started with Sketch

  1. Download Sketch: Visit the Sketch website and download the app for macOS.
  2. Install the App: Open the downloaded file and follow the instructions to install Sketch on your Mac.
  3. Create an Account: Register for a Sketch account to access all features, including Sketch Cloud.
  4. Explore Tutorials: Utilize Sketch’s resources and tutorials to familiarize yourself with its tools and interface.
  5. Start a New Project: Open Sketch and begin a new project, experimenting with its vector tools and design capabilities.
  6. Use Sketch Cloud: Save and share your work on Sketch Cloud for collaboration and feedback.
  7. Explore Plugins: Enhance your workflow by exploring and installing various Sketch plugins.
  8. Join the Community: Engage with the Sketch community for tips, inspiration, and support.

πŸ’² Sketch Pricing Overview

Sketch offers several pricing options:

  • Standard Subscription: $10/month (billed yearly) or $12/month. Includes Mac app, collaboration features, and web app access.
  • Mac-Only License: $120 per seat. Offers the native app and a year of updates, without collaboration features and web app access.
  • Business Subscription: $20/month per editor (billed yearly). Ideal for larger teams, includes Single Sign-On and unlimited storage.
  • Education Offer: Special pricing for students and teachers.

πŸ₯ŠΒ Competition

Sketch Pros:

  • Optimized for macOS, offering smooth integration and performance.
  • Powerful vector editing tools tailored for graphic and UI design.
  • Efficient symbol and layer management system.

Sketch Cons:

  • Limited to macOS, restricting cross-platform accessibility.
  • Lacks some advanced prototyping features found in competitors.

Figma Pros:

  • Web-based platform, accessible on multiple operating systems, including Windows and Mac.
  • Real-time collaboration features for team projects.
  • Includes advanced prototyping and animation tools.

Figma Cons:

  • Being browser-based, it might be less responsive than native apps in some scenarios.
  • Some users may prefer the interface and workflow of traditional desktop applications like Sketch.

πŸ“Œ Conclusion

Sketch is a powerful tool for macOS users in the digital design domain, offering advanced features for UI/UX design. While it’s exclusive to macOS, its capabilities make it a popular choice among professionals.

“Sketch is where great design happens.”

Typeform: Reinventing Online Forms and Surveys

Our Verdict 🌟

Typeform stands out in the online survey and form-building landscape with its unique blend of aesthetics and interactivity. It excels in creating forms that are not just functional but also visually engaging, making the data collection process more enjoyable for respondents.

βœ… Pros & ❌ Cons

Pros:

  • User Engagement: Interactive elements keep respondents engaged.
  • High Customizability: Extensive design options to match your brand.
  • Seamless Integrations: Integrates with a variety of platforms, enhancing workflow efficiency.

Cons:

  • Cost Factor: Higher-tier plans can be expensive for small businesses.
  • Analytics Depth: Lacks the advanced analytical capabilities of some rivals, like SurveyMonkey.

About Typeform πŸ“Š

Launched with the vision of changing how people collect data online, Typeform has revolutionized form creation with its emphasis on design and user experience. It caters to a wide range of users, from individual creators to large enterprises.

What’s In It For You? 🎯

Typeform’s strength lies in its ability to turn mundane data collection into a conversational and visually appealing experience. Whether you are conducting market research, gathering customer feedback, or creating quizzes, Typeform offers an engaging alternative to traditional forms.

How It Works πŸ› 

Building Your Form

  1. Sign Up: Create an account on Typeform’s website.
  2. Choose a Template: Select from a wide range of templates or start from scratch.
  3. Customize Your Form: Add questions, choose design elements, and customize the layout.
  4. Set Up Logic Jumps: (Optional) Add logic jumps to make your form interactive.
  5. Distribute: Share your form via email, link, or embed it on your website.
  6. Analyze Responses: Collect and analyze the responses from your dashboard.

This process enables you to create engaging, user-friendly forms or surveys tailored to your needs.

Insights and Analytics

  • Data Overview: Basic yet intuitive analytics to understand your audience better.

Typeform Pricing Overview πŸ’°

Typeform offers a variety of pricing plans, each designed to cater to different requirements:

  • Basic Plan ($25/mo, billed yearly): Ideal for simple form creation with basic features.
  • Plus Plan ($50/mo, billed yearly): Enhanced branding and customization options for growing businesses.
  • Business Plan ($83/mo, billed yearly): Advanced analytics and support for established businesses.
  • Enterprise Plan: Customizable solutions for large-scale organizational needs.

Each plan escalates in features, from basic form creation to comprehensive enterprise solutions.

Competition πŸ†

Typeform vs. SurveyMonkey:

Typeform Pros:

  • Interactive, engaging form design.
  • High customization for aesthetics.
  • User-friendly interface.

Typeform Cons:

  • Limited in advanced analytics.
  • Higher pricing tiers for premium features.

SurveyMonkey Pros:

  • Robust data analysis tools.
  • Wide range of question types.
  • Extensive integration options.

SurveyMonkey Cons:

  • Less focus on form aesthetics.
  • Can be overwhelming for beginners.

Typeform is ideal for visually engaging, interactive forms, whereas SurveyMonkey offers comprehensive data analysis and a broader range of survey functionalities.

Conclusion 🎬

Typeform is more than just a form builder; it’s a tool that transforms the way we interact with audiences online. Its focus on design and user engagement makes it a standout choice for anyone looking to create forms and surveys that are as enjoyable to complete as they are to create.

“People-Friendly Forms and Surveys.”

Adobe: The Powerhouse of Creative Software – Empowering Digital Artists Worldwide

βš–οΈ Our Verdict

Adobe, a global leader in digital media and digital marketing solutions, offers an unparalleled suite of creative software. Recognized for industry-standard applications like Photoshop for image editing, Illustrator for vector graphics, and Premiere Pro for video editing, Adobe has become indispensable in the world of digital art and design. Its comprehensive tools cater to a wide range of creative professionals, from graphic designers and photographers to video editors and digital marketers, providing them with powerful capabilities to bring their visions to life.

Pros & Cons

Pros:

  • πŸ›  Robust and Comprehensive: Adobe offers a vast array of tools covering almost every aspect of digital creativity.
  • πŸ”„ Innovation and Regular Updates: Continuously evolving, Adobe adds cutting-edge features and enhancements to keep its software at the forefront of technology.
  • 🌐 Extensive Resources: A rich library of tutorials, user forums, and community support makes learning and mastering Adobe software more accessible.

Cons:

  • πŸ’΅ Subscription Costs: While offering a range of functionalities, Adobe’s subscription model can be a significant investment over time.
  • 🧠 Learning Curve: Due to its advanced features, beginners might find Adobe software overwhelming initially.
  • πŸ–₯ Hardware Requirements: High-performance hardware is needed to efficiently run most Adobe applications.

About Adobe

Adobe’s suite caters to a wide variety of creative needs. Photoshop sets the standard for digital image manipulation, Illustrator dominates vector graphic design, and Premiere Pro offers industry-leading video editing capabilities. Beyond these, Adobe offers an ecosystem of interrelated applications that work seamlessly together, enhancing productivity and creativity.

What’s In It For You?

Adobe’s software suite is a game-changer for creative professionals and enthusiasts. Whether it’s creating stunning visual graphics, editing high-quality videos, or developing comprehensive digital marketing campaigns, Adobe provides the tools to make it happen. The integration across its applications enhances workflow, allowing for a more streamlined and efficient creative process.

Starting with Adobe: A Step-by-Step Guide for Beginners

  1. Choose Your Adobe Product: Visit the Adobe website and explore their product range to determine which software best fits your needs. Popular choices include Photoshop for image editing, Illustrator for vector graphics, and Premiere Pro for video editing.
  2. Create an Adobe Account: Sign up for an Adobe account. This is necessary for purchasing and managing your software subscriptions.
  3. Select a Subscription Plan: Adobe offers various subscription plans. Choose between individual applications or the full Creative Cloud suite. Consider the free trials to test the software before committing.
  4. Download and Install: Once subscribed, download the software from the Adobe Creative Cloud website. Install it on your computer following the provided instructions.
  5. Explore Tutorials and Resources: Adobe offers a wealth of tutorials and learning resources. Utilize these to familiarize yourself with the software’s interface and features.
  6. Start a Project: Open the software and start a new project. Begin experimenting with basic features and tools.
  7. Join the Community: Engage with Adobe’s online community through forums, social media, and user groups for tips, inspiration, and support.
  8. Practice Regularly: Consistent practice is key to mastering Adobe software. Work on various projects to improve your skills.
  9. Stay Updated: Keep your software updated to benefit from the latest features and improvements.
  10. Explore Advanced Features: As you become more comfortable, start exploring more advanced features of the software to fully leverage its capabilities.

Remember, mastering Adobe software takes time and patience. Utilize available resources and practice regularly to enhance your skills.

Pricing Plans & Support

Adobe offers flexible pricing plans:

  • Individual Plans: Starting at $20.99/month for a single app or $52.99/month for the entire Creative Cloud suite, tailored for individual professionals.
  • Business Plans: For teams and businesses, plans start at $33.99/month per license, providing collaboration and management tools.
  • Education Pricing: Special discounts for students and teachers at $19.99/month for the full suite, making it more accessible for educational purposes.

Adobe vs. Microsoft: A Comparative Overview πŸ”„

Adobe

Pros:

  • 🎨 Specialized Creative Tools: Industry-leading applications for creative tasks.
  • 🌐 Comprehensive Suite: A wide range of integrated applications.
  • πŸ”„ Regular Updates: Frequent enhancements and new features.

Cons:

  • πŸ’Έ Subscription Cost: Recurring fees can add up.
  • πŸ€” Learning Curve: Advanced features may be complex for beginners.
  • πŸ’» Hardware Requirements: Needs high-performance hardware.

Microsoft

Pros:

  • πŸ“Š Broad Productivity Suite: Essential tools for business and education.
  • πŸ’» Integration with Windows: Seamless performance on Windows OS.
  • 🌍 Diverse Range of Software: Wide variety of solutions including cloud services.

Cons:

  • 🎨 Less Focus on Creative Tools: More geared towards productivity.
  • πŸ”„ Compatibility Issues: Potential issues with non-Windows systems.
  • πŸ’Έ Cost: Free versions are limited; full features can be costly.

Conclusion

Adobe stands as an irreplaceable suite in the toolbox of any creative professional or hobbyist. Its comprehensive range of applications and constant innovation keep it at the forefront of the creative software industry, making it an essential investment for those looking to excel in digital art and design.

“Creativity for All.”

Squarespace: Your Ideal Website Creation Tool

βš–οΈ Our Verdict

πŸ† Squarespace emerges as a premium website building platform, renowned for its sleek designs and user-friendly interface. Ideal for both personal and business websites, Squarespace is a top choice for creators and entrepreneurs seeking a blend of simplicity and professionalism.

Pros & Cons

Pros:

  • Stylish, professionally-designed templates 🎨
  • Intuitive website builder with drag-and-drop functionality πŸ› οΈ
  • Strong e-commerce capabilities for online stores πŸ›οΈ
  • Excellent customer support and community resources πŸ“ž

Cons:

  • Limited third-party app integrations compared to competitors πŸ“Œ
  • Higher learning curve for advanced customization 🧠
  • E-commerce features are less extensive than specialized platforms like Shopify πŸ’Ό

About Squarespace

🌐 Initially a simple website builder, Squarespace has evolved into a comprehensive platform that offers solutions for website design, e-commerce, and digital marketing. It includes features like blogging tools, SEO optimization, and social media integration, addressing a broad spectrum of online presence needs.

What’s In It For You?

Squarespace provides a suite of tools that go beyond basic website building. These features facilitate effective online engagement, from creating visually appealing sites to implementing marketing strategies and managing e-commerce activities.

Starting Your Journey with Squarespace: A Step-by-Step Guide

1. Visit the Squarespace Website 🌐

  • Action: Head over to the Squarespace website.
  • Details: Click on one of the β€˜Get Started’ buttons to begin your journ​​e】.

2. Personalize Your Experience πŸ’‘

  • Action: Answer introductory questions (optional).
  • Details: These questions help Squarespace tailor suggestions for themes that match your website’s needs and objecti​​ce】.

3. Sign Up for an Account πŸ“

  • Action: Create or sign in to your Squarespace account.
  • Details: You can use the same account for multiple trials. After signing up, name your website, which can be changed l​​rce】.

4. Explore the Dashboard and Editor πŸ–₯️

  • Action: Familiarize yourself with the Squarespace dashboard.
  • Details: The dashboard is where you manage your account and website, including content changes, design, commerce functions, and​​urce】.

5. Edit Your Website Content ✏️

  • Action: Start editing your site.
  • Details: Squarespace provides a functioning menu, professional layouts, well-matched fonts, and color schemes from the beginning. You may only need to do light editing before l​​urce】.

6. (Optional) Add an eCommerce Store πŸ›οΈ

  • Action: Extend your website into an online store.
  • Details: Squarespace allows you to add up to 200 products, making it suitable for users who want to include an e-commerce ​​ource】.

7. Publish Your Site and Choose a Plan πŸš€

  • Action: Upgrade your plan and publish your site.
  • Details: Access the β€˜Settings’ to find publishing options. Select the best plan for your needs, especially if you require advanced e-commerce ​​source】.

By following these steps, you can effectively set up and launch your website on Squarespace, tapping into its robust capabilities for creating a personalized and professional online presence.

πŸ’Ό Squarespace Pricing Plans

Squarespace offers a range of pricing plans, suitable for various website building needs, from personal blogs to comprehensive e-commerce platforms:

  1. Personal Plan: $16 per month
    • Ideal for: Blogs, portfolios, or very small business sites.
    • Features: Basic website building tools and functionalities.
  2. Business Plan: $23 per month
    • Ideal for: Small businesses.
    • Features: Additional business-focused tools and functionalities.
  3. Basic Commerce Plan: $27 per month
    • Ideal for: Creating a basic online store.
    • Features: E-commerce capabilities for new or small-scale online stores.
  4. Advanced Commerce Plan: $49 per month
    • Ideal for: Larger-scale e-commerce sites.
    • Features: Comprehensive e-commerce tools and advanced functionalities.

Additionally, Squarespace offers a 14-day free trial to test its features before committing to a plan. While Squarespace’s prices are not the lowest compared to some competitors, the platform is noted for its superior features and excellent design functionality, particularly valuable for online stor​​e】.

Squarespace vs. Wix: A Comparative Analysis 🌐

Squarespace

Pros:

  • Sophisticated Design Templates: Squarespace is known for its elegant and professional template designs, ideal for visually-focused websites 🎨
  • Strong E-commerce Capabilities: Offers robust features for online stores, particularly suitable for businesses focused on e-commerce πŸ›’
  • High-Quality Blogging Tools: Provides excellent tools for blogging, with superior content management and presentation options ✍️
  • Built-In SEO Tools: Squarespace includes integrated SEO tools that are user-friendly and effective for improving site visibility πŸ”

Cons:

  • Less Intuitive Interface: The platform may have a steeper learning curve, especially for users unfamiliar with web design principles βš™οΈ
  • Limited App Market: Fewer third-party integrations and apps compared to Wix, which might limit functionality expansion πŸ“²
  • Less Flexibility in Customization: Offers limited customization options compared to Wix, which could be a drawback for those seeking extensive personalization πŸ–ŒοΈ

Wix

Pros:

  • User-Friendly Interface: Wix is celebrated for its intuitive and easy-to-use drag-and-drop website builder, making it ideal for beginners 🌟
  • Extensive Customization Options: Offers a wide range of customization options, allowing for more creative freedom in website design πŸ› οΈ
  • Large App Market: Provides a vast array of third-party applications and services to enhance website functionality and features πŸ“Š
  • Flexibility for Different Website Types: Suitable for a broad spectrum of website types, from simple blogs to complex e-commerce sites πŸ“ˆ

Cons:

  • SEO Limitations: While improving, Wix’s SEO capabilities have historically been considered less robust than those of Squarespace πŸ“‰
  • Template Restrictions: Once a template is selected and published, it cannot be changed without creating a new site, which could be limiting for evolving websites πŸ”„
  • Performance Issues on Complex Sites: Some users report slower loading times and performance issues with more complex or feature-rich websites 🐒

In summary, Squarespace stands out for its stylish templates and strong e-commerce tools, while Wix is known for its user-friendly interface and extensive customization options. The choice between the two depends on the specific needs and skills of the user, such as design preferences, e-commerce requirements, and desired level of customization.

Conclusion

πŸ” Squarespace is an all-in-one platform ideal for individuals and businesses aiming to build a strong online presence. With its blend of style, functionality, and e-commerce features, Squarespace caters to a wide audience, from beginners to experienced web designers.

“Build It Beautiful.”

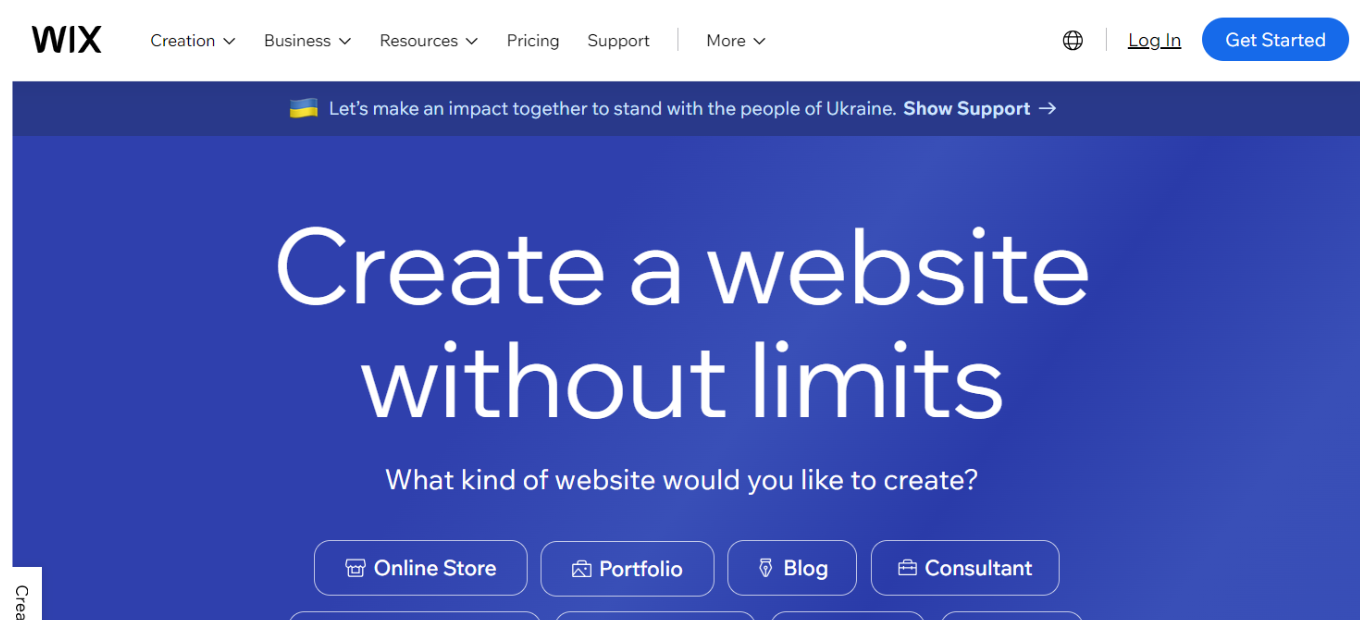
Wix: Your Comprehensive Website Building Solution

βš–οΈ Our Verdict

🌟 Wix shines as a comprehensive website building platform, offering a plethora of features from intuitive site creation to advanced SEO tools, ideal for users of all skill levels. Its user-friendly interface and vast template selection make it a top choice for web designers and business owners alike.

Pros & Cons

Pros:
– Extensive range of customizable templates 🎨
– User-friendly drag-and-drop website builder πŸ› οΈ
– Advanced SEO and marketing tools πŸ“ˆ
– Diverse app market for additional functionality πŸ“±

Cons:
– Slightly overwhelming for absolute beginners 😡
– Higher cost for premium features πŸ’°
– Inability to change templates after site publication πŸ”„

About Wix

πŸ“š Originally a simple website builder, Wix has grown into a multi-faceted platform encompassing a wide range of web design and business tools. It includes functionalities like e-commerce, online booking systems, and professional blog tools, catering to diverse web development needs.

Wix Pricing Overview 🌟

Wix offers a variety of pricing plans to suit different needs, from personal websites to large-scale business platforms. Here’s a breakdown of their current pricing as of 2023:

πŸ†“ Free Plan

  • Cost: $0
  • Features: Access to Wix’s website builder with basic features.
  • Limitations: Includes Wix ads, lacks custom domain, limited in terms of SEO.
  • Ideal For: Testing Wix features or creating a basic personal website.

πŸ’‘ Light Plan

  • Cost: $16 per month
  • Ideal For: Small businesses or individuals looking to create a standard website like a resume, portfolio, or blog.
  • Features: Offers basic functionality for a professional-looking website.

πŸ›’ Core Plan

  • Cost: $27 per month
  • Ideal For: Those starting an online store or needing ecommerce features for the first time.
  • Features: Includes ecommerce functionality.

🏒 Business Plan

  • Cost: $32 per month
  • Ideal For: Expanding offline and ecommerce sales.
  • Features: Advanced options suitable for growing businesses.

πŸ’Ό Business Elite Plan

  • Cost: $159 per month
  • Ideal For: Large businesses requiring advanced reporting, ecommerce, and marketing features.
  • Features: Comprehensive suite of tools for large-scale operations.

πŸŽ‰ Free Trial

  • Duration: 14 days
  • Access: Any Wix premium plan.
  • Limitations: Can’t accept payments; upgrading required after trial to maintain website.

Wix’s pricing structure is designed to be flexible, allowing users to scale up as their website needs grow. The free plan and trial offer opportunities to explore Wix’s capabilities before committing financially, while the higher-tier plans cater to more complex requirements like ecommerce and advanced business f​​source】.

What’s In It For You?

Wix offers tools that cater to various aspects of website creation and management, not just basic web design. Its features support effective online presence management, from building a site to driving traffic and sales.

πŸš€ Step-by-Step Guide to Starting with Wix

1. Sign Up for an Account πŸ“

  • Action: Go to the Wix website.
  • Details: Click on the ‘Sign Up’ button and enter your email and a password, or sign up using a Google or Facebook account.

2. Choose Your Website Type 🌐

  • Action: Select the type of website you want to create.
  • Details: Wix offers options like business, online store, photography, music, designer, and more.

3. Answer the Wix ADI Questions (Optional) πŸ€–

  • Action: Opt to use Wix ADI (Artificial Design Intelligence).
  • Details: Answer a series of questions about your website’s purpose and preferences. Wix ADI will then create a website for you.

4. Or Choose a Template ✨

  • Action: Browse through templates if you don’t want to use Wix ADI.
  • Details: Wix offers a wide range of templates for different industries and purposes. Choose one that fits your needs.

5. Customize Your Website 🎨

  • Action: Edit the template.
  • Details: Use the drag-and-drop editor to add, remove, or modify elements like text, images, and sections.

6. Optimize for Mobile Devices πŸ“±

  • Action: Switch to the mobile editor.
  • Details: Adjust your website’s mobile view to ensure it looks good on smartphones and tablets.

7. Set Up SEO and Other Settings πŸ”

  • Action: Use Wix’s SEO Wiz.
  • Details: Follow the step-by-step guide to optimize your site for search engines. Also, set up other features like social media links, contact forms, etc.

8. Select a Plan and Domain 🏷️

  • Action: Choose a Wix plan.
  • Details: Pick a free or premium plan. If premium, you can connect or purchase a custom domain name.

9. Publish Your Website 🌟

  • Action: Click the ‘Publish’ button.
  • Details: Once you’re happy with your site, make it live by publishing it. You can always update and republish later.

10. Promote Your Site πŸ“£

  • Action: Market your website.
  • Details: Use social media, email marketing, and other online tools to drive traffic to your new website.

Following these steps, you can create a professional-looking website tailored to your needs with Wix’s user-friendly platform.

Wix vs. Squarespace: A Head-to-Head Comparison

Wix

Pros:

  • Ease of Use: Wix’s drag-and-drop interface is user-friendly, perfect for beginners 🌟
  • Diverse Templates: Offers a vast array of customizable templates for different needs 🎨
  • Rich App Market: Access to a wide range of apps for enhanced functionality πŸ“²
  • Design Freedom: More creative control in designing websites compared to Squarespace ✨

Cons:

  • Template Restrictions: Once published, templates can’t be changed without a site rebuild πŸ”
  • Slower Performance: Can experience slower loading times, a downside for complex sites 🐒
  • SEO Constraints: SEO capabilities have improved but may still lag behind Squarespace’s πŸ“Š

Squarespace

Pros:

  • Elegant Designs: Known for sophisticated, professional template designs 🎩
  • Integrated SEO and Analytics: Strong built-in tools for SEO and site analytics πŸ”
  • E-commerce Strength: Superior e-commerce features with more built-in options πŸ’Ό
  • Better Performance: Generally offers faster and more reliable site performance πŸš€

Cons:

  • Complex Interface: The editing interface can be less intuitive, especially for new users βš™οΈ
  • Limited Apps: Fewer third-party apps and integrations than Wix 🧩
  • Customization Limits: Offers fewer customization options, limiting design flexibility πŸ–ŒοΈ

This comparison offers insights into the unique strengths and weaknesses of Wix and Squarespace, helping users make an informed decision based on their specific website building needs.

Conclusion

πŸ” Wix is an all-in-one website building platform that excels in offering a wide range of customizable features. It is suitable for both beginners and advanced users looking to establish or enhance their online presence.

“Create Your Own Professional Website.”