Xero: Streamlining Accounting for Businesses

βš–οΈ Our Verdict on Xero

Xero stands out as a premier cloud-based accounting software, particularly favored for its user-friendly design and comprehensive set of features. It’s particularly suited for small to medium-sized businesses, offering a seamless approach to managing finances, invoicing, payroll, and more. The platform’s strong suite of integration capabilities with various third-party applications enhances its value, making it an essential tool for businesses seeking to streamline their accounting processes efficiently and effectively.

Pros & Cons

Pros:

  • 🌐 User-friendly interface, making financial management accessible and efficient.
  • πŸ”— Extensive integration options with a wide array of third-party applications.
  • πŸ’Ή Real-time access to financial data, offering up-to-the-minute insights.
  • πŸ’° Efficient tools for invoicing and payroll management, simplifying these critical business operations.
  • 🏷️ Attractive pricing plans, complemented by a free trial option for new users.

Cons:

  • πŸ“Š Limited advanced features for larger enterprises, which may require more robust solutions.
  • 🧩 The array of customization options can be initially overwhelming for new users.
  • πŸ’Έ Some advanced features incur additional costs, which could add up for businesses utilizing these tools.

About Xero

Xero, as a cutting-edge accounting software solution, redefines financial management for businesses. By integrating key accounting functions such as invoicing, payroll, and reporting, it provides a streamlined, user-friendly platform. This fosters efficient and effective financial operations, making it a valuable asset for businesses looking to simplify their accounting practices.

What’s In It For You?

Xero is equipped with a diverse range of features designed to cater to the varying needs of businesses:

  • πŸ“ˆ Easy Invoicing: Streamlines the billing and invoicing process, making it faster and more accurate.
  • πŸ’΅ Payroll Management: Simplifies the complexities of employee payments and tax filings.
  • πŸ“Š Real-Time Reporting: Delivers up-to-date financial insights, aiding in better business decision-making.

Getting Started with Xero: A Step-by-Step Guide

  1. Sign Up for Xero: Visit the Xero website and choose the ‘Sign Up’ option. Select a suitable plan based on your business needs.
  2. Set Up Your Organization: After signing up, you’ll be prompted to set up your organization in Xero. This includes entering details like your organization’s name, financial year end, and tax details.
  3. Customize Your Financial Settings: Customize settings such as chart of accounts, tracking categories, and financial year end to match your business operations.
  4. Connect Your Bank Account: Link your business bank account to Xero for automatic transaction feeds. This step is crucial for accurate and up-to-date financial records.
  5. Set Up Invoicing: Customize your invoice template with your business logo and details. This prepares you to send professional invoices to clients.
  6. Enter Opening Balances: Input the opening balances for your accounts, which is essential for a seamless transition to Xero.
  7. Add Users: If other team members need access, add them as users and set permissions according to their roles.
  8. Explore Xero’s Features: Familiarize yourself with Xero’s various features, such as payroll, expense tracking, and reporting tools.
  9. Use Xero’s Resources: Take advantage of Xero’s tutorials, guides, and customer support for a smooth onboarding experience.
  10. Regularly Update and Review: Regularly update your records and review financial reports to ensure accurate and efficient financial management.

This step-by-step guide is designed to help new users navigate the initial stages of setting up and using Xero for their business accounting needs.

Xero Pricing Plans Overview πŸŒŸπŸ’°

Xero offers three main pricing plans, each designed to suit different business needs while covering essential accounting features:

  1. Starter Plan – $29 USD per Month
    • Aimed at small businesses and solo entrepreneurs.
    • Includes basic features for financial management and invoicing.
  2. Standard Plan – $46 USD per Month
    • Suitable for growing businesses requiring more comprehensive accounting tools.
    • Offers additional features compared to the Starter plan.
  3. Premium Plan – $62 USD per Month
    • Best for larger businesses with more complex accounting needs.
    • Includes advanced features and capabilities.

All plans ensure:

  • πŸ”’ Safe and secure data handling.
  • πŸ”„ Easy cancellation with one month’s notice.
  • πŸ“ž 24/7 online support for assistance anytime.

These plans are designed to provide flexibility and scalability, allowing businesses to choose a package that best fits their current operations

Xero vs. QuickBooks

Xero’s strengths:

  • πŸ–₯️ A streamlined interface that’s easy to navigate and use.
  • 🀝 A wide range of integration capabilities, enhancing overall software utility.
  • πŸ’‘ Affordable pricing models, particularly advantageous for small businesses.

QuickBooks’ strengths:

  • 🌟 Comprehensive feature set suitable for larger businesses with complex needs.
  • πŸ“Š Advanced reporting tools, providing detailed insights.
  • 🌐 Extensive user community and support, facilitating knowledge sharing and problem-solving.

QuickBooks: Your Essential Accounting Software

βš–οΈ Our Verdict

QuickBooks stands out as a comprehensive and user-friendly accounting solution, ideal for small to medium-sized businesses. It excels in streamlining financial management, offering robust features for bookkeeping, invoicing, and payroll processing.

πŸ‘ Pros & πŸ‘Ž Cons

Pros:

  • Intuitive interface and easy setup.
  • Extensive features for accounting, payroll, and tax preparation.
  • Strong reporting capabilities.
  • Wide range of integrations with other business tools.
  • Excellent customer support and resources.

Cons:

  • Can be expensive for smaller businesses.
  • Occasional complexities in advanced features.
  • Limited customization in certain areas.

πŸ“œ About QuickBooks

QuickBooks, by Intuit, is a leading accounting software that helps businesses manage their finances effectively. It offers solutions for invoicing, bill management, payroll, and financial reporting, catering to a diverse range of business needs.

πŸ’‘What’s In It For You?

QuickBooks provides:

  • Versatile accounting tools for tracking income and expenses.
  • Simplified invoicing and payment solutions.
  • Efficient payroll processing and tax filing.

Getting Started with QuickBooks: A Step-by-Step Guide

  1. Sign Up for QuickBooks: Visit QuickBooks Website and choose a plan that suits your business needs.
  2. Set Up Your Account: Fill in your business details, including company name, industry, and business structure.
  3. Customize Your Settings: Configure settings such as account preferences, invoice templates, and payment options.
  4. Connect Your Bank Account: Link your business bank account to track transactions automatically.
  5. Enter Your Business Information: Input details like customer information, vendors, and employee data.
  6. Set Up Your Chart of Accounts: Customize your chart of accounts to match your financial reporting needs.
  7. Start Invoicing: Create and send invoices to clients directly from QuickBooks.
  8. Manage Expenses: Record and categorize business expenses for accurate financial tracking.
  9. Reconcile Bank Transactions: Regularly reconcile your bank transactions to keep your accounts accurate.
  10. Explore Advanced Features: Utilize additional features like payroll, time tracking, and financial reporting for comprehensive business management.

πŸ’° Pricing Plans & Support

QuickBooks offers several pricing plans, tailored to different business needs:

  1. Simple Start:
    • Price: Starts at $15 per month (discounted price for the first 3 months).
    • Features:
      • Income and expense tracking.
      • Receipt capture and organization.
      • Invoicing with custom templates.
      • Mileage tracking.
      • Integration with popular apps.
  2. Essentials:
    • Price: Starts at $30 per month (discounted price for the first 3 months).
    • Includes all Simple Start features, plus:
      • Bill management and payment.
      • Time tracking for employees and contractors.
      • Access for up to 3 users.
      • Additional business reports.
  3. Plus:
    • Price: Starts at $45 per month (discounted price for the first 3 months).
    • Includes all Essentials features, plus:
      • Inventory tracking.
      • Project profitability analysis.
      • Access for up to 5 users.
      • Advanced reporting features.
      • Enhanced customer support.
  4. Advanced:
    • Price: Starts at $100 per month (discounted price for the first 3 months).
    • Includes all Plus features, plus:
      • Batch invoicing to save time.
      • Customized access by role.
      • Business analytics and insights.
      • Fathom reporting tool.
      • Dedicated account manager.

Each plan includes features for managing income, expenses, invoicing, and reporting, with higher plans offering more advanced functionalities like inventory tracking and business analytics.

βš”οΈQuickBooks vs. Xero

QuickBooks Pros:

  • Comprehensive accounting features.
  • Strong U.S. market presence and support.
  • Integrated payroll services.

QuickBooks Cons:

  • Higher cost for advanced features.

Xero Pros:

  • User-friendly interface.
  • Strong focus on automation and integration.
  • Competitive pricing.

Xero Cons:

  • Limited payroll options in certain regions.
  • Less comprehensive support in the U.S.

PayPal: Your Go-To for Online Transactions

βš–οΈ Our Verdict

PayPal stands as a cornerstone in the online payment landscape, renowned for its reliability and ease of use. It caters to a wide range of financial transactions, offering both personal and business solutions. With its global reach, PayPal enables users to engage in cross-border transactions with ease. The platform’s commitment to security and user protection is evident through its sophisticated fraud prevention measures. While it excels in accessibility and trust, users should be mindful of the variable fees for certain services and occasional customer service challenges.

Pros & Cons

Pros: πŸ‘ Widely accepted and trusted worldwide. πŸ‘ User-friendly interface suitable for both personal and business use. πŸ‘ Effective security measures, including fraud protection.

Cons: πŸ‘Ž Fees for some transactions can be relatively high. πŸ‘Ž Some users report challenges with customer service.

🌐 About PayPal

PayPal is renowned for its robust online payment system, providing an efficient alternative to traditional methods like checks. It’s designed to facilitate secure money transfers and e-commerce globally.

πŸ’‘ What’s In It For You?

  • Simplicity: Intuitive and easy to navigate for all users.
  • Security: Strong measures to protect against unauthorized transactions.
  • Flexibility: Versatile for personal and business needs, including invoicing and global currency support.

How to Get Started with PayPal: A Step-by-Step Guide

  1. Sign Up: Visit PayPal’s website and choose the right account type (Personal or Business).
  2. Account Creation: Fill in the necessary details to create your account.
  3. Verify Email: Check your email for a verification link from PayPal.
  4. Link Bank Account or Card: Add a bank account or credit/debit card to your PayPal account.
  5. Verification of Linked Accounts: Verify the linked accounts following PayPal’s instructions.
  6. Start Using PayPal: Begin sending or receiving payments.

πŸ’΅ Pricing Plans & Support

PayPal’s pricing structure varies based on the account type and transaction:

  1. Personal Accounts: Generally free for sending money from a linked bank account, PayPal balance, or Amex Send account.
  2. Credit/Debit Card Transactions: Fees incurred for sending money via credit or debit cards.
  3. Business Accounts: Charges for receiving payments for goods and services.
  4. Cross-border Fees: Additional fees for international transactions.
  5. Currency Conversion: Fees for converting currencies during transactions.

πŸ₯Š PayPal vs. Stripe

PayPal shines with its widespread recognition and ease of use for personal transactions. Stripe, on the other hand, offers lower transaction fees and more customization for business users, making it a strong alternative for e-commerce.

Stripe: Your Seamless Online Payment Solution

βš–οΈ Our Verdict

Stripe excels in providing a user-friendly, secure, and versatile payment processing solution. It is well-suited for businesses of all sizes, offering robust features that simplify e-commerce transactions.

πŸ‘ Pros & πŸ‘Ž Cons

Pros:

  • Ease of Integration: Stripe’s API is highly praised for its flexibility and ease of use, allowing for seamless integration into various platforms.
  • Comprehensive Features: From processing payments to handling subscriptions, Stripe covers a wide range of financial services.
  • Transparent Pricing: No hidden fees, with clear pricing structures.

Cons:

  • Complexity for Beginners: New users may find the array of features and technical details overwhelming.
  • Higher International Fees: Fees for international transactions can be higher compared to domestic ones.

πŸ›  About Stripe

Stripe stands as a leader in the online payment processing industry, offering solutions that cater to e-commerce, mobile applications, and subscription-based businesses. Its platform is designed to be both developer-friendly and scalable, accommodating the needs of small startups and large enterprises alike.

🎯 What’s In It For You?

Stripe’s platform is designed with the user in mind, offering:

  • Robust Payment Processing: Handling of various payment methods including credit cards, digital wallets, and more.
  • Subscription Management: Tools for managing recurring billing and subscriptions.
  • Global Reach: Support for multiple currencies and international payments.

Getting Started with Stripe: A Step-by-Step Guide

  1. Sign Up: Visit Stripe’s website and sign up for an account.
  2. Account Setup: Complete the account setup by providing necessary business details.
  3. Integration: Choose how to integrate Stripe (API, Stripe Dashboard, third-party integrations).
  4. Configure Payments: Set up your payment methods and preferences.
  5. Test: Utilize Stripe’s test environment to ensure everything works smoothly.
  6. Go Live: After testing, switch to the live environment to start processing real payments.
  7. Manage Transactions: Use the Stripe Dashboard to manage transactions and track payments.

πŸ’°Stripe’s Pricing Structure

Standard Pricing

  • Transaction Fees: 2.9% + 30Β’ per successful card charge.
  • No Hidden Fees: No setup, monthly, or hidden fees.

Custom Pricing

  • Tailored for Businesses: For large-scale or unique business models.
  • Features: Includes volume discounts and country-specific rates.

Additional Services

  • Fraud Protection and More: Additional fees for services like fraud management and identity verification.

Currency and Payment Methods

  • Global Reach: Supports 135+ currencies and various payment methods.

βš”οΈ Stripe vs. PayPal

Stripe Advantages:

  • Customizable payment experience.
  • Better suited for complex payment models.

PayPal Advantages:

  • Broad recognition and trust among consumers.
  • Simplicity and ease of use.

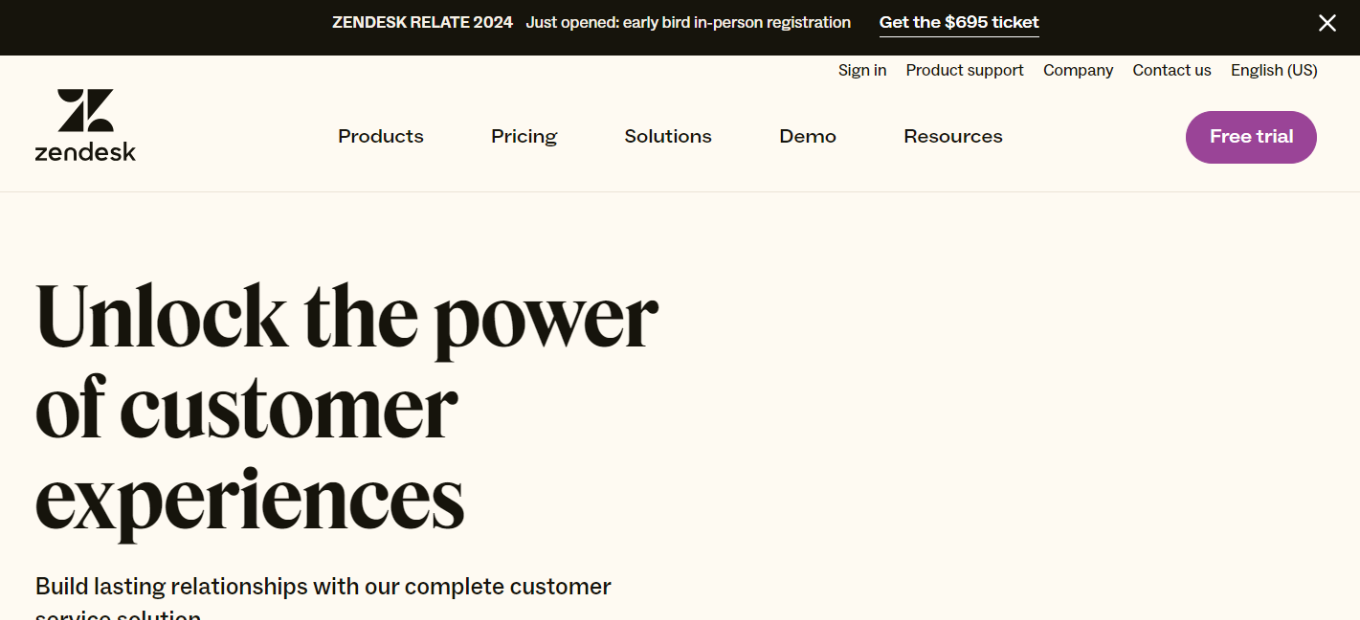
Zendesk: Elevating Customer Service with Seamless Integration

Overview 🌐

Zendesk is a leading customer service solution that offers a suite of tools designed to enhance customer support interactions. Known for its user-friendly interface and powerful features, Zendesk streamlines the process of managing customer queries and support tickets across multiple channels.

Key Features πŸ”‘

  • Omnichannel Support: Allows handling of customer interactions across email, chat, social media, and phone from a single platform.
  • Automation and AI: Leverages automation and AI for efficient ticket routing and quick responses.
  • Customizable Interface: Offers a highly customizable platform to match unique business needs and branding.
  • Reporting and Analytics: Provides in-depth insights into customer interactions and support team performance.

Benefits and Use Cases πŸ’‘

  • Enhanced Customer Experience: Delivers a seamless and personalized customer experience across various communication channels.
  • Increased Efficiency: Automates routine tasks, freeing up time for more complex customer issues.
  • Scalability: Adapts easily to businesses of all sizes, growing alongside your customer base and support needs.

Getting Started with Zendesk: A Step-by-Step Guide

Step 1: Sign Up for Zendesk πŸ“

  • Create an Account: Visit the Zendesk website and click on the ‘Free trial’ or ‘Get started’ button.
  • Provide Details: Fill in your business details, including your name, email address, and company information.

Step 2: Choose Your Plan 🏷️

  • Select a Plan: Decide between the various plans offered by Zendesk, such as Essential, Team, Professional, or Enterprise, based on your business needs.
  • Free Trial Option: Many plans offer a free trial period, allowing you to explore Zendesk’s features before committing.

Step 3: Set Up Your Zendesk Environment πŸ–₯️

  • Configure Your Account: Follow the setup wizard to configure your account settings, including company domain and support email.
  • Customize Your Space: Personalize your Zendesk workspace by setting up branding elements like logos and custom domain names.

Step 4: Create Support Channels πŸ“ž

  • Add Channels: Set up various support channels (like email, chat, phone, or social media) through which customers can reach you.
  • Integrate Channels: Integrate your existing support channels into Zendesk for centralized management.

Step 5: Build Your Knowledge Base πŸ“š

  • Create Help Articles: Start creating help articles for common queries and issues to empower customers with self-service options.
  • Organize Your Knowledge Base: Categorize and tag articles for easy navigation.

Step 6: Customize Ticket System 🎟️

  • Define Ticket Forms: Create custom ticket forms to gather necessary information from customers.
  • Set Up Automation: Automate ticket routing and responses to improve efficiency.

Step 7: Add Team Members πŸ‘₯

  • Invite Agents: Add your team members as agents in Zendesk.
  • Assign Roles and Permissions: Set roles and permissions for each team member according to their function.

Step 8: Train Your Team πŸš€

  • Familiarize with Zendesk: Ensure your team is familiar with Zendesk’s features and functionalities.
  • Training Resources: Utilize Zendesk’s training materials and resources for effective onboarding.

Step 9: Test and Go Live πŸŽ‰

  • Test Your Setup: Perform internal tests to ensure everything is working as expected.
  • Launch: Once satisfied, go live with your Zendesk support center.

Step 10: Regularly Review and Optimize πŸ”„

  • Monitor Performance: Regularly review performance metrics and customer feedback.
  • Iterate and Improve: Continuously optimize your support processes and knowledge base based on insights and feedback.

Conclusion 🎯

By following these steps, you can effectively set up and start using Zendesk to streamline your customer support operations and enhance customer satisfaction. Zendesk’s flexibility and range of features make it a valuable tool for businesses looking to improve their customer service and support systems.

Zendesk Pricing Overview

Free or Trial Version πŸ†“

  • Access: Limited features, usually meant for basic use or a short trial period.
  • Best For: Small businesses or individuals wanting to test the platform before purchasing.

Essential Plan πŸ’‘

  • Cost: Lower cost with basic features.
  • Includes: Basic customer support features suitable for small businesses or startups.
  • Limitations: Limited customization and advanced features.

Team Plan πŸŒ€

  • Pricing: Mid-range cost, offering a balance of features and value.
  • Features: Additional capabilities like advanced reporting and analytics, integration options.
  • Best For: Growing teams needing more than just the basics.

Professional Plan πŸš€

  • Cost: Higher pricing for advanced features.
  • Advanced Features: More comprehensive tools for customer service, including extensive customization and integration capabilities.
  • Suitable For: Established businesses requiring robust customer support solutions.

Enterprise Plan 🏒

  • Custom Pricing: Tailored to large businesses and enterprises.
  • Comprehensive Features: Full suite of advanced tools and features, including dedicated support and customization options.
  • Target Audience: Large enterprises with complex customer support needs.

Zendesk may also offer additional add-ons or specialized plans for specific industries or needs. For the most accurate and comprehensive pricing information, refer to Zendesk’s official pricing page. ​

Zendesk vs. Salesforce Service Cloud: A Comparative Analysis

Pros of Zendesk

User-Friendly Interface 🌟

  • Ease of Use: Known for its intuitive and user-friendly interface, making it accessible to both beginners and experts.
  • Quick Setup: Offers a straightforward setup process, allowing businesses to get up and running rapidly.

Scalability and Versatility πŸš€

  • Scalability: Adapts well to the needs of small businesses and scales up to accommodate the requirements of large enterprises.
  • Versatile: Suitable for various industries and can be customized to meet unique business needs.

Omnichannel Support πŸ“±

  • Multi-Channel Handling: Provides seamless support across multiple channels, including email, chat, social media, and phone.
  • Unified Inbox: Offers a unified inbox for agents to manage all customer interactions efficiently.

Cons of Zendesk

Cost Consideration πŸ’²

  • Pricing: Depending on the plan and feature requirements, Zendesk’s pricing can become costly, especially for larger teams.

Advanced Features πŸ› οΈ

  • Limited Complexity: While feature-rich, Zendesk may lack some of the advanced customization and automation capabilities required by complex enterprises.

Pros of Salesforce Service Cloud

Comprehensive CRM Integration πŸ”„

  • Seamless Integration: Deeply integrates with the Salesforce ecosystem, providing a comprehensive customer relationship management (CRM) solution.
  • 360-Degree Customer View: Offers a complete view of customer interactions and history for informed decision-making.

Advanced Customization πŸ› οΈ

  • Highly Customizable: Provides extensive customization options to tailor the platform to unique business processes.
  • Automation: Offers robust automation capabilities for complex workflows.

Enterprise-Level Features 🏒

  • Diverse Functionality: Includes a wide range of features, such as AI-powered insights, field service management, and analytics, suitable for large enterprises.

Cons of Salesforce Service Cloud

Learning Curve πŸ€”

  • Complexity: Due to its extensive feature set, Salesforce Service Cloud may have a steeper learning curve, requiring more training and resources.

Cost and Scalability πŸ’°

  • Cost: Tends to be more expensive than Zendesk, which may be a concern for smaller businesses.
  • Enterprise Focus: While suitable for enterprises, it might be overkill for smaller organizations with simpler support needs.

Choose between Zendesk and Salesforce Service Cloud based on your business needs. Zendesk is user-friendly, ideal for small to medium-sized businesses, while Salesforce Service Cloud offers robust CRM integration and advanced customization for larger enterprises. Consider budget, business size, and automation requirements when deciding.

Conclusion 🎯

Zendesk stands out as an intuitive and robust solution for customer service. Its wide range of features, combined with ease of use and customization options, makes it an ideal choice for businesses looking to improve their customer support operations. Whether you’re a small startup or a large enterprise, Zendesk provides the tools necessary to deliver outstanding customer service.

“Build better customer relationships with Zendesk.”

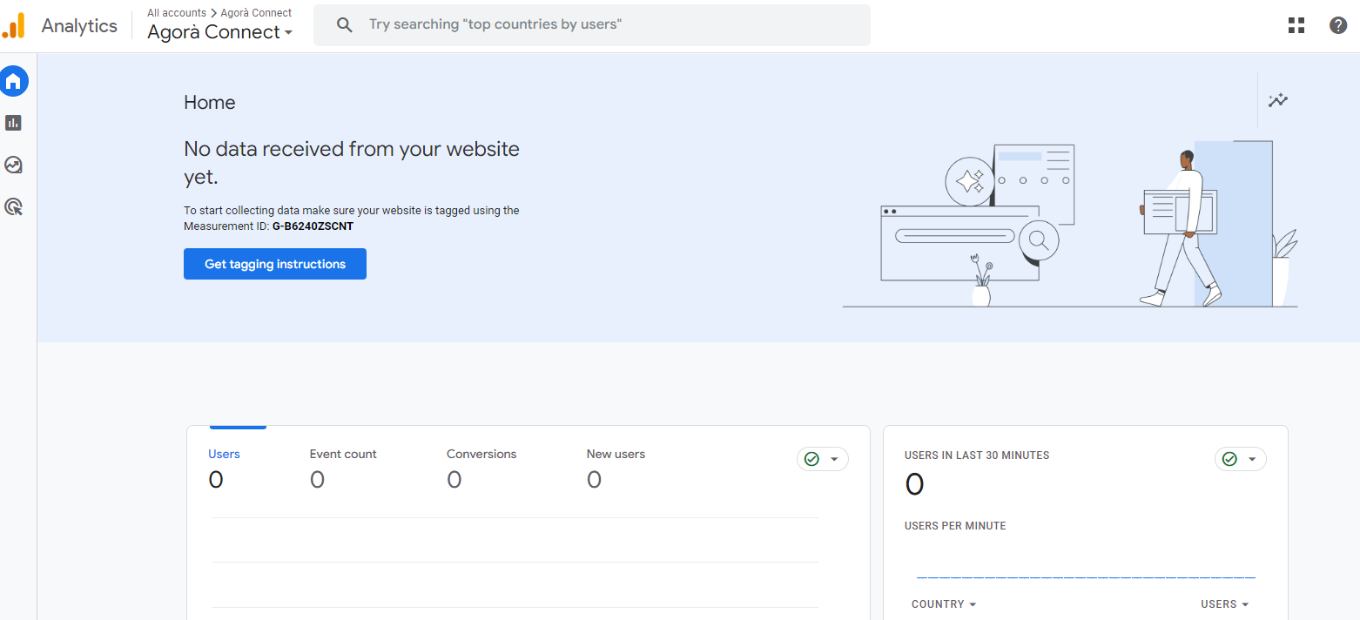
Google Analytics: Navigating Data to Drive Business Growth

Overview 🌐

Google Analytics is a powerful digital analytics tool offering in-depth insights into website and app performance. It’s designed to help businesses understand their online audience, track user interactions, and make data-driven decisions to optimize their digital strategies.

Key Features πŸ”‘

  • User Behavior Tracking: Understand how visitors interact with your website or app.
  • Real-Time Analytics: Monitor activity as it happens on your site.
  • Custom Reports: Create detailed reports tailored to specific business needs.
  • Integration Capabilities: Seamlessly integrates with other Google services and various third-party applications.

Benefits and Use Cases πŸ’‘

  • Enhanced Marketing Strategies: Use data to refine marketing campaigns for better targeting and ROI.
  • Improved User Experience: Gain insights into user behavior to enhance the website or app’s usability.
  • Data-Driven Decision Making: Make informed decisions based on comprehensive analytics data.

Starting with Google Analytics: A Step-by-Step Guide

Step 1: Create a Google Account πŸ†•

  • Account Requirement: If you don’t already have a Google account, create one at Google Accounts.
  • Sign In: Log in to your Google account to access Google Analytics.

Step 2: Sign Up for Google Analytics πŸ“ˆ

  • Visit Analytics Site: Go to the Google Analytics website.
  • Sign Up Process: Click on the ‘Sign up’ button and follow the prompts.

Step 3: Set Up Your Account and Property πŸ› οΈ

  • Account Setup: Enter your account name. You can use multiple properties (websites or apps) under one Google Analytics account.
  • Create Property: Add the name of your website or app, select the required reporting time zone, and currency.

Step 4: Configure Your Tracking Code πŸ–₯️

  • Get Tracking ID: After creating a property, you will receive a unique tracking ID and JavaScript tracking code.
  • Install Tracking Code: Add this code to every webpage you want to track or use a tag manager to simplify the process.

Step 5: Set Goals and Events πŸ”

  • Define Goals: In Google Analytics, set up specific goals to track conversions or other key actions on your site.
  • Set Up Events: Optionally, set up events to track interactions like button clicks or video plays.

Step 6: Configure Filters and Views πŸ“Š

  • Create Views: Set up views to segment your data (e.g., filtered views that exclude internal traffic).
  • Apply Filters: Use filters to exclude or include specific data in your reports.

Step 7: Explore Analytics Features 🧐

  • Check Real-Time Reports: Monitor activity on your site in real-time.
  • Analyze Reports: Explore various reports to understand user behavior, acquisition sources, conversion metrics, and more.

Step 8: Link to Other Google Services (Optional) πŸ”—

  • Google Ads Integration: If you use Google Ads, link your accounts for comprehensive ad performance analytics.
  • Search Console Integration: Link with Google Search Console to view search data alongside analytics data.

Step 9: Review and Act on Data Insights πŸ“‹

  • Regular Review: Regularly check your analytics for insights.
  • Make Data-Driven Decisions: Use the insights from Google Analytics to inform website improvements, marketing strategies, and other business decisions

Google Analytics is a powerful tool for understanding website or app performance. By following these steps, you’ll be well-equipped to gather valuable data insights to inform your digital strategy and enhance user experience.

Google Analytics Pricing Overview

Google Analytics (Standard) πŸ†“

  • Cost: Free
  • Features: Basic analytical tools and data collection suitable for small and medium-sized websites.
  • Limitations: Data sampling in reports, limited custom dimensions and metrics, standard data freshness.

Google Analytics 360 (Premium) πŸ’Ό

  • Cost: Starts at $150,000 per year (subject to change based on specific business needs and website traffic).
  • Advanced Features: Enhanced data collection and reporting capabilities, unsampled reports, more custom dimensions and metrics, integration with Google BigQuery, and access to advanced analysis tools.
  • Target Audience: Large enterprises with high traffic volumes and complex analytical needs.

Additional Options ✨

  • Integration with Google Marketing Platform: Enhanced integration options available for additional cost, offering a more comprehensive suite of tools for marketing analysis and optimization.
  • Custom Solutions: Pricing and features can be customized based on specific business requirements and usage levels.

For the most current and detailed pricing information, it’s recommended to contact Google directly or visit the Google Analytics website. Pricing and offerings are subject to change and may vary based on the scale and scope of the business needs.

Google Analytics vs. Adobe Analytics: A Comparative Review

Pros of Google Analytics

Accessibility and User-Friendliness 🌟

  • Ease of Use: Known for its user-friendly interface, making it accessible for beginners and experts alike.
  • Free Version Available: Offers a robust free version that’s sufficient for many small to medium-sized businesses.

Integration with Google Products πŸ”—

  • Google Ecosystem: Seamlessly integrates with other Google services like Google Ads, Search Console, and Google Tag Manager.
  • Data Integration: Easily combines data from various sources within the Google ecosystem for comprehensive analysis.

Real-Time Data and Reporting πŸ“Š

  • Real-Time Analytics: Tracks and reports website data in real-time.
  • Customizable Reports: Provides a range of customizable reporting options to suit different analytical needs.

Cons of Google Analytics

Data Sampling and Limitations πŸ“‰

  • Data Sampling: In the free version, high-traffic websites might encounter data sampling, leading to less precise data.
  • Complexity in Advanced Features: Advanced features can be complex and may require technical expertise.

Privacy Concerns and Data Ownership πŸ›‘οΈ

  • Data Privacy: There are concerns about data privacy and how Google uses the data.
  • Data Ownership: Users don’t own the data; Google has access to it.

Pros of Adobe Analytics

Advanced Data Analysis and Segmentation πŸš€

  • Deep Data Analysis: Provides more in-depth data analysis capabilities than Google Analytics.
  • Advanced Segmentation: Offers robust segmentation tools for detailed audience analysis.

Integration with Adobe Suite πŸ”

  • Adobe Ecosystem: Integrates well with other Adobe products, offering a more holistic view of marketing data across platforms.
  • Cross-Channel Data Integration: Efficiently combines data from various channels for a comprehensive understanding.

Customization and Flexibility πŸ› οΈ

  • Highly Customizable: Offers extensive customization options for data collection and reporting to suit enterprise-level needs.
  • Flexibility: Adaptable to a wide range of complex business requirements.

Cons of Adobe Analytics

Complexity and Learning Curve πŸ€”

  • Steep Learning Curve: More complex to use than Google Analytics, with a steeper learning curve.
  • Technical Expertise Required: Generally requires more technical knowledge or resources to fully leverage its capabilities.

Higher Cost πŸ’²

  • Cost Prohibitive for Small Businesses: Typically more expensive than Google Analytics, making it less accessible for smaller businesses or those with limited budgets.

Both Google Analytics and Adobe Analytics are powerful tools, but they cater to different needs and scales of operation. Google Analytics is more accessible and user-friendly, making it a great choice for small to medium-sized businesses, while Adobe Analytics offers more advanced analytical features and customization, suited for large enterprises and users already invested in the Adobe ecosystem. The choice between the two depends on the specific requirements, budget, and scale of your business.

Conclusion 🎯

Google Analytics stands out as an essential tool for businesses of all sizes seeking to understand and improve their online presence. Its comprehensive analytics capabilities, combined with ease of use and integration with various platforms, make it a go-to solution for gaining valuable insights into digital performance. Whether you’re a small business or a large corporation, Google Analytics provides the data necessary to drive growth and success in the digital arena.

“Empower Your Decisions: Uncover Insights, Drive Growth with Google Analytics”

Related read: Google Analytics is built around sessions and traffic sources. When the question shifts to which customers come back and what they are worth over time, RetentionX works on the customer record instead.

Smartsheet: Streamlining Project Management for Maximum Efficiency

Overview 🌐

Smartsheet is a dynamic work management and collaboration tool that empowers teams and organizations to plan, capture, manage, automate, and report on work at scale. Offering a flexible, no-code platform, it combines the ease of use of a spreadsheet with additional features like file sharing, Gantt charts, and automation.

Key Features πŸ”‘

  • Customizable Templates: Smartsheet offers a wide range of pre-built templates for different project needs.
  • Automation Tools: Automate repetitive tasks to enhance efficiency.
  • Integration Capabilities: Seamlessly integrates with popular apps like Microsoft Office 365, Google Workspace, and Salesforce.
  • Real-time Collaboration: Enables team members to collaborate in real-time, enhancing communication and workflow.

Benefits and Use Cases πŸ’‘

  • Improved Project Visibility: With dashboards and reporting tools, teams gain insights into project progress.
  • Increased Productivity: Automation and integration features save time and reduce manual workloads.
  • Flexible for Various Industries: From marketing to software development, Smartsheet caters to diverse project management needs.

Getting Started with Smartsheet: A Step-by-Step Guide

Step 1: Sign Up for an Account πŸ“

  • Create Your Account: Visit Smartsheet’s website and click on the “Get Started” button.
  • Account Details: Provide your email address and other required details to create your account.
  • Email Verification: Check your email inbox for a verification message from Smartsheet and follow the instructions to verify your account.

Step 2: Choose Your Plan 🏷️

  • Select a Plan: Decide between the Free, Pro, Business, or Enterprise plan based on your needs.
  • Trial Option: Consider starting with a free trial to explore the features of Smartsheet.

Step 3: Set Up Your Workspace πŸ–₯

  • Access Dashboard: Once logged in, you’ll be taken to your Smartsheet dashboard.
  • Explore Templates: Look through the available templates to find one that suits your project or task.
  • Create a New Sheet: Start a new sheet from scratch or modify a template to fit your needs.

Step 4: Customize Your Sheet ✏️

  • Add Columns: Define the columns you need, such as task names, deadlines, status, etc.
  • Input Data: Enter your project data into the sheet.
  • Set Up Hierarchies: Organize tasks and subtasks using the hierarchy feature for better clarity.

Step 5: Add Team Members and Collaborate πŸ‘₯

  • Invite Team Members: Share the sheet with your team members or collaborators via email.
  • Assign Tasks: Assign tasks to specific individuals and set up alerts or notifications.

Step 6: Explore Advanced Features πŸ”

  • Automations: Set up automated workflows for repetitive tasks.
  • Reports and Dashboards: Create reports and dashboards to get an overview of your project’s progress.
  • Integrations: Integrate Smartsheet with other tools you use, like Google Workspace or Microsoft Office.

Step 7: Manage Your Projects πŸ“…

  • Track Progress: Regularly update your sheets to reflect current project statuses.
  • Use Gantt Charts: Utilize Gantt charts for visual project planning and tracking.
  • Schedule Reviews: Conduct regular project review meetings using Smartsheet as your central reference point.

Step 8: Seek Support and Resources πŸ†˜

  • Help Center: Use Smartsheet’s Help Center for tutorials, guides, and FAQs.
  • Community Forums: Join Smartsheet community forums to get insights and tips from other users.

Smartsheet is a robust platform that can enhance your project management and collaboration efficiency. By following these steps, you’ll be well on your way to mastering this powerful tool and bringing more organization and productivity to your projects and workflows.

Smartsheet Pricing Overview 🏷️

Free Plan πŸ†“

  • Access: Limited to 10 free sheets.
  • Features: Basic functionalities for individual use.
  • Best For: Small projects or individuals testing the platform.

Pro Plan πŸ’Ό

  • Pricing: $7 per user/month, billed annually.
  • Includes: Unlimited sheets, reports, and dashboards with enhanced features such as Gantt and Calendar views.
  • Ideal For: Professionals and small teams needing more comprehensive project management tools.

Business Plan πŸš€

  • Pricing: $25 per user/month, billed annually.
  • Features: Advanced capabilities like automated workflows, custom branding, and unlimited free collaborators.
  • Suitable For: Larger teams and businesses requiring extensive collaboration and integration tools.

Enterprise Plan 🏒

  • Custom Pricing: Tailored to the organization’s needs.
  • Offerings: Includes advanced security features, support, and scalability options.
  • Targeted At: Large enterprises needing a high level of customization, security, and support.

Additional Options ✨

  • Add-ons: Additional features and services available for purchase.
  • Support: Enhanced support options for higher-tier plans.

For detailed information on each plan and to see which one best fits your needs, you can visit Smartsheet Pricing.

Smartsheet vs. Asana: A Comparative Review

Pros of Smartsheet

Versatile Functionality πŸ› οΈ

  • Extensive Feature Set: Offers a wide range of project management and collaboration tools, including advanced reporting and resource management.
  • Customization Options: Provides high levels of customization for sheets, reports, and dashboards to fit various project needs.

Spreadsheet-Like Interface πŸ’»

  • Familiar Layout: Resembles a spreadsheet, making it easier for users familiar with Excel to adapt.
  • Detailed Data Management: Allows for detailed data entry and complex formulas, benefiting data-intensive projects.

Advanced Integration and Automation πŸ”„

  • Robust Integrations: Integrates seamlessly with a variety of other tools, including CRM and ERP systems.
  • Powerful Automation Features: Offers advanced automation capabilities to streamline repetitive tasks and processes.

Cons of Smartsheet

Complexity in Use πŸ€”

  • Steep Learning Curve: The extensive features can be overwhelming for new users or small teams.
  • Time-Consuming Setup: Setting up sheets and reports with complex requirements can be time-consuming.

Cost Factor πŸ’²

  • Higher Cost: Tends to be more expensive than some competitors, particularly for advanced features and larger teams.

Pros of Asana

User-Friendly Interface 🌟

  • Intuitive Design: Known for its user-friendly and visually appealing interface, making it easy to navigate and use.
  • Task-Oriented Structure: Excellently suits task and to-do list management.

Collaboration and Communication Tools πŸ—£οΈ

  • Enhanced Team Collaboration: Offers excellent tools for team communication and collaboration, including task comments and project updates.
  • Real-Time Notifications: Keeps teams informed with real-time updates and notifications.

Flexibility and Scalability πŸ“ˆ

  • Adaptable for Various Teams: Suits a wide range of teams and project types, from simple task management to complex projects.
  • Scalable Solution: Easily scales with the growth of a team or project complexity.

Cons of Asana

Limited Data Management βš™οΈ

  • Less Robust for Complex Data Management: Not as powerful as Smartsheet in handling complex data and lacks advanced reporting features.
  • Limited Customization for Reporting: While it offers basic reporting, it doesn’t match the depth of Smartsheet’s reporting capabilities.

Pricing for Premium Features πŸ’³

  • Cost for Advanced Features: Many of Asana’s more advanced features are locked behind its premium plans.

Both Smartsheet and Asana offer strong project management capabilities but cater to different needs and preferences. Smartsheet is more suitable for data-intensive projects and users who prefer a spreadsheet-like environment with robust customization and integration capabilities. On the other hand, Asana is ideal for teams prioritizing ease of use, task management, and collaboration, offering an intuitive interface and strong communication tools. The choice between the two will largely depend on the specific needs, scale, and preferences of the team or organization.

Final Thoughts and Recommendations ✨

Smartsheet stands out as a versatile and powerful project management tool, especially for those who are accustomed to spreadsheet functionalities but require more robust project management features. It’s an excellent choice for businesses looking for a comprehensive tool to manage projects, automate workflows, and collaborate effectively.

“Flexible solutions fit your work at any scale”

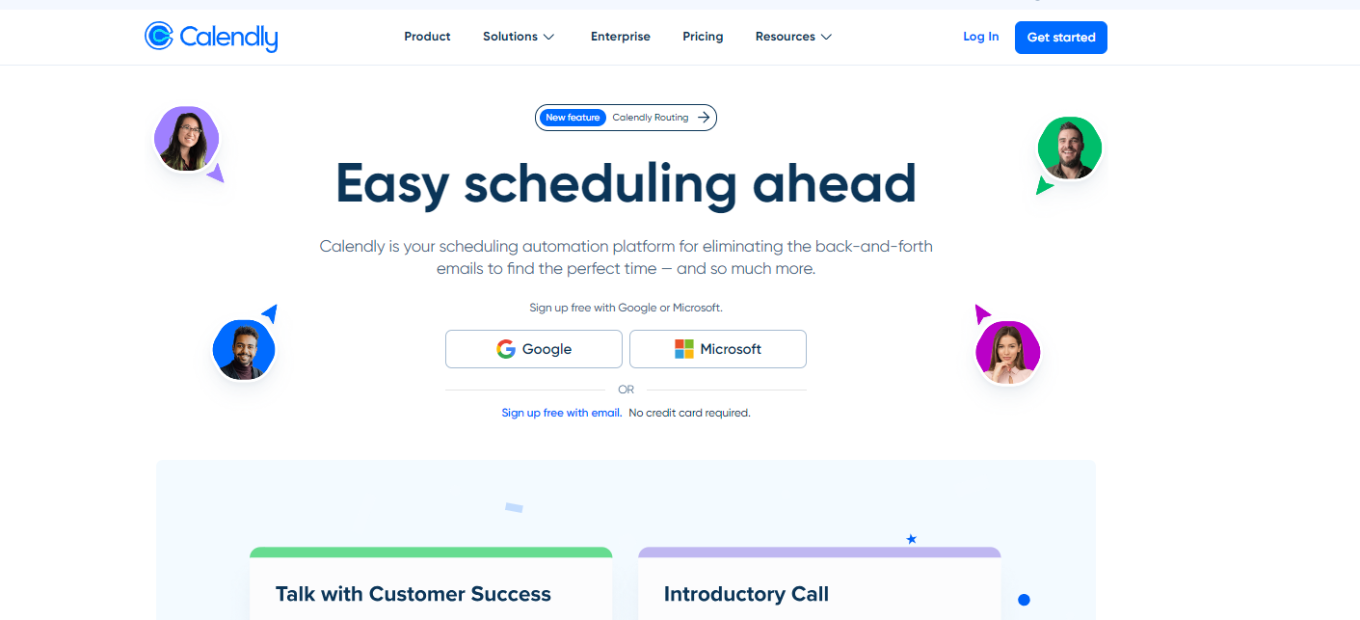
Calendly: Revolutionizing Your Scheduling Experience

Overview 🌐

Calendly is a powerful scheduling platform designed to simplify the coordination of meetings and appointments. It effectively eliminates the tedious back-and-forth communication typically associated with arranging meetings. With its user-friendly interface and robust integration with various calendar services, Calendly offers a streamlined scheduling experience.

Key Features πŸ”‘

  • Automated Scheduling: Calendly automates the process of finding suitable meeting times by syncing with your calendar.
  • Customizable Meeting Types: Users can set up different types of meetings, from one-on-ones to group sessions.
  • Time Zone Intelligence: Calendly automatically adjusts for different time zones, ensuring global compatibility.
  • Integration with Popular Tools: The platform seamlessly integrates with tools like Google Calendar, Office 365, and Zoom.

Benefits and Use Cases πŸ’‘

  • Increased Productivity: Reduces time spent on scheduling, allowing more focus on productive tasks.
  • Flexibility: Offers flexibility in scheduling, catering to various business needs and personal preferences.
  • Improved Professionalism: Streamlines the scheduling process, presenting a professional image to clients and colleagues.

How to Get Started with Calendly

Step 1: Sign Up for an Account πŸ“

  • Create an Account: Visit the Calendly website and sign up. You can use your email address or directly sign up with your Google or Office 365 account.
  • Verification: Verify your email if required to activate your account.

Step 2: Set Up Your Calendar πŸ—“

  • Calendar Integration: Connect your preferred calendar (Google, Outlook, Office 365, or iCloud). This sync ensures Calendly knows your availability to avoid double bookings.
  • Availability Settings: Define your general availability in the Calendly settings. This schedule will apply to all your event types by default.

Step 3: Create Event Types 🎟

  • Add New Event Types: Click on β€œNew Event Type” and choose between a one-on-one or a group event.
  • Customize Event Details: Set the event name, duration, and location (in-person, phone call, or video call).
  • Advanced Options: Customize additional settings like buffer times, event color, and email notifications.

Step 4: Personalize Your Calendly Link πŸ”—

  • Customize Your Link: Personalize your Calendly URL to make it recognizable and easier to share.
  • Link Sharing: Share your Calendly link via email, social media, or embed it on your website.

Step 5: Manage Bookings πŸ“…

  • View Appointments: Check your Calendly dashboard to see upcoming meetings.
  • Reschedule or Cancel: You can reschedule or cancel appointments directly from the dashboard.

Step 6: Integrate with Other Tools πŸ”Œ

  • Connect with Other Apps: Use Calendly’s integrations with platforms like Zoom, Salesforce, or Zapier to enhance your scheduling process.
  • Automate Workflows: Set up automated workflows for added efficiency, like sending follow-up emails after a booking.

Step 7: Upgrade If Necessary πŸ’³

  • Evaluate Your Needs: If you need more features like automated reminders, team scheduling, or analytics, consider upgrading to a premium plan.
  • Choose a Plan: Select from Calendly’s various paid plans based on your specific requirements.

Remember, the initial setup process is crucial for ensuring a smooth and efficient use of Calendly. Taking the time to correctly set up your availability, event types, and integrations will save you time and streamline your appointment scheduling in the long run.

Calendly Pricing Overview

Basic Plan (Free) πŸ†“

  • Features: Offers essential scheduling tools suitable for individuals.
  • Advantages: Ideal for personal use or testing the platform’s capabilities.
  • Limitations: Access to basic features only.

Essentials Plan πŸ’Ό

  • Pricing: Monthly and annual subscription options available.
  • Features: Includes more advanced scheduling options and customization.
  • Suitability: Best for professionals and small teams requiring more than the basic functionalities.

Professional Plan πŸš€

  • Pricing: Available on a monthly or annual subscription basis.
  • Features: Offers extensive customization and integration capabilities.
  • Best For: Ideal for businesses and teams needing comprehensive scheduling solutions.

Teams Plan πŸ‘₯

  • Pricing: Monthly and annual payment options.
  • Features: Designed for collaboration within teams, offering centralized billing and admin controls.
  • Ideal For: Larger teams and organizations that require shared scheduling and administrative oversight.

Enterprise Plan 🏒

  • Features: Tailored for large organizations with specific needs.
  • Customization: Offers extensive customization and dedicated support.
  • Advantages: Best suited for large enterprises requiring a scalable and secure scheduling solution.

For detailed information on pricing and features, you can visit Calendly Pricing.

Calendly vs. Acuity Scheduling: A Comparative Analysis

Pros of Calendly

User-Friendly Interface 🌟

  • Ease of Use: Calendly is known for its intuitive and clean interface, making it easy for both first-time and regular users to navigate.
  • Seamless Integration: It integrates smoothly with various calendar types and popular business tools.

Efficient Scheduling πŸ“…

  • Automated Time Zone Adjustments: Calendly automatically adjusts for different time zones, simplifying global scheduling.
  • Flexible Meeting Types: Allows customization of various meeting types, from individual appointments to group events.

Enhanced Productivity πŸš€

  • Reduced Scheduling Hassle: By automating the scheduling process, it reduces manual coordination efforts.
  • Professional Image: Streamlines the appointment setting process, presenting a polished and professional front.

Cons of Calendly

Limited Features in Free Plan πŸ“‰

  • Basic Functionality: The free version of Calendly offers limited features compared to its paid versions.
  • Restrictions on Customizations: There are fewer customization options available in the free plan.

Lack of Payment Integration πŸ’³

  • No Direct Payment Options: In its basic plans, Calendly lacks integration with payment gateways, a feature that can be critical for businesses charging for appointments.

Pros of Acuity Scheduling

Comprehensive Features πŸ“Š

  • Diverse Functionality: Acuity offers a wide range of features, including appointment scheduling, payment integration, and selling memberships or packages.
  • Customizable Booking Experience: Users can tailor their booking pages extensively, matching their brand and specific needs.

Payment Integration πŸ’°

  • Direct Payment Processing: Acuity integrates with popular payment platforms like Stripe, PayPal, and Square, facilitating easy billing and payment collection.

Versatile Use Cases πŸ› 

  • Suitable for Various Businesses: Acuity is well-suited for service-based businesses like spas, fitness studios, and consultants who need to manage appointments and accept payments.

Cons of Acuity Scheduling

Complexity in Setup πŸ€”

  • Steep Learning Curve: Some users find the setup process of Acuity Scheduling to be more complex than Calendly, especially when dealing with numerous features.
  • Time-Consuming Customization: Extensive customization options, while beneficial, can take time to set up properly.

No Free Version 🚫

  • Lack of a Free Plan: Acuity does not offer a free plan, which might be a barrier for individual users or small businesses just starting out.

In summary, Calendly stands out for its user-friendly interface and efficient scheduling capabilities, especially for users looking for a straightforward scheduling tool. On the other hand, Acuity Scheduling offers more comprehensive features and payment integration, making it a better fit for service-based businesses that need more robust booking and payment options.

Final Thoughts and Recommendations ✨

Calendly stands out as a highly efficient and user-friendly scheduling tool. It’s well-suited for professionals and businesses looking to streamline their appointment setting process. Whether you’re a freelancer, a small business owner, or part of a larger organization, Calendly offers a solution to meet your scheduling needs.

“Easy scheduling ahead.”

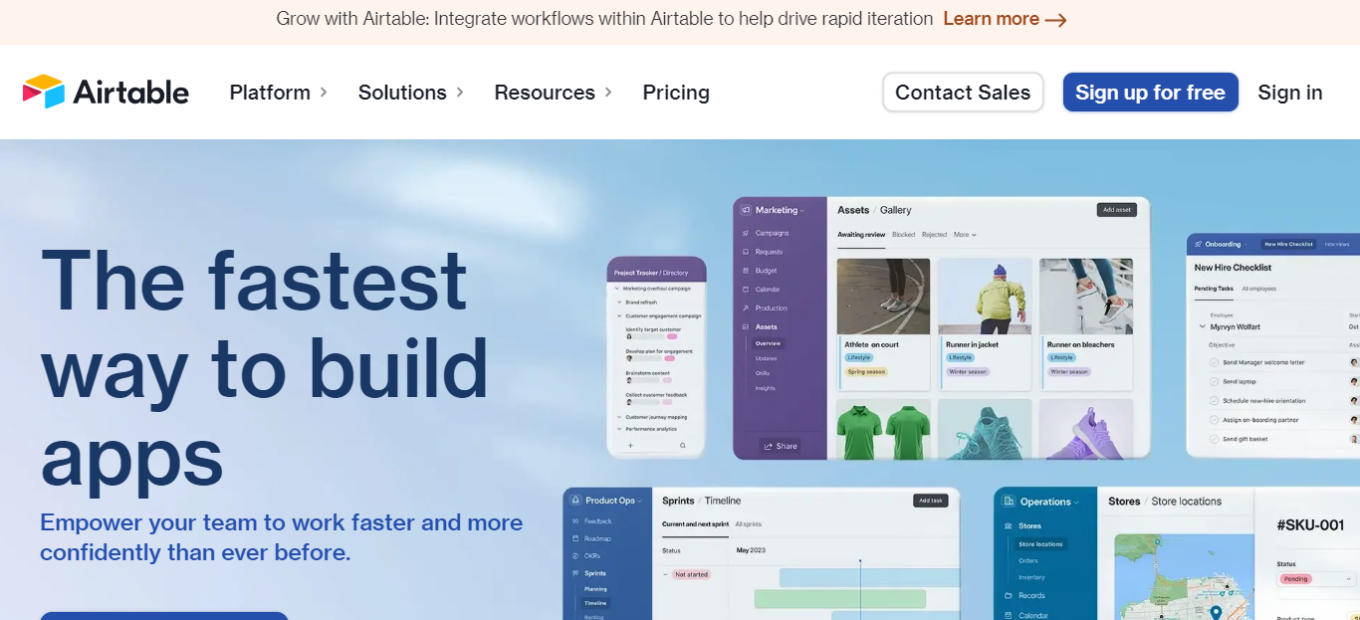
Airtable: The All-in-One Workspace for Your Creative Projects

βš–οΈ Our Verdict on Airtable

Airtable stands out as a versatile cloud-based platform, blending the functionalities of a database with the simplicity of a spreadsheet. It’s an excellent choice for businesses and individuals seeking a flexible solution for data organization, project management, and collaborative work.

Pros & Cons

Pros:

  • πŸ”„ Wide range of customization options.
  • 🌐 Seamless integration with various apps and tools.
  • πŸ›  User-friendly interface with spreadsheet-like functionality.

Cons:

  • πŸ’΅ Can be pricier than some competitors.
  • 🧩 Some features require a learning curve.
  • πŸ” Limited advanced database functionalities compared to traditional database systems.

About Airtable

Airtable offers an innovative approach to data management, combining the features of databases and spreadsheets. It’s designed to cater to diverse needs, from content management to event planning, making it a versatile tool for various business and creative applications.

What’s In It For You?

Airtable provides a unique platform that supports project management, data organization, and collaborative work. Its features include customizable views, extensive automation, and robust integration capabilities, enabling teams to streamline their workflows and manage projects more efficiently.

Getting Started with Airtable: A Step-by-Step Guide

Step 1: Sign Up for Airtable

  1. Visit the Airtable website and click “Get started for free.”
  2. Sign up with your email, Google, or Apple account.

Step 2: Create Your First Base (Database)

  1. Once logged in, click “Add a base” and choose a template or start from scratch.
  2. Customize your base by adding tables, fields, and views.

Step 3: Add and Organize Data

  1. Open a table and start adding records (data).
  2. Use fields to structure and categorize your data.

Step 4: Collaborate and Share

  1. Invite team members to collaborate on your base.
  2. Set permissions to control who can view or edit data.
  3. Share views or bases with external collaborators.

Step 5: Explore Advanced Features

  1. Discover advanced features like automations and integrations.
  2. Explore templates and blocks to enhance functionality.

Step 6: Learn and Get Support

  1. Access Airtable’s learning resources, including guides and webinars.
  2. Join the Airtable community for tips and insights.
  3. Contact Airtable support for assistance when needed.

Step 7: Upgrade Your Plan (Optional)

  1. Consider upgrading to a paid plan for more features and storage.

Now you’re ready to dive into Airtable and tailor it to your specific needs, whether for project management, data organization, or creative collaboration.

Pricing Plans & Support

A pricing page for Airtable, a cloud-based database and collaboration platform, would typically provide information about the various pricing plans they offer. These plans may include details such as:

  1. Free Plan: Information about a free tier, if available, which usually comes with limited features and storage.
  2. Paid Plans: Details on different paid subscription tiers, which often include more advanced features, increased storage capacity, and additional functionality.
  3. Pricing Tiers: The pricing structure, including monthly and annual subscription options, with corresponding costs for each plan.
  4. Features: A breakdown of the features and capabilities included in each plan, helping users understand what they get at each pricing level.
  5. User Licenses: Information on the number of users or team members included in each plan and any associated costs for additional users.
  6. Data and Storage Limits: Details about the amount of data storage available for each plan and any limits on the number of records or items you can create.
  7. Support and Resources: Information on customer support options, access to help resources, and community forums.
  8. Payment Options: Accepted payment methods and billing cycles (e.g., monthly or annually).
  9. Enterprise or Custom Plans: If available, information about tailored plans for larger organizations with specific needs.
  10. Trial Period: If offered, details about a free trial period during which users can evaluate the service before committing to a paid plan.

Airtable vs. Smartsheet

Airtable Pros:

  • 🎨 Intuitive and visually appealing interface.
  • πŸ›  Highly customizable and flexible for various use cases.

Airtable Cons:

  • πŸ’² Higher cost for more advanced features.
  • πŸ€” Requires some time to fully utilize its capabilities.

Smartsheet Pros:

  • πŸ”„ Strong project management features.
  • πŸ“Š Robust reporting and automation tools.

Smartsheet Cons:

  • 🧰 Less intuitive for spreadsheet-based tasks.
  • πŸ–₯ Interface may not be as user-friendly as Airtable.

Conclusion

Airtable is a highly effective tool for those seeking a combination of database functionality and spreadsheet ease. Ideal for businesses of all sizes, it enhances collaboration, organization, and workflow efficiency, making it a standout choice in the realm of project and data management tools.

No matter your workflow,

you can build it in Airtable

Adobe: The Powerhouse of Creative Software – Empowering Digital Artists Worldwide

βš–οΈ Our Verdict

Adobe, a global leader in digital media and digital marketing solutions, offers an unparalleled suite of creative software. Recognized for industry-standard applications like Photoshop for image editing, Illustrator for vector graphics, and Premiere Pro for video editing, Adobe has become indispensable in the world of digital art and design. Its comprehensive tools cater to a wide range of creative professionals, from graphic designers and photographers to video editors and digital marketers, providing them with powerful capabilities to bring their visions to life.

Pros & Cons

Pros:

  • πŸ›  Robust and Comprehensive: Adobe offers a vast array of tools covering almost every aspect of digital creativity.
  • πŸ”„ Innovation and Regular Updates: Continuously evolving, Adobe adds cutting-edge features and enhancements to keep its software at the forefront of technology.
  • 🌐 Extensive Resources: A rich library of tutorials, user forums, and community support makes learning and mastering Adobe software more accessible.

Cons:

  • πŸ’΅ Subscription Costs: While offering a range of functionalities, Adobe’s subscription model can be a significant investment over time.
  • 🧠 Learning Curve: Due to its advanced features, beginners might find Adobe software overwhelming initially.
  • πŸ–₯ Hardware Requirements: High-performance hardware is needed to efficiently run most Adobe applications.

About Adobe

Adobe’s suite caters to a wide variety of creative needs. Photoshop sets the standard for digital image manipulation, Illustrator dominates vector graphic design, and Premiere Pro offers industry-leading video editing capabilities. Beyond these, Adobe offers an ecosystem of interrelated applications that work seamlessly together, enhancing productivity and creativity.

What’s In It For You?

Adobe’s software suite is a game-changer for creative professionals and enthusiasts. Whether it’s creating stunning visual graphics, editing high-quality videos, or developing comprehensive digital marketing campaigns, Adobe provides the tools to make it happen. The integration across its applications enhances workflow, allowing for a more streamlined and efficient creative process.

Starting with Adobe: A Step-by-Step Guide for Beginners

  1. Choose Your Adobe Product: Visit the Adobe website and explore their product range to determine which software best fits your needs. Popular choices include Photoshop for image editing, Illustrator for vector graphics, and Premiere Pro for video editing.
  2. Create an Adobe Account: Sign up for an Adobe account. This is necessary for purchasing and managing your software subscriptions.
  3. Select a Subscription Plan: Adobe offers various subscription plans. Choose between individual applications or the full Creative Cloud suite. Consider the free trials to test the software before committing.
  4. Download and Install: Once subscribed, download the software from the Adobe Creative Cloud website. Install it on your computer following the provided instructions.
  5. Explore Tutorials and Resources: Adobe offers a wealth of tutorials and learning resources. Utilize these to familiarize yourself with the software’s interface and features.
  6. Start a Project: Open the software and start a new project. Begin experimenting with basic features and tools.
  7. Join the Community: Engage with Adobe’s online community through forums, social media, and user groups for tips, inspiration, and support.
  8. Practice Regularly: Consistent practice is key to mastering Adobe software. Work on various projects to improve your skills.
  9. Stay Updated: Keep your software updated to benefit from the latest features and improvements.
  10. Explore Advanced Features: As you become more comfortable, start exploring more advanced features of the software to fully leverage its capabilities.

Remember, mastering Adobe software takes time and patience. Utilize available resources and practice regularly to enhance your skills.

Pricing Plans & Support

Adobe offers flexible pricing plans:

  • Individual Plans: Starting at $20.99/month for a single app or $52.99/month for the entire Creative Cloud suite, tailored for individual professionals.
  • Business Plans: For teams and businesses, plans start at $33.99/month per license, providing collaboration and management tools.
  • Education Pricing: Special discounts for students and teachers at $19.99/month for the full suite, making it more accessible for educational purposes.

Adobe vs. Microsoft: A Comparative Overview πŸ”„

Adobe

Pros:

  • 🎨 Specialized Creative Tools: Industry-leading applications for creative tasks.
  • 🌐 Comprehensive Suite: A wide range of integrated applications.
  • πŸ”„ Regular Updates: Frequent enhancements and new features.

Cons:

  • πŸ’Έ Subscription Cost: Recurring fees can add up.
  • πŸ€” Learning Curve: Advanced features may be complex for beginners.
  • πŸ’» Hardware Requirements: Needs high-performance hardware.

Microsoft

Pros:

  • πŸ“Š Broad Productivity Suite: Essential tools for business and education.
  • πŸ’» Integration with Windows: Seamless performance on Windows OS.
  • 🌍 Diverse Range of Software: Wide variety of solutions including cloud services.

Cons:

  • 🎨 Less Focus on Creative Tools: More geared towards productivity.
  • πŸ”„ Compatibility Issues: Potential issues with non-Windows systems.
  • πŸ’Έ Cost: Free versions are limited; full features can be costly.

Conclusion

Adobe stands as an irreplaceable suite in the toolbox of any creative professional or hobbyist. Its comprehensive range of applications and constant innovation keep it at the forefront of the creative software industry, making it an essential investment for those looking to excel in digital art and design.

“Creativity for All.”