Jira, developed by Atlassian, emerges as a leading project management tool, particularly favored in software development environments. Known for its robust issue-tracking and agile project management capabilities, Jira is a top choice for teams looking for efficient workflow management and project tracking.
Pros & Cons
Pros:
🌐 Extensive project management and tracking features.
🛠️ Highly customizable workflows and boards.
🔗 Seamless integration with various development tools.
📊 Advanced reporting and analytics capabilities.
Cons:
💸 Can be more expensive than some competitors.
🧩 Complexity increases with customization.
⏳ Steeper learning curve for new users.
About Jira
Originally designed as an issue tracker, Jira has evolved into a comprehensive project management tool. It encompasses features for agile development, project tracking, issue tracking, and a suite of tools for software development lifecycle management.
What’s In It For You?
Jira offers tools that support all aspects of project management and software development. Its features enable effective team collaboration, project tracking from inception to delivery, and include tools for backlog prioritization, sprint planning, and release management.
How to Get Started with Jira ️
Step 1: Sign Up for a Jira Account ️
🌐 Visit the Jira Website: Go to Atlassian’s official website.
🆓 Start Your Free Trial: Opt for the “Start free trial” option. Jira offers a 7-day free trial.
📝 Provide Your Details: Enter required information such as your email, create a password, and choose your Jira site’s name.
Step 2: Set Up Your Project ⚙️
📊 Select a Template: Choose a project template that fits your workflow (Scrum, Kanban, etc.).
🏷️ Create Your Project: Name your project and add a key for easy identification.
Step 3: Add Issues to Your Project
➕ Add Tasks: Create tasks, bugs, or stories using the ‘Create’ button.
🏷️ Detail Your Issues: Add descriptions, assignees, and set priorities for each issue.
Step 4: Customize Your Workflow
🛠️ Configure Workflow: Adapt Jira’s workflow to match your team’s processes.
🎨 Customize Boards: Tailor your Kanban or Scrum boards with custom columns and filters.
Step 5: Collaborate with Your Team
👥 Add Team Members: Invite team members to your Jira project.
🗨️ Communicate: Use Jira’s commenting and tagging features for collaboration.
Step 6: Track Project Progress
📈 Use Dashboards: Monitor your project’s progress with Jira’s dashboards.
📅 Schedule Meetings: Plan sprints and retrospectives within Jira.
Step 7: Review and Adapt
🔍 Conduct Reviews: Regularly review project progress and backlog.
🔄 Adapt and Iterate: Make continuous improvements based on team feedback.
Pricing Plans & Support
Jira offers various pricing plans tailored to different team sizes and needs:
🆓 Free Plan: For small teams (up to 10 users), offering basic features.
💼 Standard Plan: Priced at $7.50/user/month, suitable for growing teams.
🏢 Premium Plan: At $14.50/user/month, includes advanced features for larger teams.
⭐ Enterprise Plan: Custom pricing for extra-large teams, with enterprise-grade features and support.
Jira vs. Microsoft Azure DevOps
Jira Pros:
🛠️ Comprehensive project management and issue tracking.
📊 Advanced reporting and customizable workflows.
Jira Cons:
💸 Higher cost for premium features.
⚙️ Requires time to learn the platform’s full capabilities.
Microsoft Azure DevOps Pros:
🖥️ Integrated suite for software development lifecycle.
💰 Competitive pricing and integration with other Microsoft tools.
Microsoft Azure DevOps Cons:
📚 May be overwhelming for smaller teams or non-development projects.
🧩 Less flexible in workflow customization compared to Jira.
Conclusion
Jira stands as a comprehensive tool for project management, especially beneficial for teams engaged in software development. With its range of features, Jira is suitable for both small startups and large enterprises aiming to streamline their project processes.
🏆 Squarespace emerges as a premium website building platform, renowned for its sleek designs and user-friendly interface. Ideal for both personal and business websites, Squarespace is a top choice for creators and entrepreneurs seeking a blend of simplicity and professionalism.
Pros & Cons
Pros:
Stylish, professionally-designed templates 🎨
Intuitive website builder with drag-and-drop functionality 🛠️
Strong e-commerce capabilities for online stores 🛍️
Excellent customer support and community resources 📞
Cons:
Limited third-party app integrations compared to competitors 📌
Higher learning curve for advanced customization 🧠
E-commerce features are less extensive than specialized platforms like Shopify 💼
About Squarespace
🌐 Initially a simple website builder, Squarespace has evolved into a comprehensive platform that offers solutions for website design, e-commerce, and digital marketing. It includes features like blogging tools, SEO optimization, and social media integration, addressing a broad spectrum of online presence needs.
What’s In It For You?
Squarespace provides a suite of tools that go beyond basic website building. These features facilitate effective online engagement, from creating visually appealing sites to implementing marketing strategies and managing e-commerce activities.
Starting Your Journey with Squarespace: A Step-by-Step Guide
1. Visit the Squarespace Website 🌐
Action: Head over to the Squarespace website.
Details: Click on one of the ‘Get Started’ buttons to begin your journe】.
2. Personalize Your Experience 💡
Action: Answer introductory questions (optional).
Details: These questions help Squarespace tailor suggestions for themes that match your website’s needs and objectice】.
3. Sign Up for an Account 📝
Action: Create or sign in to your Squarespace account.
Details: You can use the same account for multiple trials. After signing up, name your website, which can be changed lrce】.
4. Explore the Dashboard and Editor 🖥️
Action: Familiarize yourself with the Squarespace dashboard.
Details: The dashboard is where you manage your account and website, including content changes, design, commerce functions, andurce】.
5. Edit Your Website Content ✏️
Action: Start editing your site.
Details: Squarespace provides a functioning menu, professional layouts, well-matched fonts, and color schemes from the beginning. You may only need to do light editing before lurce】.
6. (Optional) Add an eCommerce Store 🛍️
Action: Extend your website into an online store.
Details: Squarespace allows you to add up to 200 products, making it suitable for users who want to include an e-commerce ource】.
7. Publish Your Site and Choose a Plan 🚀
Action: Upgrade your plan and publish your site.
Details: Access the ‘Settings’ to find publishing options. Select the best plan for your needs, especially if you require advanced e-commerce source】.
By following these steps, you can effectively set up and launch your website on Squarespace, tapping into its robust capabilities for creating a personalized and professional online presence.
💼 Squarespace Pricing Plans
Squarespace offers a range of pricing plans, suitable for various website building needs, from personal blogs to comprehensive e-commerce platforms:
Personal Plan: $16 per month
Ideal for: Blogs, portfolios, or very small business sites.
Features: Basic website building tools and functionalities.
Business Plan: $23 per month
Ideal for: Small businesses.
Features: Additional business-focused tools and functionalities.
Basic Commerce Plan: $27 per month
Ideal for: Creating a basic online store.
Features: E-commerce capabilities for new or small-scale online stores.
Advanced Commerce Plan: $49 per month
Ideal for: Larger-scale e-commerce sites.
Features: Comprehensive e-commerce tools and advanced functionalities.
Additionally, Squarespace offers a 14-day free trial to test its features before committing to a plan. While Squarespace’s prices are not the lowest compared to some competitors, the platform is noted for its superior features and excellent design functionality, particularly valuable for online store】.
Squarespace vs. Wix: A Comparative Analysis 🌐
Squarespace
Pros:
Sophisticated Design Templates: Squarespace is known for its elegant and professional template designs, ideal for visually-focused websites 🎨
Strong E-commerce Capabilities: Offers robust features for online stores, particularly suitable for businesses focused on e-commerce 🛒
High-Quality Blogging Tools: Provides excellent tools for blogging, with superior content management and presentation options ✍️
Built-In SEO Tools: Squarespace includes integrated SEO tools that are user-friendly and effective for improving site visibility 🔍
Cons:
Less Intuitive Interface: The platform may have a steeper learning curve, especially for users unfamiliar with web design principles ⚙️
Limited App Market: Fewer third-party integrations and apps compared to Wix, which might limit functionality expansion 📲
Less Flexibility in Customization: Offers limited customization options compared to Wix, which could be a drawback for those seeking extensive personalization 🖌️
Wix
Pros:
User-Friendly Interface: Wix is celebrated for its intuitive and easy-to-use drag-and-drop website builder, making it ideal for beginners 🌟
Extensive Customization Options: Offers a wide range of customization options, allowing for more creative freedom in website design 🛠️
Large App Market: Provides a vast array of third-party applications and services to enhance website functionality and features 📊
Flexibility for Different Website Types: Suitable for a broad spectrum of website types, from simple blogs to complex e-commerce sites 📈
Cons:
SEO Limitations: While improving, Wix’s SEO capabilities have historically been considered less robust than those of Squarespace 📉
Template Restrictions: Once a template is selected and published, it cannot be changed without creating a new site, which could be limiting for evolving websites 🔄
Performance Issues on Complex Sites: Some users report slower loading times and performance issues with more complex or feature-rich websites 🐢
In summary, Squarespace stands out for its stylish templates and strong e-commerce tools, while Wix is known for its user-friendly interface and extensive customization options. The choice between the two depends on the specific needs and skills of the user, such as design preferences, e-commerce requirements, and desired level of customization.
Conclusion
🔍 Squarespace is an all-in-one platform ideal for individuals and businesses aiming to build a strong online presence. With its blend of style, functionality, and e-commerce features, Squarespace caters to a wide audience, from beginners to experienced web designers.
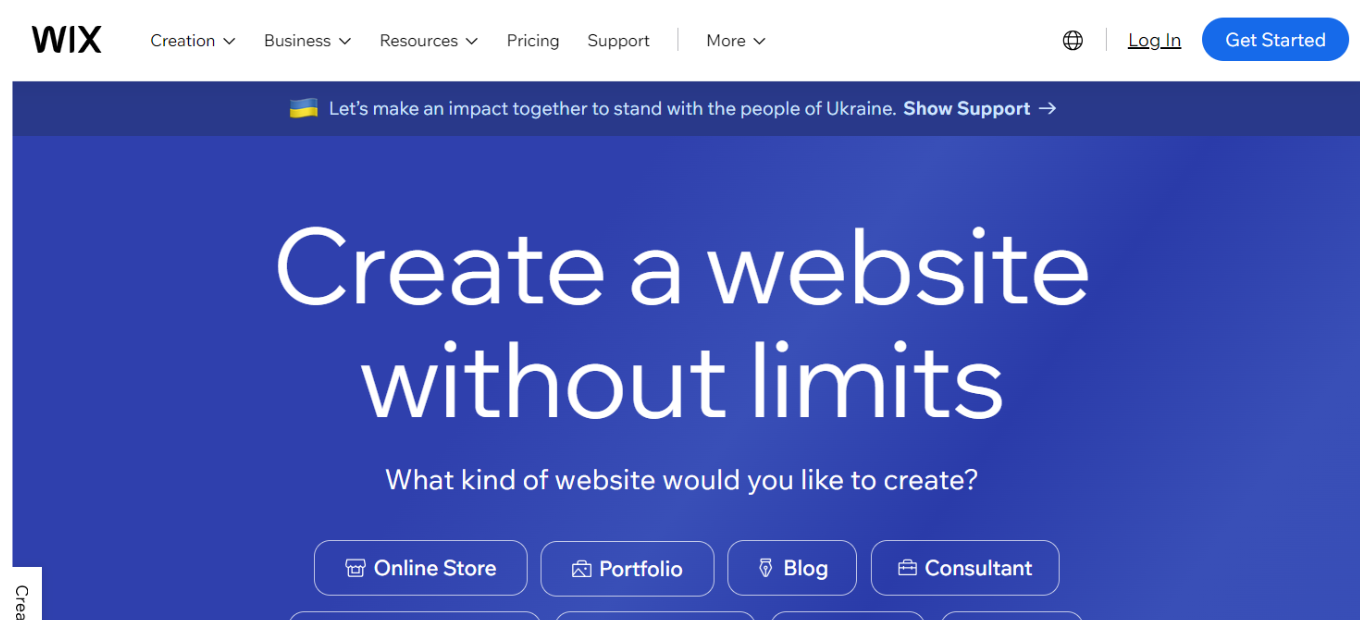
🌟 Wix shines as a comprehensive website building platform, offering a plethora of features from intuitive site creation to advanced SEO tools, ideal for users of all skill levels. Its user-friendly interface and vast template selection make it a top choice for web designers and business owners alike.
Pros & Cons
Pros: – Extensive range of customizable templates 🎨 – User-friendly drag-and-drop website builder 🛠️ – Advanced SEO and marketing tools 📈 – Diverse app market for additional functionality 📱
Cons: – Slightly overwhelming for absolute beginners 😵 – Higher cost for premium features 💰 – Inability to change templates after site publication 🔄
About Wix
📚 Originally a simple website builder, Wix has grown into a multi-faceted platform encompassing a wide range of web design and business tools. It includes functionalities like e-commerce, online booking systems, and professional blog tools, catering to diverse web development needs.
Wix Pricing Overview 🌟
Wix offers a variety of pricing plans to suit different needs, from personal websites to large-scale business platforms. Here’s a breakdown of their current pricing as of 2023:
🆓 Free Plan
Cost: $0
Features: Access to Wix’s website builder with basic features.
Limitations: Includes Wix ads, lacks custom domain, limited in terms of SEO.
Ideal For: Testing Wix features or creating a basic personal website.
💡 Light Plan
Cost: $16 per month
Ideal For: Small businesses or individuals looking to create a standard website like a resume, portfolio, or blog.
Features: Offers basic functionality for a professional-looking website.
🛒 Core Plan
Cost: $27 per month
Ideal For: Those starting an online store or needing ecommerce features for the first time.
Features: Includes ecommerce functionality.
🏢 Business Plan
Cost: $32 per month
Ideal For: Expanding offline and ecommerce sales.
Features: Advanced options suitable for growing businesses.
💼 Business Elite Plan
Cost: $159 per month
Ideal For: Large businesses requiring advanced reporting, ecommerce, and marketing features.
Features: Comprehensive suite of tools for large-scale operations.
🎉 Free Trial
Duration: 14 days
Access: Any Wix premium plan.
Limitations: Can’t accept payments; upgrading required after trial to maintain website.
Wix’s pricing structure is designed to be flexible, allowing users to scale up as their website needs grow. The free plan and trial offer opportunities to explore Wix’s capabilities before committing financially, while the higher-tier plans cater to more complex requirements like ecommerce and advanced business fsource】.
What’s In It For You?
Wix offers tools that cater to various aspects of website creation and management, not just basic web design. Its features support effective online presence management, from building a site to driving traffic and sales.
🚀 Step-by-Step Guide to Starting with Wix
1. Sign Up for an Account 📝
Action: Go to the Wix website.
Details: Click on the ‘Sign Up’ button and enter your email and a password, or sign up using a Google or Facebook account.
2. Choose Your Website Type 🌐
Action: Select the type of website you want to create.
Details: Wix offers options like business, online store, photography, music, designer, and more.
3. Answer the Wix ADI Questions (Optional) 🤖
Action: Opt to use Wix ADI (Artificial Design Intelligence).
Details: Answer a series of questions about your website’s purpose and preferences. Wix ADI will then create a website for you.
4. Or Choose a Template ✨
Action: Browse through templates if you don’t want to use Wix ADI.
Details: Wix offers a wide range of templates for different industries and purposes. Choose one that fits your needs.
5. Customize Your Website 🎨
Action: Edit the template.
Details: Use the drag-and-drop editor to add, remove, or modify elements like text, images, and sections.
6. Optimize for Mobile Devices 📱
Action: Switch to the mobile editor.
Details: Adjust your website’s mobile view to ensure it looks good on smartphones and tablets.
7. Set Up SEO and Other Settings 🔍
Action: Use Wix’s SEO Wiz.
Details: Follow the step-by-step guide to optimize your site for search engines. Also, set up other features like social media links, contact forms, etc.
8. Select a Plan and Domain 🏷️
Action: Choose a Wix plan.
Details: Pick a free or premium plan. If premium, you can connect or purchase a custom domain name.
9. Publish Your Website 🌟
Action: Click the ‘Publish’ button.
Details: Once you’re happy with your site, make it live by publishing it. You can always update and republish later.
10. Promote Your Site 📣
Action: Market your website.
Details: Use social media, email marketing, and other online tools to drive traffic to your new website.
Following these steps, you can create a professional-looking website tailored to your needs with Wix’s user-friendly platform.
Wix vs. Squarespace: A Head-to-Head Comparison
Wix
Pros:
Ease of Use: Wix’s drag-and-drop interface is user-friendly, perfect for beginners 🌟
Diverse Templates: Offers a vast array of customizable templates for different needs 🎨
Rich App Market: Access to a wide range of apps for enhanced functionality 📲
Design Freedom: More creative control in designing websites compared to Squarespace ✨
Cons:
Template Restrictions: Once published, templates can’t be changed without a site rebuild 🔁
Slower Performance: Can experience slower loading times, a downside for complex sites 🐢
SEO Constraints: SEO capabilities have improved but may still lag behind Squarespace’s 📊
Squarespace
Pros:
Elegant Designs: Known for sophisticated, professional template designs 🎩
Integrated SEO and Analytics: Strong built-in tools for SEO and site analytics 🔍
E-commerce Strength: Superior e-commerce features with more built-in options 💼
Better Performance: Generally offers faster and more reliable site performance 🚀
Cons:
Complex Interface: The editing interface can be less intuitive, especially for new users ⚙️
Limited Apps: Fewer third-party apps and integrations than Wix 🧩
This comparison offers insights into the unique strengths and weaknesses of Wix and Squarespace, helping users make an informed decision based on their specific website building needs.
Conclusion
🔍 Wix is an all-in-one website building platform that excels in offering a wide range of customizable features. It is suitable for both beginners and advanced users looking to establish or enhance their online presence.
WordPress, the widely popular content management system, offers an extensive range of features from website creation to blog management, ideal for users of all skill levels. Its flexibility and extensive plugin library make it a top choice for web creators.
Pros & Cons 👍👎
Pros:
Wide range of themes and plugins.
Intuitive content management and publishing tools.
High customizability for unique website designs.
Large community and extensive support resources.
Cons:
Can be overwhelming for beginners.
Some maintenance required for updates and security.
Dependence on plugins for advanced features.
About WordPress 🖥️
Established as a blogging platform, WordPress has evolved into a comprehensive tool for website creation. It includes features for web design, e-commerce, SEO, and social media integration, catering to a diverse range of web creation needs.
What’s In It For You? 💡
WordPress provides tools for various aspects of web creation, not just content management. Its features support effective website development, from conceptualization to execution and ongoing management.
Starting on WordPress: A Step-by-Step Guide 🚀
WordPress is a popular platform for creating websites and blogs. Here’s a comprehensive guide to help you get started:
Select a Plan: Choose from the available plans (Free, Personal, Premium, Business, Commerce, or Enterprise) based on your needs.
Step 2: Set Up Your Account 🛠️
Create an Account: Sign up by providing your email address, choosing a username, and setting a password.
Confirm Your Email: Verify your email address through the confirmation email sent by WordPress.
Step 3: Choose a Domain Name 🌐
Select a Domain: Choose a domain name that reflects your blog or website’s purpose. This will be your website’s address (e.g., yourwebsite.com).
Register or Map the Domain: If you have selected a paid plan, you can register a new domain for free for the first year. Alternatively, you can map an existing domain.
Step 4: Customize Your Website 🎨
Select a Theme: Browse through the themes available on WordPress and choose one that suits your website’s style and purpose.
Customize the Theme: Use the WordPress Customizer to modify various aspects of your theme, including layouts, colors, fonts, and more.
Step 5: Add Content to Your Site ✏️
Create Pages and Posts: Start adding content to your site. Pages are for static content like ‘About’ or ‘Contact’ pages, while posts are for blog entries.
Add Media: Upload images, videos, and other media to enhance your posts and pages.
Step 6: Configure Website Settings ⚙️
Adjust General Settings: Set your site title, tagline, and language.
Configure Reading Settings: Decide what your front page displays – your latest posts or a static page.
Set Up Permalinks: Permalinks are the URLs for your posts and pages. Choose a structure that works best for SEO and user readability.
Step 7: Install Plugins (Optional) 🔌
Browse Plugins: If you’re on a Business or higher plan, explore the thousands of plugins available and install the ones that add functionality to your site (e.g., SEO, security, e-commerce).
Step 8: Publish Your Site 🌟
Review Your Site: Make sure everything looks good and works as expected.
Publish: Once you’re satisfied, publish your site. If you’re on a Free plan, remove the privacy setting to make your site visible to the public.
Step 9: Promote Your Website 📣
Share on Social Media: Link your site to your social media accounts and share your content.
SEO Optimization: Use SEO plugins and tools to improve your site’s visibility on search engines.
Step 10: Monitor and Update Your Site 🔍
Regular Updates: Regularly update your content, themes, and plugins.
Monitor Performance: Use analytics to track visitor behavior and make improvements.
Starting with WordPress is a journey of creativity and learning. Enjoy the process of building and growing your website or blog! 🌱
Pricing Plans & Support 💳
WordPress offers a range of pricing plans, each designed to cater to different needs, from personal blogging to large enterprises:
Free Plan: This plan is $0 and offers basic features such as beautiful themes, unlimited pages, built-in newsletters & RSS, brute-force protection, 1 GB storage, and more. It’s ideal for those getting a taste of WordPress and its capabilities.
Personal Plan: Priced at $9 per month (billed yearly), the Personal plan includes everything in the Free plan plus a free domain for one year, an ad-free experience, 6 GB of storage, and email support. This plan is suitable for creating a personal home on the web with a custom domain name.
Premium Plan: For $18 per month (billed yearly), the Premium plan builds on the Personal plan with additional features like live chat support, premium themes, 4K videos with VideoPress, 13 GB of storage, and more. This plan is tailored for building a unique website with powerful design tools.
Business Plan: At $40 per month (billed yearly), the Business plan offers everything in the Premium plan plus access to 50,000+ plugins and themes, unrestricted bandwidth, 50 GB of storage, and advanced features for business websites.
Commerce Plan: This plan costs $70 per month (billed yearly) and includes everything in the Business plan, plus features for creating a powerful online store, such as premium store themes, unlimited products, inventory management, and 50 GB of storage. It’s ideal for setting up a robust e-commerce platform.
Enterprise Plan: Targeting large-scale business needs, the Enterprise plan starts at $25,000 yearly. It’s designed to deliver unmatched performance and the highest security standards for enterprise-level content management.
Each of these plans is tailored to cater to different stages of website development and management, from personal blogs to professional business sites and large enterprise solutions.
WordPress vs. Squarespace 🥊
WordPress Pros:
Extensive customization and flexibility.
Large selection of themes and plugins.
Strong community support and resources.
WordPress Cons:
Requires more technical know-how for setup and customization.
Regular maintenance and updates needed.
Squarespace Pros:
User-friendly interface for beginners.
All-in-one solution with integrated features.
Sleek design templates.
Squarespace Cons:
Less customization flexibility compared to WordPress.
Limited third-party integrations.
Conclusion 🎯
WordPress is a versatile and powerful platform suitable for a wide range of web creation needs. Whether you’re a blogger, business owner, or web developer, WordPress offers the tools and flexibility to create a unique and functional website.
Shopify emerges as a leading e-commerce platform, renowned for its comprehensive features that cater to businesses of all sizes. Known for its user-friendly interface and extensive customization options, Shopify stands as a top choice for entrepreneurs and established businesses alike.
Pros & Cons 👍👎
Pros:
Wide array of themes and designs for store customization.
Intuitive and user-friendly store builder.
Advanced sales and marketing tools.
Comprehensive analytics and reporting capabilities.
Cons:
Can be more expensive than some competitors.
Complexity increases with the addition of advanced features.
Limited functionality in the free version.
About Shopify 🌍
Originally a solution for online store creation, Shopify has evolved into a multifaceted e-commerce platform. It now includes features like a point of sale (POS) system, social media integration, and a plethora of marketing tools, addressing a wide array of e-commerce needs.
What’s In It For You? 💡
Shopify offers tools that support the full spectrum of e-commerce activities, not just online store creation. Its features facilitate effective customer engagement, from the acquisition phase to retention, including a suite of tools for inventory management, marketing, payment processing, and customer service.
How to Register and Start a Shopify Store 🛍️
Starting an online store with Shopify is a straightforward process. Here’s a step-by-step guide to help you get started:
Start Your Free Trial: Click on the “Start free trial” button. Shopify typically offers a 3-day free trial.
Provide Your Details: Fill in the required information such as your email address, password, and store name. Your store name will become part of your default Shopify domain (e.g., yourstorename.myshopify.com).
Step 2: Set Up Your Store ⚙️
Answer Questions: After signing up, Shopify will ask a few questions about your business to tailor the setup experience.
Add Address: Enter your business address, which is necessary for calculating taxes and shipping rates.
Step 3: Add Products to Your Store 📦
Navigate to Products: Go to the dashboard, click on ‘Products’.
Add New Products: Click on ‘Add product’ and enter details like product names, descriptions, prices, and images.
Step 4: Customize Your Store 🎨
Choose a Theme: Click on ‘Online Store’ and then ‘Themes’. Shopify offers a variety of free and paid themes.
Customize Theme: Select a theme and customize it using the theme editor to match your brand.
Step 5: Set Up Domain 🌐
Choose a Domain: You can buy a new domain through Shopify or connect an existing one.
Set Primary Domain: Once the domain is added, set it as the primary domain for your store.
Step 6: Set Up Payments 💳
Choose Payment Providers: Go to ‘Settings’ and then ‘Payments’.
Configure Payment Methods: Set up payment methods like credit cards, PayPal, and others that Shopify supports.
Step 7: Configure Shipping 🚚
Set Shipping Rates: Go to ‘Settings’ and then ‘Shipping and Delivery’.
Configure Shipping Zones: Define shipping rates and zones depending on where you’ll be shipping your products.
Step 8: Test Your Store 🧪
Place a Test Order: Before launching, place a test order to ensure everything works as expected.
Adjust Settings if Needed: Make any necessary adjustments based on the test order.
Step 9: Launch Your Store 🚀
Remove Password: Go to ‘Online Store’ settings and remove the password to make your store live to the public.
Announce Your Launch: Use social media, email, and other marketing channels to announce your store’s opening.
Step 10: Optimize and Market Your Store 🔍
Monitor Performance: Use Shopify’s analytics to monitor your store’s performance.
Marketing: Engage in continuous marketing efforts to attract and retain customers.
Following these steps will help you set up your Shopify store and start your e-commerce journey. Remember, regular updates and marketing are key to growing your online business.
Pricing Plans & Support 💳
Shopify offers various pricing plans tailored to different business needs, including a free trial and special offers for new subscribers:
Free Trial and Introductory Offer: Shopify provides a 3-day free trial with no credit card required. New users can enjoy a special rate of $1/month for the first three months.
Basic Plan: Priced at $39 USD/month, this plan is designed for individuals and small businesses. It covers all the essentials needed to create a store, ship products, and process payments. There’s a special offer for new users to get the first three months for $1/month.
Shopify Plan: Targeted at small businesses, this plan costs $105 USD/month. It includes professional reporting and more staff accounts, with a similar introductory offer as the Basic Plan.
Advanced Plan: For medium to large businesses, the Advanced Plan is priced at $399 USD/month. It offers custom reporting and the lowest transaction fees, with the same introductory offer for the first three months.
Starter Plan: This plan is available for $5 USD/month for the first three months. It is ideal for selling products at events and through social media and messaging apps.
Retail Plan: Costing $89 USD/month for the first three months, this plan is designed for in-store sales with advanced staff, inventory, and loyalty features.
Shopify Plus: Starting at $2,000 USD/month for the first three months, Shopify Plus is geared towards high-volume businesses and enterprises, offering extensive capabilities and support.
All plans include features like an online store builder, sales channels across social media and marketplaces, point of sale options, and 24/7 email and live chat support.
Shopify vs. Wix 🥊
Shopify Pros:
Comprehensive e-commerce and marketing platform.
Extensive customization options for online stores.
Robust analytics and reporting features.
Shopify Cons:
Higher pricing tiers for more advanced features.
May require time to learn the platform’s full capabilities.
Wix Pros:
User-friendly website builder with flexible design options.
Suitable for both simple and complex website designs.
Competitive pricing for various plan options.
Wix Cons:
E-commerce features may be less advanced compared to Shopify.
SEO capabilities might be limited compared to specialized platforms.
Conclusion 🎯
Shopify is a comprehensive e-commerce platform, ideal for businesses looking to establish or expand their online presence. With its wide range of features, Shopify is well-suited for both newcomers to e-commerce and experienced merchants aiming to enhance their online sales strategies.
Salesforce is renowned as a superior solution in customer relationship management, excelling in integrating data, AI, and CRM. It’s a top pick for businesses aiming to enhance customer engagement and sales strategies. The platform’s versatility suits various business sizes, and its integration of data and AI is pivotal in improving customer connections.
Pros & Cons 👍👎
Pros:
Robust CRM functionalities across sales, service, and marketing.
Unified platform for diverse business operations.
Data-centric approach for improved customer interactions.
Highly trusted and widely adopted by various businesses.
Accessible free trial without requiring a credit card.
Cons:
Initial complexity for new users.
Potentially higher costs compared to competitors, especially for advanced features.
Comprehensive features may demand significant time for mastery and deployment.
About Salesforce 🌐
Salesforce, as the world’s premier CRM platform, empowers businesses to harmonize their marketing, sales, commerce, service, and IT efforts. It’s a holistic platform enabling teams to collaborate efficiently, ensuring customer satisfaction in every interaction.
What’s In It For You? 💡
Salesforce presents an array of products catering to diverse business requirements, suitable for both small firms and large corporations. Its key solutions include:
Sales Cloud: Facilitates deal closures and growth acceleration.
Service Cloud: Fosters customer loyalty with efficient service.
Marketing Cloud: Cultivates long-lasting customer relationships with data-driven marketing strategies.
Pricing Plans & Support 💳
Salesforce Sales Cloud offers a range of pricing plans designed to accommodate different business needs, each offering varying levels of functionality and customization:
Starter: Priced at $25 USD/user/month (billed annually), this plan is aimed at businesses looking to start quickly with sales, service, and email outreach tools. It’s an entry-level option for those needing basic CRM functionalities.
Professional: This plan costs $80 USD/user/month (billed annually) and provides a complete CRM solution for any size team. It’s a step up from the Starter plan, offering more comprehensive CRM features.
Enterprise: The most popular choice, the Enterprise plan is priced at $165 USD/user/month (billed annually). It is deeply customizable and caters to businesses seeking a more tailored CRM experience.
Unlimited: At $330 USD/user/month (billed annually), this plan is the ultimate platform for growth, offering extensive CRM capabilities and the highest level of customization and support.
Each of these plans includes features for lead management, account and contact management, opportunity management, customizable sales processes, and various tools for sales and marketing activities. Users can benefit from Salesforce’s mobile app, full offline functionality, customizable reports and dashboards, and collaboration tools like Chatter. Additional features like case management, knowledge management, Lightning Flow Automation, and AppExchange integrations are also part of the offering.
Furthermore, Salesforce introduces the Sales Suite, a comprehensive package starting at $600/user/month. This suite is designed to provide the best-in-class solutions for all sales-related needs on a single platform, potentially offering savings of up to 39% compared to purchasing individual solutions separately
Salesforce vs. Microsoft Dynamics 365 🥊
Salesforce Cons:
Comprehensive platform for varied business functions.
Globally acknowledged and utilized for CRM.
No-charge trial available without credit card requirement.
Advanced capabilities in data integration and AI.
Salesforce Cons:
Complexity in navigating through its extensive features.
Higher pricing for advanced functionalities.
Microsoft Dynamics 365 Pros:
Integrated platform merging CRM with ERP solutions.
Notable for revenue generation and broad user base.
Advanced customization and feature options.
Microsoft Dynamics 365 Cons:
Complexity for beginners.
Substantial investment required for setup and training.
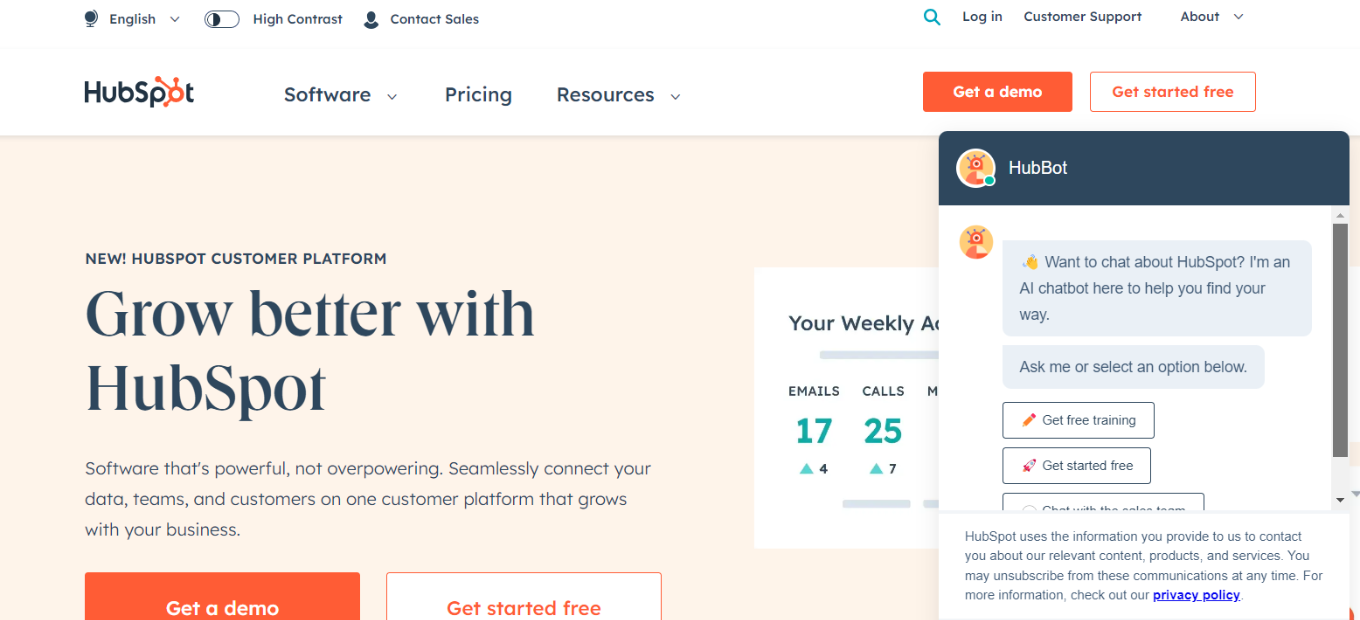
HubSpot stands out as a comprehensive CRM and inbound marketing platform, ideal for businesses seeking an integrated approach to customer relationship management, marketing automation, and sales tracking. Its ease of use and extensive feature set make it a top choice for companies of all sizes.
✅ Pros & ❌ Cons
Pros:
🔄 Integration across sales, marketing, and customer service modules.
📊 Advanced analytics and reporting tools.
🌐 Extensive third-party integrations.
🧑💼 User-friendly interface with robust training resources.
Cons:
💲 Higher cost for premium features.
📏 Limited customization in lower-tier plans.
📚 Steeper learning curve for advanced features.
📖 About HubSpot
Founded in 2006, HubSpot has evolved into a leader in inbound marketing, sales, and CRM software. It provides a comprehensive suite of tools designed to align sales and marketing efforts, improve customer experiences, and drive growth.
🎯 What’s In It For You?
HubSpot offers a holistic approach to managing customer relationships and marketing efforts, with features that cater to lead generation, email marketing, social media management, and more.
Find the Sign-Up Option: Look for a sign-up button or link, usually located on the top right corner of the website.
2. Choose a Plan
Review the Plans: HubSpot offers various plans, including a free CRM and tiered pricing for more advanced features.
Select a Plan: Choose a plan that suits your business needs. You can start with the free version or select a paid plan for additional features.
3. Create an Account
Enter Your Information: Provide your email address, create a password, and fill in the required details.
Business Information: You may need to enter some information about your business, like company size and industry.
4. Account Verification
Check Your Email: After registering, you’ll receive an email from HubSpot.
Verify Your Account: Open the email and click on the verification link to activate your account.
5. Set Up Your Account
Complete the Setup: Once your account is verified, you’ll be directed to complete the setup, which may include adding more details about your business and personalizing your HubSpot experience.
Onboarding Process: HubSpot might guide you through an onboarding process to help you understand how to use the platform effectively.
6. Integrate Your Tools
Connect Your Tools: If you have existing tools like email, social media accounts, or other marketing tools, you can integrate them with HubSpot.
Authorization: You’ll need to authorize HubSpot to connect to these tools.
7. Explore HubSpot Features
Familiarize Yourself: Start exploring the various features of HubSpot, such as contact management, email marketing, lead generation tools, and more.
Use Helpful Resources: HubSpot provides tutorials, guides, and a comprehensive knowledge base to help you maximize the platform.
8. Start Using HubSpot
Begin Your Marketing Efforts: You can now start using HubSpot for your marketing, sales, and service activities.
🔗 Helpful Tips
Take Advantage of Free Training: HubSpot Academy offers free training and certifications that can help you get the most out of your HubSpot experience.
Utilize Customer Support: If you need assistance, HubSpot’s customer support team is available to help.
By following these steps, you can successfully sign up and start using HubSpot to enhance your business’s marketing, sales, and service efforts.
💲 HubSpot Pricing Overview
🌟 Pricing Tiers
HubSpot offers various pricing tiers, each designed to suit different business needs and scales. These tiers typically range from basic free options to more advanced, feature-rich paid plans.
✅ Free Tools
Overview: HubSpot provides a range of free tools, particularly in its CRM offering.
Included Features: Basic features such as contact management, deal tracking, and task management are typically included.
💼 Starter Plans
Target Audience: Ideal for small businesses or startups beginning to expand their marketing, sales, or service efforts.
Key Features: Enhanced functionalities over the free tier, including additional marketing tools and customer support options.
🚀 Professional Plans
Designed For: Medium-sized businesses looking for more advanced capabilities.
Advanced Features: Includes automation, detailed analytics, and deeper customization options.
🏢 Enterprise Plans
Suited For: Large businesses or enterprises requiring extensive, scalable solutions.
Premium Offerings: Advanced features like increased limits, sophisticated analytics, and extensive customization abilities.
🤔 Considerations
Scalability: Each plan is designed to grow with your business, offering more features and capabilities as your needs evolve.
Integration and Ecosystem: HubSpot’s pricing also factors in its extensive ecosystem of integrations and add-ons, allowing businesses to customize their HubSpot experience.
🥊 Competition
HubSpot
✅ Pros
👍 User-Friendly Interface: Known for its intuitive and accessible interface.
🔗 All-in-One Platform: Offers comprehensive CRM, sales, marketing, and service tools.
🎯 Inbound Marketing Focus: Excels in content marketing, SEO, and lead nurturing.
🆓 Free CRM Offering: Robust free version, great for small businesses or startups.
📚 Educational Resources: Extensive learning resources like HubSpot Academy.
❌ Cons
🔧 Limited Customization in Lower Tiers: Advanced customization mainly in higher plans.
💸 Cost Escalation: Costs can increase significantly for advanced features.
📉 Less Advanced Analytics: Analytics capabilities may be less comprehensive than Salesforce.
Salesforce
✅ Pros
🛠️ Highly Customizable: Extensive customization to fit specific business needs.
🏢 Advanced Features for Enterprises: Ideal for large businesses with complex CRM needs.
📊 Strong Analytics and Reporting: Powerful tools for data-driven decision making.
⚙️ Wide Range of Integrations: Supports a vast array of third-party apps.
❌ Cons
🤯 Complexity: Can be challenging for new users or small teams.
🪙 Higher Cost: Generally more expensive, especially with additional customizations.
👨💼 Resource-Intensive Implementation: Requires dedicated resources for optimal setup and management.
Both HubSpot and Salesforce have their unique advantages and drawbacks, with HubSpot being more user-friendly and ideal for small to medium businesses, while Salesforce is more suitable for larger organizations with complex CRM requirements.
📌 Conclusion
HubSpot is an all-in-one platform excelling in CRM, marketing, and sales. With its wide range of features, it is well-suited for businesses looking to streamline their marketing and customer management strategies.
Hootsuite stands as a comprehensive social media management tool, ideal for businesses and marketers of all sizes. It combines user-friendly interfaces with a wide array of functionalities, from post scheduling to detailed analytics, establishing itself as a top choice for social media professionals.
✅ Pros & ❌ Cons
Pros:
🔄 Supports multiple social media platforms.
📅 Advanced post scheduling and content curation.
🔍 Detailed analytics and reporting tools.
🤝 Strong third-party app integrations.
Cons:
😵 Potentially overwhelming for new users.
🔒 Premium features require higher-tier plans.
📊 Limited customizability in analytics.
📖 About Hootsuite
Originating in 2008, Hootsuite has evolved into a leading platform for social media management. It enables users to schedule posts, monitor social media conversations, and analyze campaign results, all from a unified dashboard.
🎯 What’s In It For You?
Hootsuite goes beyond mere post scheduling to offer a full suite of tools for engagement, monitoring, analytics, and team collaboration, making it a comprehensive solution for managing social media from a single platform.
Choose a Plan: Select a plan that suits your needs. You can start with the free version or choose one of the paid plans (Professional, Team, or Enterprise).
Create an Account: Click on the sign-up option. You’ll need to provide your email address, create a password, and fill in some basic information about yourself and your business.
2. Account Activation
Check Your Email: After signing up, you’ll receive an account activation email from Hootsuite.
Activate Your Account: Open the email and click on the ‘Activate Account’ link to complete your account setup.
3. Setting Up Your Dashboard
Log In: Once your account is activated, log in to your Hootsuite dashboard.
Connect Social Media Accounts: In the dashboard, you can connect your social media accounts (like Twitter, Facebook, Instagram, etc.). You’ll need to authorize Hootsuite to access these accounts.
4. Scheduling Your First Post
Navigate to Composer: Click on the ‘New Post’ button or navigate to the post composer section.
Create Your Post: Type your message, add images or links as needed.
Choose Social Networks: Select the social networks where you want to publish the post.
Schedule the Post: Choose the date and time when you want your post to be published or publish it immediately.
5. Monitoring Social Media Activity
Set Up Streams: In the dashboard, set up streams to monitor different social media activities like mentions, messages, or specific hashtags.
Engage with Your Audience: Use these streams to keep track of what’s happening on your social media channels and engage with your audience.
6. Analyzing Your Performance
Access Reports: Use Hootsuite’s analytics tools to get reports on your social media performance.
Understand Insights: These insights help you understand the reach, engagement, and overall effectiveness of your social media efforts.
7. Exploring Additional Features
Explore Hootsuite: Depending on your plan, you can explore additional features like team collaboration, social media ad management, and more.
Customize Your Experience: Tailor your dashboard and settings to fit your specific needs and preferences.
🔗 Helpful Resources
Hootsuite offers a variety of tutorials, help articles, and customer support options to assist you in navigating and making the most out of their platform.
Following these steps will help you get started with Hootsuite and begin managing your social media presence effectively.
Key Offerings: Unlimited posts, post scheduling, access to messages in one inbox
Additional Info: Option for a free 30-day trial or a 60% discount if skipping the trie】.
🌟 Team Plan
Most Popular
Pricing: Monthly subscription
Features:
Users: 3
Social Accounts: 20 (including the same platforms as the Professional plan)
Additional Features: Everything in the Professional plan, plus roles & permissions, and ability to assign messages to team members
Additional Info: Includes a free 30-day trial option or a 60% discount for skipping the trce】.
🏢 Enterprise Plan
Pricing: Custom pricing
Features:
Users: Starts at 5
Social Accounts: Begins at 50 (covers the same platforms)
Exclusive Features: Everything in the Team plan, plus social ads management, social ads analytics & reporting, employee advocacy, team productivity reporting, and additional automation tools for social media customer service
Additional Info: Requires contacting Hootsuite for a demo and custom pricing detrce】.
📊 Feature Comparison
Hootsuite provides a detailed comparison of features across different plans, indicating which features are included or not in eachurce】.
This summary captures the essence of Hootsuite’s various plans, providing a quick reference for users to determine which plan best suits their social media management needs.
🥊 Competition
Hootsuite vs. 🟠 Buffer: Pros and Cons
🦉 Hootsuite
✅ Pros
🔍 Comprehensive Features: Offers a wide range of functionalities like post scheduling, analytics, and team collaboration.
🔗 Multiple Platform Integration: Supports a broad array of social media platforms.
📊 Advanced Analytics: Provides detailed reporting and analytics options.
👥 Team Collaboration: Well-suited for teams with features for task assignments and workflows.
❌ Cons
🤔 Complex Interface: Can be overwhelming for new users due to its multitude of features.
💰 Higher Cost: More expensive, especially for advanced feature plans.
📚 Steeper Learning Curve: Requires more time to learn due to extensive functionalities.
🟠 Buffer
✅ Pros
👌 User-Friendly Interface: Known for its simplicity and ease of use.
📅 Effective Post Scheduling: Efficient tools for scheduling posts across platforms.
💵 Affordability: More affordable, particularly for small businesses or individuals.
🔎 Focused Features: Concentrates on essential social media management tools, avoiding complexity.
❌ Cons
🔧 Limited Features: Fewer features compared to Hootsuite, especially in social listening and in-depth analytics.
👤 Less Suitable for Large Teams: Not as equipped for larger teams that require extensive collaboration.
🧩 Fewer Integrations: Supports fewer social media platforms and third-party integrations.
This comparison highlights the key strengths and weaknesses of Hootsuite and Buffer, providing a clear perspective on which tool might be more suitable based on specific needs and preferences.
📌 Conclusion
Hootsuite offers a robust and versatile platform for social media management, suitable for both novices and seasoned marketers. With its array of features and integrations, it empowers users to effectively manage and expand their social media presence.
“Simplify Your Social Media Management with Hootsuite.”
Quick answers to the questions people ask most before choosing Hootsuite.
Is Hootsuite free? Hootsuite no longer offers a permanent free plan. You can start a free trial to test the platform, but ongoing use needs a paid subscription. If a no-cost tool is a hard requirement, a lighter scheduler will suit you better.
How much does Hootsuite cost? The Professional plan is the entry point and is built for a single user, with Team and higher tiers for more people and more social accounts. Pricing shifts over time and by billing period, so check the current figure on Hootsuite’s pricing page before you commit. Annual billing usually costs less per month than paying month to month.
Which social networks does Hootsuite support? Hootsuite connects to the major networks, including Instagram, Facebook, X (formerly Twitter), LinkedIn, TikTok, YouTube and Pinterest. You schedule posts, reply to messages and track performance for all of them from one dashboard.
Hootsuite vs Buffer, which should I pick? Buffer is leaner and cheaper, and it fits people who mainly want to queue posts. Hootsuite does more: social listening, deeper analytics and team approval workflows. If scheduling is all you need, Buffer is enough. If you manage several accounts and want monitoring in the same place, Hootsuite earns its price.
Is Hootsuite good for small teams? Yes. Shared calendars, approval steps and role permissions are where it pays off, so a small marketing team running several channels gets the most value. A solo creator posting to one or two networks may find it heavier than needed.
Hootsuite compared to Buffer, Sprout Social, Later and SocialPilot
The FAQ above weighs Hootsuite against Buffer. The wider field splits on four things: whether there is a free plan, whether listening is included, how far the analytics go, and when approvals unlock. We checked every cell against the vendor’s own pricing page in July 2026.
Tool
Free plan
Social listening
Analytics depth
Approval workflow
Positioned for
Hootsuite
No, trial only
Brand and competitor keyword tracking on the entry plan, full listening on enterprise
Custom performance reports
Higher tier
Teams running several accounts with governance needs
Buffer
Yes, 3 channels
Not offered
Post and account reporting
Higher tier
Solo creators and small businesses
Sprout Social
No, 30-day trial
Keyword and location monitoring from the second tier, competitor and sentiment above that
Competitor benchmarking
Not listed on the entry plan
Social teams that report to stakeholders
Later
No on the public pricing page
Top tier only, as brand mentions and competitive benchmarking
Three months of history on the entry plan, two years plus custom analytics at the top
Second tier and up
Visual-first scheduling, now sold as a social marketing and commerce platform
SocialPilot
No, 14-day trial
Not offered
Basic on the entry plan, advanced on higher plans
Second tier and up
Agencies managing client accounts
Which one to pick. Buffer and SocialPilot both queue posts for less money than Hootsuite. Once several people need to sign off on work, SocialPilot gets you there a tier earlier than either Hootsuite or Buffer. Sprout Social is worth a look if your reporting gets scrutinised, because competitor benchmarking comes with its higher plans. Later suits visual-first brands, though it repositioned in 2026 towards influencer and commerce work, so check that the scheduling side still matches what you need. Hootsuite earns its price when you want monitoring, scheduling and team governance in one dashboard instead of three tools.
One warning on the numbers. Hootsuite’s own pricing page served us two different tier structures on the day we checked, so treat any figure you read anywhere, including here, as a starting point and confirm it on the vendor’s site before you commit. SocialPilot was acquired by group.one in 2025, which has not changed the product so far.
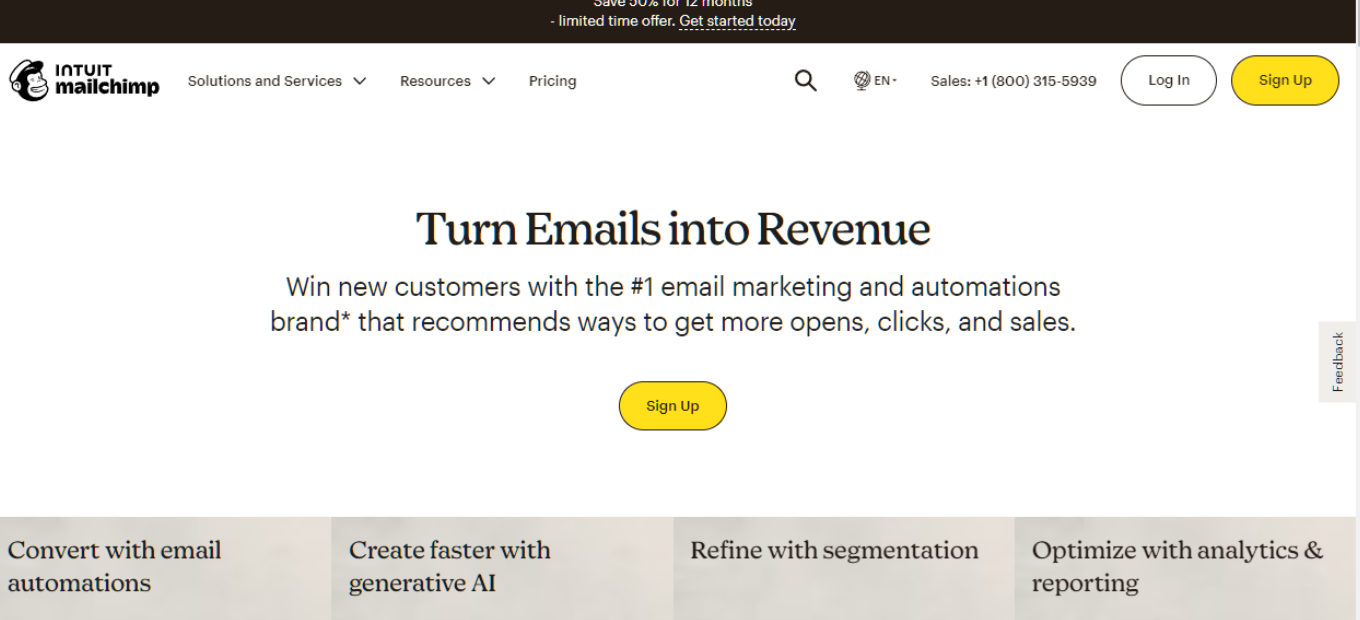
Mailchimp stands as a robust email marketing platform, offering a range of features from email campaigns to automation, ideal for businesses of all sizes. Its user-friendly interface and extensive template library make it a top choice for marketers.
👍 Pros & 👎 Cons
Pros: – Wide range of email templates and designs – Intuitive drag-and-drop email builder – Advanced segmentation and personalization options – Comprehensive analytics and reporting tools
Cons: – Can be more expensive than some competitors – Complexity increases with advanced features – Limited customization in the free version
💡 About Mailchimp
Established as a simple email marketing tool, Mailchimp has evolved into a multi-faceted marketing platform. It now includes features like CRM, landing pages, and social media tools, catering to a diverse range of marketing needs.
🎯 What’s In It For You?
Mailchimp offers tools that cater to various aspects of digital marketing, not just email campaigns. Its features support effective customer engagement, from acquisition to retention.
Type in your Email and Password, then click ‘Sign Up’.
After signing up, check your inbox for the account activation email.
Open the activation email and click ‘Activate Account’ to complete your account setup.
📋 Completing the Signup Details
Name: Enter the name associated with your account profile. This profile can have access to multiple Mailchimp accounts.
Business Name: Provide the name of your company or organization. This will appear on every email along with your physical mailing address.
Phone Number (optional): Add a mobile phone number for account verification, recovery, and setting up 2-factor authentication.
Physical Address: Enter a mailing address where you can receive mail. This address is required by law on any email you send out.
Organization Questions: Answer details about your organization to help Mailchimp provide relevant content and guidance.
Website URL: Include the website URL for your company, organization, or personal website. Mailchimp uses this to help create on-brand content.
After entering this information, follow the prompts to finish the activation process and start using your new Mailchimp account.
💲 Pricing Plans & Support
Mailchimp offers a free version for basic needs and various paid plans that provide additional features and capabilities. These plans are designed to scale with your business growth.
🥊 Mailchimp vs. ActiveCampaign
ActiveCampaign ([ActiveCampaign](https://www.activecampaign.com/)): Known for its advanced features and marketing automation, ActiveCampaign is a strong competitor offering more specialized tools for segmentation and personalization.
Mailchimp Pros 🌟:
Easy-to-use interface for beginners.
Free plan available for small businesses.
Wide range of email templates and design tools.
Decent analytics and reporting features.
Integration with various third-party apps and services.
Mailchimp Cons 💔:
Automation features limited in the free plan.
Pricing can become expensive as your email list grows.
Advanced email segmentation and personalization options.
CRM integration for better customer management.
Excellent customer support and educational resources.
Competitive pricing with various plan options.
ActiveCampaign Cons 💔:
Learning curve for beginners due to advanced features.
No free plan, with pricing starting at a higher point.
Interface may feel complex to some users.
Requires time and effort to set up advanced automation.
🏁 Conclusion
Mailchimp is an all-in-one marketing platform that excels in email marketing. With its wide range of features, it is suitable for both beginners and advanced users looking to streamline their marketing strategies.
Grammarly is an indispensable tool for improving writing across various platforms. It offers comprehensive writing assistance, including grammar checking, plagiarism detection, and style suggestions. Ideal for professionals, students, and anyone aiming to enhance their written communication.
🤔 Pros Cons
Pros: – Accurate grammar and punctuation checks – Contextual spelling correction – Style and tone guidance – Plagiarism detection
Cons: – Limited features in the free version – Requires an internet connection for full functionality
💡 About Grammarly
Grammarly started as a simple grammar checking tool but has evolved into a sophisticated writing assistant. It integrates with various platforms and offers features like real-time editing, vocabulary enhancement, and genre-specific writing style checks.
🎯 What’s In It For You?
Grammarly’s real-time correction and suggestions help improve writing skills, ensuring clarity, correctness, and conciseness. It’s an excellent tool for non-native English speakers and professionals looking to refine their writing.
🚀 How Does It Work?
Sign Up: Create a Grammarly account.
Choose Platform: Use Grammarly on its web editor, desktop app, or browser extension.
Write and Edit: Write directly in Grammarly or paste your text. Grammarly provides real-time corrections and suggestions.
Customize: Set goals based on intent, audience, style, and emotion.
Review and Apply: Review Grammarly’s suggestions and apply changes as needed.
💲 Pricing Plans & Support
Free: $0 USD per month
Premium: $12 USD per month, billed annually
Business: $15 USD per member per month, billed annually
Enterprise: Offers advanced privacy and security, dedicated support, and unlimited generative AI prompts. Pricing details require contacting sales
Key Features Comparison
The features vary across different plans. Key features include grammar and spelling checks, tone adjustments, plagiarism detection, and more. The Business and Enterprise plans offer additional features like brand tones, knowledge sharing, analytics dashboard, and enhanced security features.
Frequently Asked Questions
Grammarly Premium vs Business: Premium is for individuals, while Business is designed for teams, offering additional communication and security features.
Security: Grammarly prioritizes enterprise-grade security and privacy in its product and operations.
Volume Discounts: Available for annual plans with 10 or more members.
Payment Options: Accepts major credit cards and PayPal. Bank transfer, Apple Pay, and Google Pay are also options for Business plans.
Discounts for Educational Institutions: Grammarly offers special discounts for educational institutions`
🥊 The Competition
ProWritingAid, similar to Grammarly, provides writing assistance with additional features like style editing and plagiarism checks. ProWritingAid
Grammarly Advantages Over ProWritingAid ✅
Ease of Use: Grammarly is noted for its user-friendly interface, making it slightly easier to use compared to ProWritingAid
Powerful AI Writing Assistant: Grammarly provides a robust AI writing assistant that helps users write and edit work much faster
Rephrasing Tools: Grammarly has better rephrasing tools which are crucial for refining content and conveying ideas more effectively
Free Plan: Grammarly’s free plan is considered better, offering multiple features without any cost
Accurate Tone Detection: Grammarly provides accurate tone detection, helping users understand how their text sounds to the audience
Plagiarism Checker: Grammarly includes a plagiarism checker, ensuring the originality of the content`
Genre-Specific Word Suggestions: It offers suggestions for genre-specific words, enhancing the relevance and accuracy of the writing
Smooth Functioning: Grammarly is known for its smooth functioning and minimal interface, which enhances the user experience
Grammarly Disadvantages Over ProWritingAid 📉
Analysis Reports: ProWritingAid wins hands-down on analysis reports, offering more comprehensive feedback compared to Grammarly
Long-Form Writing: ProWritingAid is more suited for long-form writing, providing in-depth analysis and editing tools ideal for extensive texts
Editing Fiction: ProWritingAid is great for editing fiction, offering tools specifically tailored for creative writin
🏁 Conclusion
Grammarly is an excellent tool for anyone looking to improve their writing. With its comprehensive features and user-friendly interface, it’s suitable for both casual and professional writing.
This website uses cookies to ensure you get the best experience on our website. Surfing the website you are authorizing the use of cookies.
Privacy & Cookies Policy
Privacy Overview
This website uses cookies to improve your experience while you navigate through the website. Out of these cookies, the cookies that are categorized as necessary are stored on your browser as they are essential for the working of basic functionalities of the website. We also use third-party cookies that help us analyze and understand how you use this website. These cookies will be stored in your browser only with your consent. You also have the option to opt-out of these cookies. But opting out of some of these cookies may have an effect on your browsing experience.
Necessary cookies are absolutely essential for the website to function properly. This category only includes cookies that ensures basic functionalities and security features of the website. These cookies do not store any personal information.
Any cookies that may not be particularly necessary for the website to function and is used specifically to collect user personal data via analytics, ads, other embedded contents are termed as non-necessary cookies. It is mandatory to procure user consent prior to running these cookies on your website.