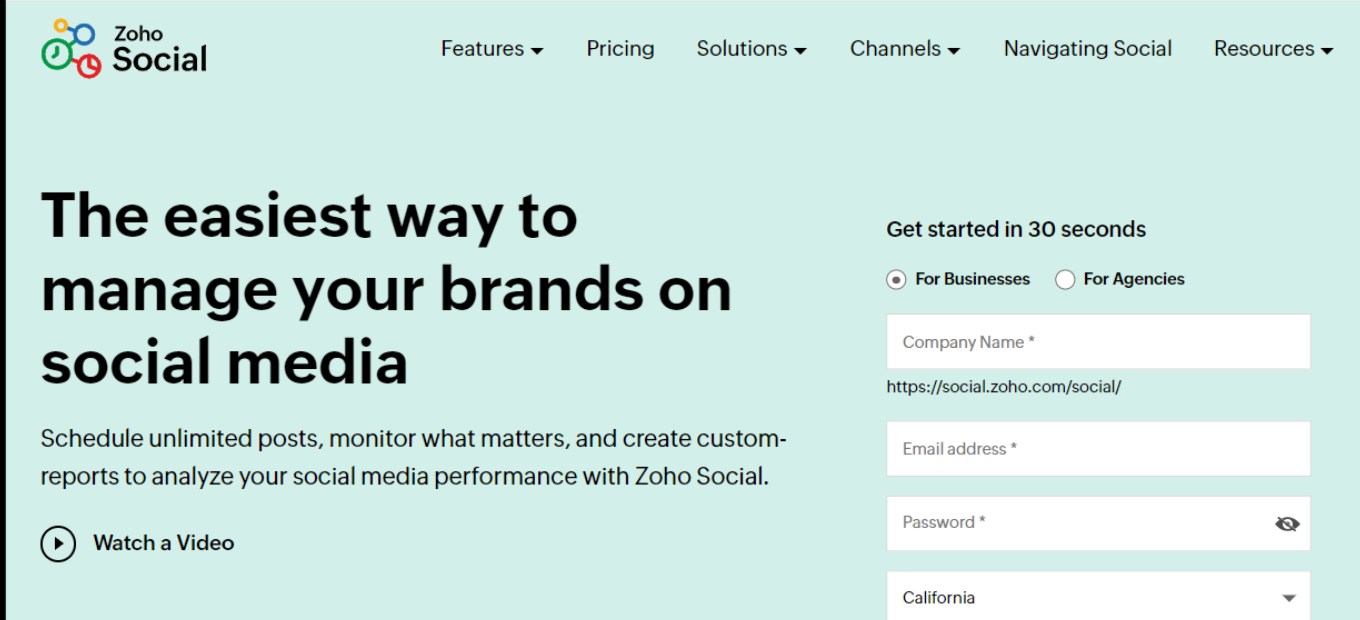
Zoho Social Review: A Comprehensive Social Media Management Solution

🏆 Our Verdict

Zoho Social is a powerful social media management platform designed to simplify and enhance your social media marketing efforts. With a range of features and a user-friendly interface, it’s a valuable tool for businesses looking to improve their social media presence.

✅ Pros & ❌ Cons

Pros:

🔄 Multi-Channel Management

Zoho Social allows you to manage multiple social media channels from a single platform, streamlining your social media efforts.

📊 Analytics and Reporting

The platform provides robust analytics and reporting tools to track your social media performance and make data-driven decisions.

🌐 Integration Options

Zoho Social offers integrations with various third-party apps and tools, enhancing its functionality.

🧑‍💼 User-Friendly Interface

Its intuitive interface and comprehensive training resources make it accessible for users of all skill levels.

Cons:

💲 Pricing Considerations

Pricing plans can be on the higher side for smaller businesses, especially as additional features are needed.

📏 Learning Curve

While user-friendly, there might be a slight learning curve for beginners, especially for advanced features.

📚 Limited Customization

The platform offers customization options but may not be as flexible as some competitors.

📖 About Zoho Social

Zoho Social is a part of the Zoho suite of products and is designed to help businesses manage their social media presence effectively. It offers features for scheduling posts, tracking social media performance, and engaging with followers.

🎯 What’s In It For You?

Zoho Social offers a holistic approach to managing your social media presence, with features that cover post scheduling, social media analytics, engagement, and more.

🚀 How It Works

Getting Started with Zoho Social

  1. Visit the Zoho Social Website
  2. Choose a Plan
    • Review the available plans, including pricing and features.
    • Select a plan that aligns with your business needs.
  3. Create an Account
    • Provide your email, create a password, and fill in required information.
    • Some business details might be requested.
  4. Account Verification
    • Check your email for a verification link.
    • Click on the link to activate your Zoho Social account.
  5. Set Up Your Account
    • Complete the setup process, which may involve adding more business details.
    • Zoho Social may guide you through onboarding.
  6. Connect Your Social Media Channels
    • Integrate your social media accounts with Zoho Social.
  7. Explore Zoho Social Features
    • Familiarize yourself with the platform’s features, such as post scheduling and analytics.
  8. Start Managing Your Social Media
    • Begin using Zoho Social to schedule posts, track performance, and engage with your audience.

🔗 Helpful Tips

  • Utilize Zoho Social’s training resources to maximize your experience.
  • Contact Zoho Social’s customer support if you need assistance.

💲 Zoho Social Pricing Overview

🌟 Pricing Tiers

Zoho Social offers various pricing tiers to cater to different business sizes and needs. These tiers typically range from basic plans to more advanced ones with additional features.

  • Free Tools (if applicable)
    • Overview: Zoho Social may offer free tools with basic features.
    • Included Features: Basic features such as post scheduling and basic analytics.
  • Starter Plans
    • Target Audience: Suitable for small businesses and startups.
    • Key Features: Enhanced functionalities beyond the free tier.
  • Professional Plans
    • Designed for medium-sized businesses seeking advanced capabilities.
    • Advanced Features: Includes advanced analytics, scheduling options, and more.
  • Enterprise Plans
    • Suited for large businesses requiring scalable solutions.
    • Premium Offerings: Advanced features, increased limits, and extensive customization abilities.

🤔 Considerations

  • Zoho Social’s plans are scalable, allowing your social media management to grow with your business.
  • Integration with third-party tools is available to customize your Zoho Social experience.

🥊 Competition

Zoho Social vs. Hootsuite

Zoho Social

  • ✅ Pros
    • Multi-Channel Management.
    • Analytics and Reporting.
    • User-Friendly Interface.
  • ❌ Cons
    • Pricing Considerations.
    • Learning Curve.
    • Limited Customization.

Hootsuite

  • ✅ Pros
    • Comprehensive Social Media Management.
    • Extensive Integration.
    • Analytics and Reporting.
  • ❌ Cons
    • Pricing may vary.
    • Learning curve for beginners.

Both Zoho Social and Hootsuite offer valuable features, with Zoho Social excelling in its user-friendly interface and integrated approach to social media management.

📌 Conclusion

Zoho Social is a comprehensive social media management platform with features for post scheduling, analytics, and engagement. While pricing can be a consideration, its user-friendly interface and integration capabilities make it a valuable asset for businesses looking to enhance their social media presence.

“Elevate Your Social Media with Zoho Social.”

CoSchedule Review: A Comprehensive Marketing Platform

🏆 Our Verdict

CoSchedule is a robust marketing platform that offers a wide range of features, making it a valuable tool for businesses seeking to streamline their marketing efforts. With its user-friendly interface and extensive capabilities, CoSchedule is a strong contender in the marketing software space.

✅ Pros & ❌ Cons

Pros:

🔄 Integration Across Marketing Channels

CoSchedule seamlessly integrates with various marketing channels, allowing for centralized campaign management.

📊 Advanced Analytics and Reporting

The platform provides powerful analytics tools to track campaign performance and make data-driven decisions.

🌐 Social Media Management

CoSchedule excels in social media management, making it easy to schedule and monitor posts across multiple platforms.

🧑‍💼 User-Friendly Interface

Its intuitive interface and comprehensive training resources make it accessible for users of all skill levels.

Cons:

💲 Pricing Considerations

CoSchedule’s pricing can be on the higher side for smaller businesses, especially as additional features are needed.

📏 Learning Curve

While user-friendly, there might be a slight learning curve for beginners, especially for advanced features.

📚 Limited Customization

The platform offers customization options but may not be as flexible as some competitors.

📖 About CoSchedule

CoSchedule, founded in [Year], has established itself as a leading marketing platform designed to simplify marketing and content planning, social media management, and analytics.

🎯 What’s In It For You?

CoSchedule offers an integrated approach to marketing, with features covering content planning, social media management, analytics, and more.

🚀 How It Works

Signing Up for CoSchedule

  1. Visit the CoSchedule Website
    • Navigate to CoSchedule by going to https://coschedule.com/
    • Look for the Sign-Up Option, usually located in the top right corner.
  2. Choose a Plan
    • Review the available plans, including pricing and features.
    • Select a plan that aligns with your business needs.
  3. Create an Account
    • Provide your email, create a password, and fill in required information.
    • Some business details might be requested.
  4. Account Verification
    • Check your email for a verification link.
    • Click on the link to activate your CoSchedule account.
  5. Set Up Your Account
    • Complete the setup process, which may involve adding more business details.
    • CoSchedule may guide you through onboarding.
  6. Integrate Your Tools
    • Connect your existing marketing tools and authorize CoSchedule to use them.
  7. Explore CoSchedule Features
    • Familiarize yourself with the platform’s features, such as content planning and social media management.
  8. Start Using CoSchedule
    • Begin using CoSchedule to manage your marketing efforts effectively.

🔗 Helpful Tips

  • Take advantage of CoSchedule’s training resources to maximize your experience.
  • Contact CoSchedule’s customer support if you need assistance.

💲 CoSchedule Pricing Overview

🌟 Pricing Tiers

CoSchedule offers various pricing tiers to cater to different business sizes and needs. These tiers typically range from basic plans to more advanced ones with additional features.

  • Free Tools (if applicable)
    • Overview: CoSchedule may offer free tools with basic features.
    • Included Features: Basic features such as content planning and social media scheduling.
  • Starter Plans
    • Target Audience: Suitable for small businesses and startups.
    • Key Features: Enhanced functionalities beyond the free tier.
  • Professional Plans
    • Designed for medium-sized businesses seeking advanced capabilities.
    • Advanced Features: Includes automation, detailed analytics, and customization options.
  • Enterprise Plans
    • Suited for large businesses requiring scalable solutions.
    • Premium Offerings: Advanced features, increased limits, and extensive customization abilities.

🤔 Considerations

  • CoSchedule’s plans are scalable, allowing your business to grow within the platform.
  • Integration with third-party tools is available to customize your CoSchedule experience.

🥊 Competition

CoSchedule vs. Hootsuite

CoSchedule

  • ✅ Pros
    • User-Friendly Interface.
    • Integration Across Marketing Channels.
    • Advanced Analytics.
  • ❌ Cons
    • Pricing Considerations.
    • Learning Curve.
    • Limited Customization.

Hootsuite

  • ✅ Pros
    • Comprehensive Social Media Management.
    • Extensive Integration.
    • Analytics and Reporting.
  • ❌ Cons
    • Pricing may vary.
    • Learning curve for beginners.

Both CoSchedule and Hootsuite offer valuable features, with CoSchedule excelling in its user-friendly interface and integrated approach to marketing.

📌 Conclusion

CoSchedule offers a comprehensive marketing platform with features for content planning, social media management, and analytics. While pricing can be a consideration, its user-friendly interface and integration capabilities make it a valuable asset for businesses looking to enhance their marketing strategies.

“Boost Your Marketing with CoSchedule Today.”

SocialPilot: Elevate Your Social Media Presence

🏆 Overview

SocialPilot offers a powerful social media management solution designed to help businesses enhance their online presence and engage with their audience effectively. In this article, we’ll delve into the pros and cons of using SocialPilot, walk you through the sign-up process, explore its pricing options, and provide valuable tips for making the most of this platform.

✅ Pros & ❌ Cons

Pros of SocialPilot

  • 🔄 Comprehensive social media scheduling
  • 🌐 Support for multiple social media platforms
  • 🧑‍💼 User-friendly interface
  • 💲 Affordable pricing plans

Cons of SocialPilot

  • 💬 Limited analytics and reporting in lower-tier plans
  • 🚫 No built-in image editor

📖 About SocialPilot

Founded with a focus on simplifying social media management, SocialPilot empowers businesses to efficiently schedule, publish, and analyze their social media content across various platforms.

🎯 What’s In It For You?

SocialPilot provides an affordable solution for managing your social media presence, with features for content scheduling, team collaboration, and social media analytics.

🚀 How It Works

Getting Started with SocialPilot

  1. Visit the SocialPilot Website
    • Navigate to SocialPilot by going to their website.
    • Look for the Sign-Up Option, usually located prominently on the homepage.
  2. Choose a Plan
    • Review the Plans, which include different pricing tiers, including a free plan and paid options.
    • Select a Plan that suits your business needs, whether it’s the free version or a paid plan.
  3. Create an Account
    • Enter Your Information, including your email address, password, and required details.
    • You may need to provide information about your business.
  4. Account Verification
    • Check Your Email for a message from SocialPilot.
    • Verify Your Account by following the instructions in the email.
  5. Set Up Your Account
    • Complete the Setup process, guided by the platform.
    • Connect your social media accounts during this step.
    • SocialPilot may offer an onboarding process to help you get started.
  6. Explore SocialPilot Features
    • Familiarize Yourself with the platform’s features, including social media scheduling, content calendar, and team collaboration.
    • Utilize the provided tutorials and guides to maximize its capabilities.
  7. Start Managing Social Media
    • Begin Posting and scheduling your social media content.

🔗 Helpful Tips

  • Utilize Support: SocialPilot offers customer support to assist you with any questions or issues.
  • Take Advantage of the Free Plan: If you’re on a budget, the free plan provides a good starting point.

💲 SocialPilot Pricing Overview

🌟 Pricing Tiers

SocialPilot offers various pricing tiers, catering to different business needs and budgets. These tiers typically range from a free plan to more advanced paid options.

  • Free Plan
    • Overview: SocialPilot provides a free plan with basic features.
    • Included Features: Limited social media profiles and scheduling.
  • Professional Plans
    • Target Audience: Ideal for small to medium-sized businesses.
    • Key Features: Increased social media profiles, bulk scheduling, and analytics.
  • Small Team Plans
    • Designed For: Teams requiring collaboration and advanced scheduling.
    • Advanced Features: Team collaboration, content suggestions, and client management.
  • Agency Plans
    • Suited For: Agencies managing multiple clients’ social media.
    • Premium Offerings: White-label reports, client approval workflows, and social inbox.

🤔 Considerations

  • Scalability: SocialPilot’s pricing plans are designed to grow with your business, offering more features as your needs expand.
  • Integration: SocialPilot offers integrations with various social media platforms and tools.

🥊 SocialPilot vs. Buffer: Social Media Management Showdown

Pros of SocialPilot:

  • 🔄 Comprehensive social media scheduling
  • 🌐 Support for multiple social media platforms
  • 🧑‍💼 User-friendly interface
  • 💲 Affordable pricing plans

Cons of SocialPilot:

  • 💬 Limited analytics and reporting in lower-tier plans
  • 🚫 No built-in image editor

Pros of Buffer:

  • 🎨 Intuitive and user-friendly interface
  • 📊 Advanced analytics and reporting tools
  • 🌎 Extensive third-party integrations
  • 🧑‍💼 Excellent customer support

Cons of Buffer:

  • 💲 Higher cost compared to SocialPilot
  • 📏 Limited customization in lower-tier plans
  • 📚 Learning curve for advanced features

📌 Conclusion

SocialPilot is a powerful and cost-effective social media management platform that can help businesses streamline their online presence. Whether you’re a small business or a growing agency, SocialPilot offers the tools you need to succeed in the world of social media marketing.

“Empower Your Social Media Presence with SocialPilot.”

Related read: SocialPilot is the cheaper way to get client approvals running. If you also want social listening in the same dashboard, Hootsuite for social listening covers what that costs you.

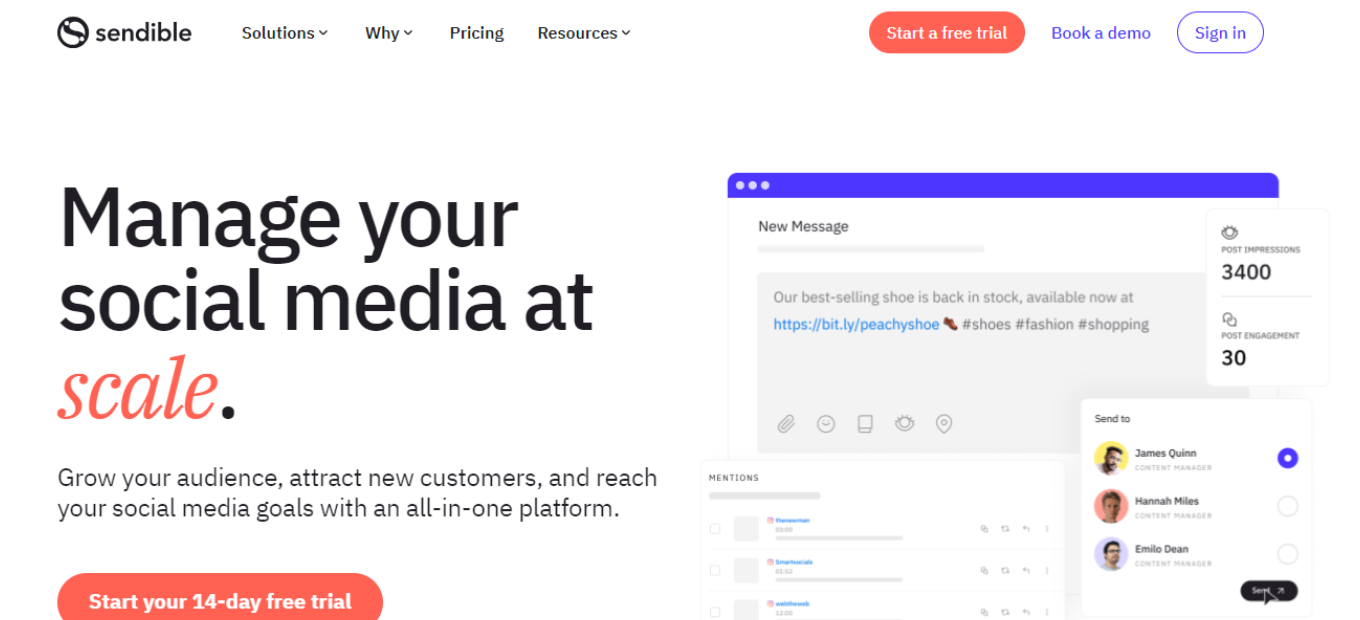
Sendible: Your All-in-One Social Media Management Platform

🏆 Our Verdict

Sendible is a comprehensive social media management platform that excels in streamlining social media marketing efforts for businesses of all sizes. Its robust features and user-friendly interface make it a top choice for managing social media accounts, scheduling content, and analyzing performance.

✅ Pros & ❌ Cons Pros:

Pros:

🚀 Multi-platform posting and scheduling.
📊 Advanced analytics and reporting.
🔗 Seamless integration with various social media platforms.
🧑‍💼 User-friendly interface with helpful training resources.

Cons:

💲 Higher cost for premium plans.
📏 Limited features in lower-tier plans.
📚 Learning curve for advanced analytics and automation.

📖 About Sendible

Founded in 2009, Sendible has grown to become a leading social media management platform, serving businesses and agencies worldwide. Its mission is to simplify social media management and help businesses achieve their marketing goals.

🎯 What’s In It For You?

Sendible offers a comprehensive suite of tools for social media management, including content scheduling, engagement tracking, and in-depth analytics. It empowers businesses to enhance their social media presence and engage with their audience effectively.

🚀 How It Works

Getting Started with Sendible

  1. Visit the Sendible Website Navigate to Sendible: Go to the Sendible website. Sign Up: Click on the “Sign Up” or “Start Your Free Trial” button.
  2. Choose a Plan Review the Plans: Sendible offers various plans, including a free trial and tiered pricing for more advanced features. Select a Plan: Choose a plan that suits your business needs.
  3. Create an Account Provide Information: Enter your email address, create a password, and fill in the required details. Business Information: You may need to provide information about your business.
  4. Account Setup Complete the Setup: Follow the on-screen prompts to set up your account and connect your social media profiles. Onboarding Assistance: Sendible provides guidance to help you get started.
  5. Explore Sendible Features Discover the Tools: Familiarize yourself with Sendible’s features, including content scheduling, social inbox, and analytics. Training Resources: Sendible offers tutorials and a knowledge base to help you make the most of the platform.
  6. Start Managing Your Social Media Begin Posting: You can now start scheduling and posting content to your social media accounts. Engage with Your Audience: Use Sendible to monitor and engage with your audience.

🔗 Helpful Tips

Utilize Training Resources: Take advantage of Sendible’s training resources to master the platform.

Customer Support: If you need assistance, Sendible’s customer support team is available to help.

💲 Sendible Pricing Overview

🌟 Pricing Tiers Sendible offers various pricing tiers to cater to different business needs.

✅ Free Trial Overview: Sendible provides a free trial for users to explore its features. Included Features: Access to core features, limited to a trial period.

💼 Plans for Small Businesses Target Audience: Ideal for small businesses and startups looking to manage their social media presence. Key Features: Enhanced capabilities, including content scheduling and reporting.

🚀 Plans for Agencies and Enterprises Designed For: Medium to large businesses, marketing agencies, and enterprises. Advanced Features: Includes team collaboration, advanced reporting, and custom branding.

🤔 Considerations Scalability: Sendible’s plans are designed to accommodate the growth of businesses and agencies. Integration: Sendible seamlessly integrates with various social media platforms to streamline your workflow.

🥊 Competition

Here are the pros and cons of Sendible compared to Hootsuite:

Sendible

Pros:

  1. 🌟 Multi-platform posting and scheduling.
  2. 📊 Advanced analytics and reporting.
  3. 🔗 Seamless integration with various social media platforms.
  4. 🧑‍💼 User-friendly interface with helpful training resources.

Cons:

  1. 💲 Higher cost for premium plans.
  2. 📏 Limited features in lower-tier plans.
  3. 📚 Learning curve for advanced analytics and automation.

Hootsuite

Pros:

  1. 🌟 Multi-platform posting and scheduling.
  2. 🔊 Robust social media listening and monitoring features.
  3. 🛠️ Extensive app directory for third-party integrations.
  4. 📊 Comprehensive analytics and reporting tools.
  5. 🧑‍💼 User-friendly interface with customizable dashboards.

Cons:

  1. 💲 Higher cost for premium plans.
  2. 📏 Limited features in the free plan.
  3. 🤯 Some users find the interface overwhelming due to the range of features.

📌 Conclusion

Sendible is a powerful social media management platform that simplifies the process of managing and growing your social media presence. Whether you’re a small business or a marketing agency, Sendible has the tools you need to succeed in the world of social media marketing.

“Elevate Your Social Media Marketing with Sendible.”

Related read: for agencies juggling client accounts, Hootsuite centralises scheduling, replies and reporting in one workspace.

Later: Streamline Your Social Media Scheduling

🏆 Our Verdict

Later is a versatile social media scheduling tool that caters to businesses and individuals alike. It simplifies the process of planning and automating social media content, making it an excellent choice for those looking to enhance their online presence.

✅ Pros & ❌ Cons

Pros:

  • 📅 Easy-to-use social media calendar.
  • 📱 Mobile app for on-the-go scheduling.
  • 🔗 Integration with various social platforms.
  • 🆓 Free plan available for small users.

Cons:

  • 💲 Limited features in the free plan.
  • 📊 Basic analytics compared to some competitors.
  • 🚀 Limited automation options in lower-tier plans.

📖 About Later

Founded in 2014, Later has grown to become a prominent player in the social media scheduling industry. Its focus on visual content and Instagram scheduling sets it apart in the market.

🎯 What’s In It For You?

Later offers an efficient way to plan and schedule social media posts, especially for visual platforms like Instagram. It’s designed to save you time and help maintain a consistent online presence.

🚀 How It Works

Getting Started with Later

  1. Visit the Later Website
    • Navigate to Later: Go to Later’s website.
    • Sign-Up: Click on the “Sign Up” or “Get Started” button to create an account.
  2. Choose a Plan
    • Later offers a range of plans, including a free option. Choose the one that suits your needs.
  3. Connect Your Social Accounts
    • Link your social media accounts to Later. You can connect Instagram, Facebook, Twitter, and more.
  4. Create and Schedule Posts
    • Use Later’s intuitive calendar to create and schedule your posts. Visual content is its strong suit.
  5. Analytics and Optimization
    • Later provides basic analytics to track engagement and performance. Use this data to refine your strategy.

🔗 Helpful Tips

  • Utilize the Mobile App: Later’s mobile app lets you schedule and manage posts from your smartphone.
  • Experiment with Hashtags: Use Later’s hashtag suggestions to boost the visibility of your posts.

💲 Later Pricing Overview

🌟 Pricing Tiers

Later offers a range of pricing options, including a free plan with limited features.

💼 Free Plan

Ideal for: Individuals and small businesses. Features: Basic scheduling and 30 posts per social profile per month.

🚀 Paid Plans

Designed for: Growing businesses and teams. Features: Advanced scheduling, analytics, and additional social profiles.

🏢 Business Plans

Suited for: Larger organizations and agencies. Features: Enhanced collaboration and branding features.

🥊 Competition

Later

✅ Pros
  • 📅 Intuitive social media calendar.
  • 📱 Mobile app for scheduling on the go.
  • 🔗 Multi-platform integration.
  • 🆓 Free plan available.
❌ Cons
  • 💲 Limited features in the free plan.
  • 📊 Basic analytics compared to some competitors.
  • **🚀 Limited automation options in lower-tier plans.

Buffer

✅ Pros
  • 📅 Social media calendar with scheduling.
  • 📊 Robust analytics and reporting.
  • 🔗 Integration with multiple social platforms.
  • 📈 Advanced features in paid plans.
❌ Cons
  • 💲 Costs may increase for premium features.
  • **📏 Limited automation options in lower-tier plans.

📌 Conclusion

Later offers a straightforward approach to social media scheduling, particularly for visual content. It’s an ideal choice for those seeking an efficient way to manage their online presence.

“Enhance Your Social Media Strategy with Later.”

Related read: beyond visual scheduling, Hootsuite adds monitoring and team approvals across every major network from a single dashboard.

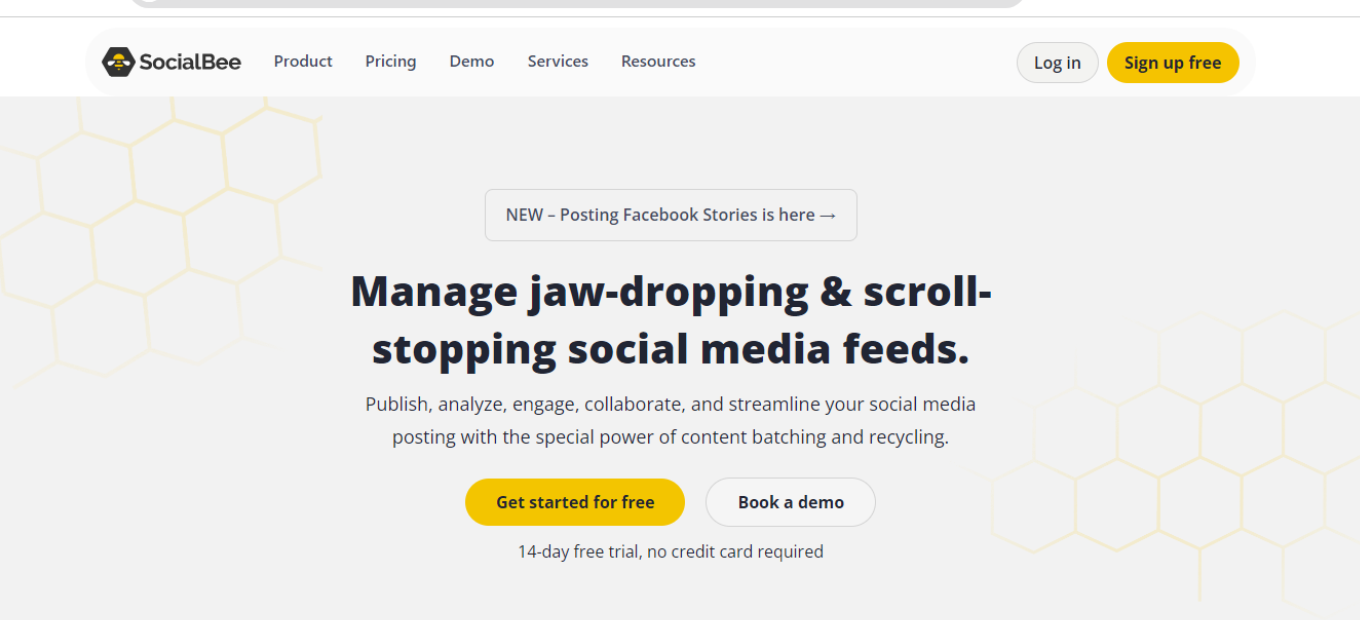
SocialBee: Your Comprehensive Social Media Management Solution

🏆 Our Verdict

SocialBee is a comprehensive social media management platform that caters to businesses seeking an integrated approach to social media scheduling, content curation, and audience engagement. Its user-friendly interface and extensive feature set make it a top choice for companies of all sizes.

✅ Pros & ❌ Cons

Pros:

  • 🔄 Integration with major social media platforms: SocialBee seamlessly connects with various social media networks for efficient management.
  • 📊 Advanced content scheduling and categorization tools: It offers robust scheduling and content categorization features to streamline your social media posting.
  • 🌐 Extensive third-party integrations: SocialBee supports a wide range of third-party integrations to enhance its functionality.
  • 🧑‍💼 User-friendly interface with comprehensive training resources: SocialBee’s intuitive interface is complemented by helpful training materials.

Cons:

  • 💲 Premium features may come at an additional cost: Some advanced features may require a higher-tier subscription, potentially leading to additional expenses.
  • 📏 Limited customization in lower-tier plans: Lower-tier plans may have limitations in terms of customization options.
  • 📚 Steeper learning curve for advanced features: Mastering advanced features in SocialBee may require some time and effort.

📖 About SocialBee

Founded to simplify social media management, SocialBee has evolved into a leader in the field. It provides a comprehensive suite of tools designed to streamline social media posting, content curation, and audience engagement across multiple platforms.

🎯 What’s In It For You?

SocialBee offers an all-in-one solution for managing your social media presence, with features that include content scheduling, content categorization, and audience targeting.

🚀 How It Works

Signing Up for SocialBee

  1. Visit the SocialBee Website
    • Navigate to SocialBee: Go to the SocialBee website.
    • Find the Sign-Up Option: Look for a sign-up button or link, usually located on the top right corner of the website.
  2. Choose a Plan
    • Review the Plans: SocialBee offers various plans, including tiered pricing for additional features.
    • Select a Plan: Choose a plan that suits your business needs. You can start with the basic version or select a paid plan for more advanced features.
  3. Create an Account
    • Enter Your Information: Provide your email address, create a password, and complete the required details.
    • Business Information: You may need to enter information about your business, such as its size and industry.
  4. Account Verification
    • Check Your Email: After registering, you’ll receive an email from SocialBee.
    • Verify Your Account: Open the email and click on the verification link to activate your account.
  5. Set Up Your Account
    • Complete the Setup: Once your account is verified, follow the prompts to finalize your account setup.
    • Onboarding Process: SocialBee might guide you through an onboarding process to help you get started.
  6. Integrate Your Tools
    • Connect Your Social Media Accounts: Integrate your social media accounts with SocialBee to start managing them.
    • Authorization: Authorize SocialBee to connect to your social media profiles.
  7. Explore SocialBee Features
    • Familiarize Yourself: Begin exploring the various features of SocialBee, such as content scheduling, categorization, and audience targeting.
    • Use Helpful Resources: SocialBee provides tutorials and guides to assist you in maximizing the platform.
  8. Start Using SocialBee
    • Begin Managing Your Social Media: You can now start using SocialBee to enhance your social media management efforts.

🔗 Helpful Tips

  • Take Advantage of Training: SocialBee offers training resources to help you make the most of the platform.
  • Utilize Customer Support: If you need assistance, SocialBee’s customer support team is available to help.

💲 SocialBee Pricing Overview

🌟 Pricing Tiers

SocialBee offers various pricing tiers, each designed to cater to different business needs and scales. These tiers typically range from basic free options to more advanced, feature-rich paid plans.

  • Free Tools
    • Overview: SocialBee provides a range of free tools, particularly in its basic offering.
    • Included Features: Basic features such as content scheduling and basic categorization are typically included.
  • Starter Plans
    • Target Audience: Ideal for small businesses or startups looking to enhance their social media presence.
    • Key Features: Enhanced functionalities over the free tier, including additional scheduling options.
  • Professional Plans
    • Designed For: Medium-sized businesses looking for more advanced capabilities.
    • Advanced Features: Includes advanced scheduling, categorization, and audience targeting options.
  • Agency Plans
    • Suited For: Agencies and enterprises requiring extensive, scalable solutions.
    • Premium Offerings: Advanced features like team management, white-labeling, and client reporting.

🤔 Competition

Here are the Pros and Cons of SocialBee compared to Buffer:

SocialBee

Pros:

  • Advanced content scheduling and categorization tools.
  • User-friendly interface with comprehensive training resources.
  • Extensive third-party integrations.
  • Suitable for businesses seeking comprehensive social media management.

Cons:

  • Premium features may come at an additional cost.
  • Limited customization in lower-tier plans.
  • Steeper learning curve for advanced features.

Buffer

Pros:

  • User-friendly interface with an intuitive dashboard.
  • Robust social media publishing and scheduling features.
  • Excellent analytics and reporting tools.
  • Suitable for businesses of all sizes, including startups.

Cons:

  • Some advanced features may require higher-tier subscriptions.
  • Limited social media content categorization options.
  • May not offer as many advanced customization options as SocialBee.

Please note that the specific pros and cons may vary depending on your individual needs and preferences. It’s essential to consider your business goals and requirements when choosing between these two social media management platforms.

📌 Conclusion

SocialBee is an all-in-one social media management platform suitable for businesses of all sizes. With its comprehensive feature set and user-friendly interface, it offers an efficient solution for managing your social media presence.

“Enhance Your Social Media Management with SocialBee.”

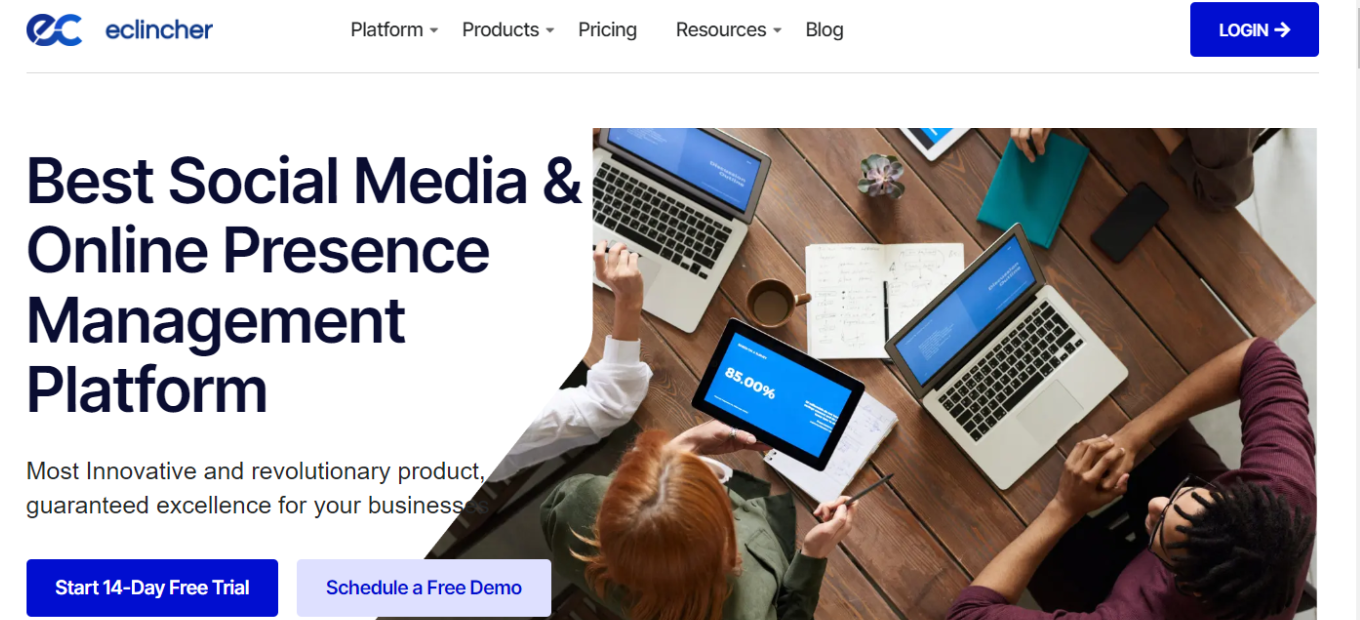
eClincher: Your All-in-One Social Media Management Solution

🏆 Our Verdict

eClincher is a comprehensive social media management platform that caters to businesses seeking an integrated approach to social media scheduling, monitoring, and engagement. Its user-friendly interface and extensive feature set make it a top choice for companies of all sizes.

✅ Pros & ❌ Cons

Pros:

  • 🔄 Integration with major social media platforms.
  • 📊 Advanced analytics and reporting tools.
  • 🌐 Extensive third-party integrations.
  • 🧑‍💼 User-friendly interface with robust training resources.

Cons:

  • 💲 Premium features may come at an additional cost.
  • 📏 Limited customization in lower-tier plans.
  • 📚 Steeper learning curve for advanced features.

📖 About eClincher

Founded to simplify social media management, eClincher has evolved into a leader in the field. It provides a comprehensive suite of tools designed to streamline social media posting, monitoring, and engagement across multiple platforms.

🎯 What’s In It For You?

eClincher offers an all-in-one solution for managing your social media presence, with features that include scheduling posts, social media monitoring, and analytics.

🚀 How It Works

Signing Up for eClincher

  1. Visit the eClincher Website
    • Navigate to eClincher: Go to the eClincher website.
    • Find the Sign-Up Option: Look for a sign-up button or link, typically located on the top right corner of the website.
  2. Choose a Plan
    • Review the Plans: eClincher offers various plans, including tiered pricing for additional features.
    • Select a Plan: Choose a plan that suits your business needs. You can start with the basic version or select a paid plan for more advanced features.
  3. Create an Account
    • Enter Your Information: Provide your email address, create a password, and complete the required details.
    • Business Information: You may need to enter information about your business, such as its size and industry.
  4. Account Verification
    • Check Your Email: After registering, you’ll receive an email from eClincher.
    • Verify Your Account: Open the email and click on the verification link to activate your account.
  5. Set Up Your Account
    • Complete the Setup: Once your account is verified, follow the prompts to finalize your account setup.
    • Onboarding Process: eClincher may guide you through an onboarding process to help you get started.
  6. Integrate Your Tools
    • Connect Your Social Media Accounts: Integrate your social media accounts with eClincher to start managing them.
    • Authorization: Authorize eClincher to connect to your social media profiles.
  7. Explore eClincher Features
    • Familiarize Yourself: Begin exploring the various features of eClincher, such as post scheduling, monitoring, and engagement.
    • Use Helpful Resources: eClincher provides tutorials and guides to assist you in maximizing the platform.
  8. Start Using eClincher
    • Begin Managing Your Social Media: You can now start using eClincher to enhance your social media management efforts.

🔗 Helpful Tips

  • Take Advantage of Training: eClincher offers training resources to help you make the most of the platform.
  • Utilize Customer Support: If you need assistance, eClincher’s customer support team is available to help.

💲 eClincher Pricing Overview

🌟 Pricing Tiers

eClincher offers various pricing tiers, each designed to cater to different business needs and scales. These tiers typically range from basic free options to more advanced, feature-rich paid plans.

  • Free Tools
    • Overview: eClincher provides a range of free tools, particularly in its basic offering.
    • Included Features: Basic features such as social media scheduling and basic analytics are typically included.
  • Starter Plans
    • Target Audience: Ideal for small businesses or startups looking to enhance their social media presence.
    • Key Features: Enhanced functionalities over the free tier, including additional scheduling options.
  • Professional Plans
    • Designed For: Medium-sized businesses looking for more advanced capabilities.
    • Advanced Features: Includes advanced analytics and reporting, team collaboration, and social inbox management.
  • Agency Plans
    • Suited For: Agencies and enterprises requiring extensive, scalable solutions.
    • Premium Offerings: Advanced features like team management, white-labeling, and client reporting.

🤔 Competition

Here are the Pros and Cons of eClincher compared to Buffer:

eClincher

Pros:

  1. 🔄 Integration with major social media platforms: eClincher provides robust integration options with various social media networks, making it easy to manage all your accounts in one place.
  2. 📊 Advanced analytics and reporting tools: eClincher offers in-depth analytics and reporting features to help you track the performance of your social media campaigns.
  3. 🌐 Extensive third-party integrations: It supports a wide range of third-party integrations, enhancing its functionality and adaptability.
  4. 🧑‍💼 User-friendly interface with robust training resources: eClincher offers a user-friendly interface that is easy to navigate, and it provides training resources to help users make the most of the platform.

Cons:

  1. 💲 Premium features may come at an additional cost: Some advanced features in eClincher may require a higher-tier subscription, leading to potential extra expenses.
  2. 📏 Limited customization in lower-tier plans: Lower-tier plans may have limitations when it comes to customization options.
  3. 📚 Steeper learning curve for advanced features: Mastering some of the more advanced features in eClincher may take time and effort.

Buffer

Pros:

  1. 👍 User-friendly interface: Buffer is known for its intuitive and user-friendly interface, making it easy for users to schedule and manage social media posts.
  2. 🔗 All-in-One Platform: Buffer offers a comprehensive suite of social media management tools, including scheduling, analytics, and engagement.
  3. 🎯 Inbound Marketing Focus: It excels in content marketing, SEO, and lead nurturing, making it a valuable choice for inbound marketing strategies.
  4. 🆓 Free CRM Offering: Buffer provides a free version with basic features, making it suitable for small businesses or startups.
  5. 📚 Educational Resources: Buffer offers extensive learning resources through the Buffer Academy.

Cons:

  1. 🔧 Limited Customization in Lower Tiers: Advanced customization options are mainly available in higher-tier plans.
  2. 💸 Cost Escalation: Costs can increase significantly as you move to higher-tier plans or add advanced features.
  3. 📉 Less Advanced Analytics: Some users may find that Buffer’s analytics capabilities are less comprehensive compared to other platforms like Salesforce.

Please note that the pros and cons listed here are subject to change as these platforms continue to evolve and update their features and pricing structures. It’s essential to evaluate both platforms based on your specific business needs and preferences before making a decision.

📌 Conclusion

eClincher is an all-in-one social media management platform suitable for businesses of all sizes. With its comprehensive feature set and user-friendly interface, it offers an efficient solution for managing your social media presence.

“Enhance Your Social Media Management with eClincher.”

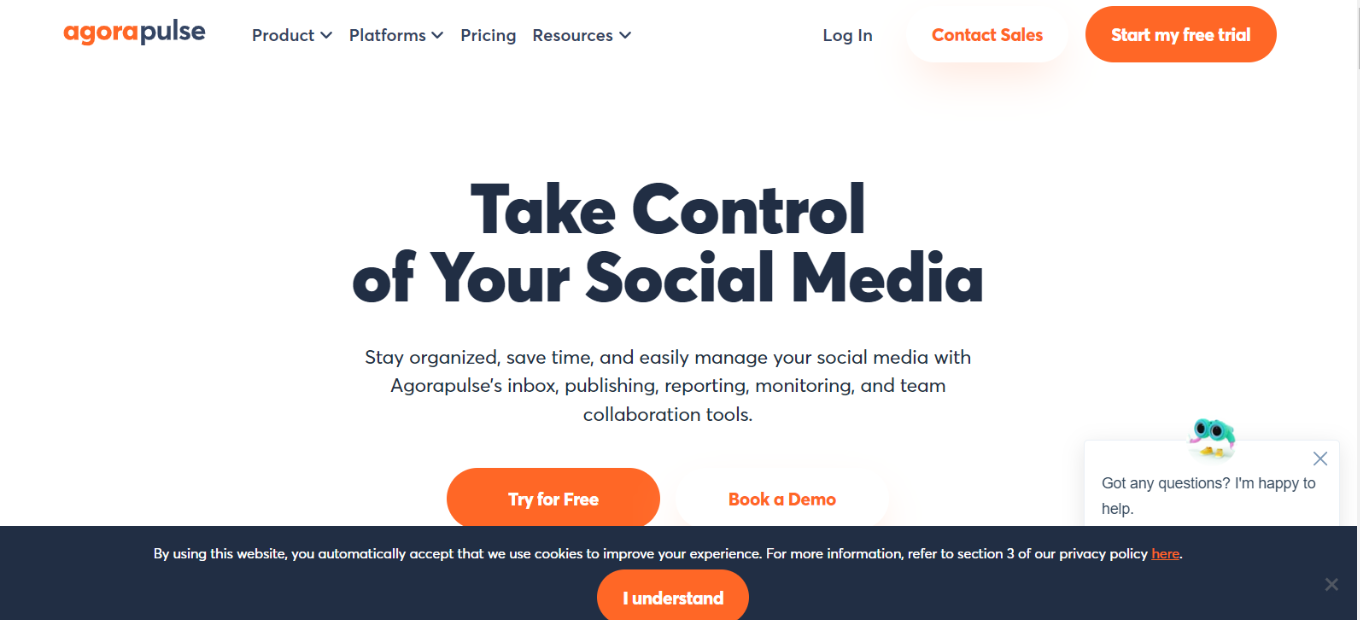
Agorapulse: Streamline Your Social Media Management

🏆 Our Verdict

Agorapulse is a versatile social media management platform that excels in simplifying the complexities of online engagement. With its user-friendly interface and a range of features, it’s a solid choice for businesses of all sizes.

Pros & ❌ Cons Pros:

Pros:

  • 🔄 Seamless Social Media Management: Agorapulse offers integration across multiple social media platforms.
  • 📊 Advanced Analytics: Robust reporting tools for data-driven insights.
  • 🌐 Broad Third-party Integrations: Connects with various third-party apps. 🧑‍💼 User-friendly Interface: Easy navigation with helpful training resources.

Cons:

  • 💲 Premium Features Cost: Access to advanced features may require higher-tier subscriptions.
  • 📏 Limited Customization: Some lower-tier plans might have customization limitations.
  • 📚 Learning Curve: Users may experience a learning curve with advanced features.

📖 About Agorapulse

Founded to simplify social media management, Agorapulse has become a prominent player in the industry. It offers a suite of tools to streamline social media activities, enhance engagement, and drive results.

🎯 What’s In It For You?

Agorapulse offers a comprehensive approach to social media management, covering scheduling, publishing, analytics, and audience engagement.

🚀 How It Works

Getting Started with Agorapulse

  1. Visit the Agorapulse Website
    • Go to Agorapulse’s website.
    • Find the Sign-Up Option.
  2. Choose a Plan
    • Review available plans, including free trials and tiered pricing for advanced features.
    • Select a plan aligning with your social media management needs.
  3. Create an Account
    • Provide your email, create a password, and enter necessary details.
    • Optionally, input information about your business and social media accounts.
  4. Account Verification
    • Check your email for a verification link sent by Agorapulse.
    • Click the link to activate your account.
  5. Set Up Your Account
    • Complete onboarding, customizing your Agorapulse experience.
    • Explore training materials and tutorials.
  6. Connect Your Social Media Platforms
    • Integrate your social media accounts with Agorapulse.
    • Authorize Agorapulse to access and manage your accounts.
  7. Explore Agorapulse Features
    • Familiarize yourself with Agorapulse’s social media management capabilities.
    • Utilize available resources for efficiency.
  8. Start Managing Your Social Media
    • Begin scheduling posts, engaging with your audience, and analyzing social media performance.

🔗 Helpful Tips

  • Make use of Agorapulse’s training resources and guides.
  • Reach out to Agorapulse’s customer support for assistance.

💲 Agorapulse Pricing Overview

🌟 Pricing Tiers

Agorapulse offers various pricing tiers to suit different business needs and scales.

Basic Plans

  • Foundational features for social media management.
  • Suitable for businesses starting with social media management.

💼 Pro Plans

  • Enhanced functionalities over the basic tier.
  • Designed for businesses seeking more advanced social media management.

🚀 Premium Plans

  • Ideal for larger businesses or agencies requiring extensive social media solutions.
  • Offers advanced features, team collaboration, and in-depth analytics.

🏢 Enterprise Plans

  • Tailored for enterprises and agencies with complex social media requirements.
  • Premium offerings include advanced customization, API access, and priority support.

🤔 Considerations

  • Agorapulse’s pricing scales with your social media management needs.
  • It integrates seamlessly with various social media platforms, allowing for a personalized experience.

🥊 Competition

Agorapulse vs. Hootsuite

Pros

  • Both Agorapulse and Hootsuite offer user-friendly interfaces.
  • Comprehensive social media management tools for scheduling, publishing, and reporting.

Cons

  • Costs may increase for access to premium features in both platforms.

🗣️ Testimonials

“Agorapulse has transformed our social media management, helping us engage with our audience effectively.” – Emily Davis, Social Media Manager.

“As a growing business, Agorapulse has been instrumental in managing our social media accounts efficiently.” – Mark Johnson, Founder, Digital Solutions.

📌 Conclusion

Agorapulse is a reliable social media management platform that can streamline your online engagement. Whether you’re a marketer, social media manager, or business owner, Agorapulse’s user-friendly interface and social media enhancements can simplify your social media journey.

“Simplify Social Media with Agorapulse.”

Related read: Agorapulse and Hootsuite overlap on the inbox and the publishing calendar. Our Hootsuite review sets out where the two part company on listening and on which tier unlocks approvals.

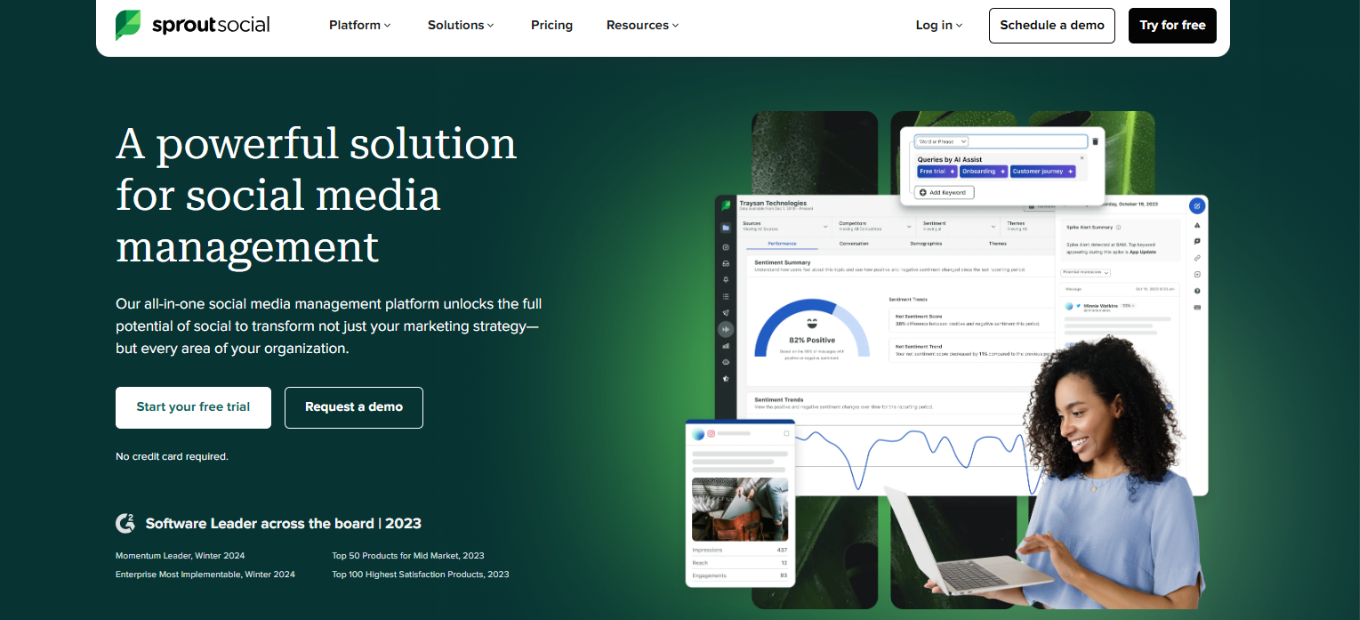
Sprout Social: Elevate Your Social Media Management

🏆 Our Verdict

Sprout Social is a comprehensive social media management platform that excels in helping businesses enhance their online presence. With a user-friendly interface and a wealth of features, it’s an excellent choice for companies of all sizes.

Pros & ❌ Cons Pros:

Pros:

  • 🔄 Seamless Social Media Management: Sprout Social offers integration across various social media platforms.
  • 📊 Advanced Analytics: Detailed reporting tools empower data-driven decision-making.
  • 🌐 Extensive Integrations: Connects with a wide range of third-party apps and tools.
  • 🧑‍💼 User-Friendly Interface: Easy-to-navigate design with comprehensive training resources.

Cons:

  • 💲 Premium Features Cost: Access to some advanced features may require a higher-tier subscription.
  • 📏 Limited Customization: Lower-tier plans may have limitations in terms of customization.
  • 📚 Learning Curve: Users might face a learning curve with advanced features.

📖 About Sprout Social

Founded to revolutionize social media management, Sprout Social has become a leader in the industry. It provides a suite of tools to streamline social media activities, enhance engagement, and drive growth.

🎯 What’s In It For You?

Sprout Social offers a holistic approach to managing social media, with features catering to scheduling, content publishing, analytics, and engagement.

🚀 How It Works

Getting Started with Sprout Social

  1. Visit the Sprout Social Website
    • Go to Sprout Social’s website.
    • Locate the Sign-Up Option.
  2. Choose a Plan
    • Review the available plans, including a free trial and tiered pricing for advanced features.
    • Select a plan that aligns with your social media management needs.
  3. Create an Account
    • Provide your email, create a password, and enter necessary details.
    • Optionally, input information about your business, industry, and social media accounts.
  4. Account Verification
    • Check your email for a verification link sent by Sprout Social.
    • Click the link to activate your account.
  5. Set Up Your Account
    • Complete the onboarding process, customizing your Sprout Social experience.
    • Explore training materials and tutorials.
  6. Connect Your Social Media Platforms
    • Integrate your social media accounts with Sprout Social.
    • Authorize Sprout Social to access and manage your accounts.
  7. Explore Sprout Social Features
    • Familiarize yourself with Sprout Social’s social media management capabilities.
    • Utilize available resources for maximum efficiency.
  8. Start Managing Your Social Media
    • Begin scheduling posts, engaging with your audience, and analyzing your social media performance.

🔗 Helpful Tips

  • Take advantage of Sprout Social’s training resources and guides.
  • Reach out to Sprout Social’s customer support for any assistance.

💲 Sprout Social Pricing Overview

🌟 Pricing Tiers Sprout Social offers various pricing tiers to suit different business needs and scales.

Standard Plans

  • Basic features for social media management.
  • Suitable for businesses starting with social media management.

💼 Professional Plans

  • Enhanced functionalities over the standard tier.
  • Designed for businesses seeking more advanced social media management.

🚀 Advanced Plans

  • Ideal for larger businesses or agencies requiring extensive social media solutions.
  • Offers advanced features, team collaboration, and in-depth analytics.

🏢 Enterprise Plans

  • Tailored for enterprises and agencies with complex social media requirements.
  • Premium offerings include advanced customization, API access, and priority support.

🤔 Considerations

  • Sprout Social’s pricing scales with your social media management needs.
  • It integrates seamlessly with various social media platforms, allowing for a personalized experience.

🥊 Competition

Sprout Social vs. Hootsuite

Pros

  • Both Sprout Social and Hootsuite offer user-friendly interfaces.
  • Comprehensive social media management tools for scheduling, publishing, and reporting.

Cons

  • Costs may increase for access to premium features in both platforms.

📌 Conclusion

Sprout Social is a robust social media management platform that can empower your business’s online presence. Whether you’re a marketer, social media manager, or business owner, Sprout Social’s user-friendly interface and social media enhancements can elevate your social media game.

“Elevate Your Social Media with Sprout Social.”

Related read: weighing enterprise social suites? Our guide to Hootsuite covers where it fits for teams that manage several accounts.

Shopify: The Premier E-commerce Platform 🛒

⚖️ Our Verdict 🌟

Shopify emerges as a leading e-commerce platform, renowned for its comprehensive features that cater to businesses of all sizes. Known for its user-friendly interface and extensive customization options, Shopify stands as a top choice for entrepreneurs and established businesses alike.

Pros & Cons 👍👎

Pros:

  • Wide array of themes and designs for store customization.
  • Intuitive and user-friendly store builder.
  • Advanced sales and marketing tools.
  • Comprehensive analytics and reporting capabilities.

Cons:

  • Can be more expensive than some competitors.
  • Complexity increases with the addition of advanced features.
  • Limited functionality in the free version.

About Shopify 🌍

Originally a solution for online store creation, Shopify has evolved into a multifaceted e-commerce platform. It now includes features like a point of sale (POS) system, social media integration, and a plethora of marketing tools, addressing a wide array of e-commerce needs.

What’s In It For You? 💡

Shopify offers tools that support the full spectrum of e-commerce activities, not just online store creation. Its features facilitate effective customer engagement, from the acquisition phase to retention, including a suite of tools for inventory management, marketing, payment processing, and customer service.

How to Register and Start a Shopify Store 🛍️

Starting an online store with Shopify is a straightforward process. Here’s a step-by-step guide to help you get started:

Step 1: Sign Up for a Shopify Account 🖊️

  1. Visit the Shopify Website: Go to Shopify’s website.
  2. Start Your Free Trial: Click on the “Start free trial” button. Shopify typically offers a 3-day free trial.
  3. Provide Your Details: Fill in the required information such as your email address, password, and store name. Your store name will become part of your default Shopify domain (e.g., yourstorename.myshopify.com).

Step 2: Set Up Your Store ⚙️

  1. Answer Questions: After signing up, Shopify will ask a few questions about your business to tailor the setup experience.
  2. Add Address: Enter your business address, which is necessary for calculating taxes and shipping rates.

Step 3: Add Products to Your Store 📦

  1. Navigate to Products: Go to the dashboard, click on ‘Products’.
  2. Add New Products: Click on ‘Add product’ and enter details like product names, descriptions, prices, and images.

Step 4: Customize Your Store 🎨

  1. Choose a Theme: Click on ‘Online Store’ and then ‘Themes’. Shopify offers a variety of free and paid themes.
  2. Customize Theme: Select a theme and customize it using the theme editor to match your brand.

Step 5: Set Up Domain 🌐

  1. Choose a Domain: You can buy a new domain through Shopify or connect an existing one.
  2. Set Primary Domain: Once the domain is added, set it as the primary domain for your store.

Step 6: Set Up Payments 💳

  1. Choose Payment Providers: Go to ‘Settings’ and then ‘Payments’.
  2. Configure Payment Methods: Set up payment methods like credit cards, PayPal, and others that Shopify supports.

Step 7: Configure Shipping 🚚

  1. Set Shipping Rates: Go to ‘Settings’ and then ‘Shipping and Delivery’.
  2. Configure Shipping Zones: Define shipping rates and zones depending on where you’ll be shipping your products.

Step 8: Test Your Store 🧪

  1. Place a Test Order: Before launching, place a test order to ensure everything works as expected.
  2. Adjust Settings if Needed: Make any necessary adjustments based on the test order.

Step 9: Launch Your Store 🚀

  1. Remove Password: Go to ‘Online Store’ settings and remove the password to make your store live to the public.
  2. Announce Your Launch: Use social media, email, and other marketing channels to announce your store’s opening.

Step 10: Optimize and Market Your Store 🔍

  1. Monitor Performance: Use Shopify’s analytics to monitor your store’s performance.
  2. Marketing: Engage in continuous marketing efforts to attract and retain customers.

Following these steps will help you set up your Shopify store and start your e-commerce journey. Remember, regular updates and marketing are key to growing your online business.

Pricing Plans & Support 💳

Shopify offers various pricing plans tailored to different business needs, including a free trial and special offers for new subscribers:

  1. Free Trial and Introductory Offer: Shopify provides a 3-day free trial with no credit card required. New users can enjoy a special rate of $1/month for the first three months​​.
  2. Basic Plan: Priced at $39 USD/month, this plan is designed for individuals and small businesses. It covers all the essentials needed to create a store, ship products, and process payments. There’s a special offer for new users to get the first three months for $1/month​​.
  3. Shopify Plan: Targeted at small businesses, this plan costs $105 USD/month. It includes professional reporting and more staff accounts, with a similar introductory offer as the Basic Plan​​.
  4. Advanced Plan: For medium to large businesses, the Advanced Plan is priced at $399 USD/month. It offers custom reporting and the lowest transaction fees, with the same introductory offer for the first three months​​.
  5. Starter Plan: This plan is available for $5 USD/month for the first three months. It is ideal for selling products at events and through social media and messaging apps​​.
  6. Retail Plan: Costing $89 USD/month for the first three months, this plan is designed for in-store sales with advanced staff, inventory, and loyalty features​​.
  7. Shopify Plus: Starting at $2,000 USD/month for the first three months, Shopify Plus is geared towards high-volume businesses and enterprises, offering extensive capabilities and support​​.

All plans include features like an online store builder, sales channels across social media and marketplaces, point of sale options, and 24/7 email and live chat support​​.

Shopify vs. Wix 🥊

Shopify Pros:

  • Comprehensive e-commerce and marketing platform.
  • Extensive customization options for online stores.
  • Robust analytics and reporting features.

Shopify Cons:

  • Higher pricing tiers for more advanced features.
  • May require time to learn the platform’s full capabilities.

Wix Pros:

  • User-friendly website builder with flexible design options.
  • Suitable for both simple and complex website designs.
  • Competitive pricing for various plan options.

Wix Cons:

  • E-commerce features may be less advanced compared to Shopify.
  • SEO capabilities might be limited compared to specialized platforms.

Conclusion 🎯

Shopify is a comprehensive e-commerce platform, ideal for businesses looking to establish or expand their online presence. With its wide range of features, Shopify is well-suited for both newcomers to e-commerce and experienced merchants aiming to enhance their online sales strategies.

“Empowering Entrepreneurs Everywhere.”