Basecamp: Streamlining Project Management for Teams

๐Ÿ† Our Verdict

Basecamp stands as a robust and user-friendly project management tool, ideal for teams seeking a simple yet effective way to coordinate tasks and communication.

โœ… Pros & โŒ Cons

Pros:

  • Streamlined user interface, easy to navigate.
  • Integrates task lists, schedules, and file sharing in one platform.
  • Effective communication tools like message boards and Campfire chat.

Cons:

  • Lacks the granularity of some more complex project management tools.
  • Limited customization options.
  • May not suit very large teams with complex project management needs.

๐ŸŒ About Basecamp

Founded in 2004, Basecamp has evolved into a go-to solution for straightforward, no-fuss project management. With a focus on simplicity and clarity, it has garnered a loyal user base.

๐ŸŽฏ Whatโ€™s In It For You?

Basecamp consolidates project tasks, communication, schedules, and files, fostering a central space for team collaboration.

๐Ÿš€ How It Works

Getting Started with Basecamp

1๏ธโƒฃ Visit Basecamp’s Website

2๏ธโƒฃ Sign Up

  • Click on the โ€˜Sign Upโ€™ button to create a new account.

3๏ธโƒฃ Choose Your Plan

  • Select a plan that best fits your teamโ€™s needs.

4๏ธโƒฃ Set Up Your Workspace

  • Customize your workspace with your company details.

5๏ธโƒฃ Create Your First Project

  • Start a new project and set up the project name and details.

6๏ธโƒฃ Add Team Members

  • Invite team members to join the project workspace.

7๏ธโƒฃ Utilize Features

  • Begin using Basecampโ€™s features like to-do lists, message boards, and schedules.

8๏ธโƒฃ Collaborate and Communicate

  • Use the discussion boards and Campfire chat for team communication.

๐Ÿ“Œ Helpful Tips

  • Regularly update your to-do lists and schedules to keep your team on track.
  • Utilize the file storage feature for easy access to project documents.

๐Ÿ’ฐ Basecamp Pricing Overview

Basecamp’s pricing includes:

  • Basecamp Per User Plan:
    • Cost: $15/user per month.
    • Features: Full feature access, 500 GB storage.
    • Suitable for freelancers, startups, small teams.
  • Basecamp Pro Unlimited Plan:
    • Cost: $299/month (annual billing) or $349/month (monthly billing).
    • Features: Full feature access, 1:1 onboarding, 5 TB storage, priority support.
    • Ideal for larger teams and growing businesses.

Both plans offer a 30-day free trial, unlimited projects, and free guests. Discounts are available for non-profits and educational institutions.

๐ŸฅŠ Competition

Basecamp vs Trello


Basecamp Pros:

  • Simplified project management with a centralized dashboard.
  • Strong focus on team communication and collaboration.
  • Flat-rate pricing structure, good for large teams.

Basecamp Cons:

  • Limited task management features compared to Trello.
  • Less flexibility in project visualization.
  • Fewer integration options.

Trello Pros:

  • Highly customizable boards and cards for task management.
  • Visual and intuitive interface, great for managing complex projects.
  • Extensive integration options with other apps and tools.

Trello Cons:

  • Can become cluttered with large numbers of cards and boards.
  • Pricing per user may get expensive for larger teams.
  • Less focus on broader project management features like team communication tools.

๐Ÿ”š Conclusion

Basecamp offers an accessible and effective solution for team project management, particularly valued for its simplicity and focus on essential features.

“The All-In-One Toolkit for Working Remotely.”
Harvest: Streamlining Time Tracking and Invoicing for Professionals

๐Ÿ† Our Verdict

Harvest stands out as a robust and user-friendly tool for time tracking and invoicing, perfectly suited for freelancers, small businesses, and larger teams looking for an efficient way to manage time and bill clients.

โœ… Pros & โŒ Cons

Pros:

  • ๐Ÿ•’ Easy-to-use time tracking interface.
  • ๐Ÿ“Š Comprehensive reporting tools.
  • ๐Ÿงพ Integrated invoicing and project management features.

Cons:

  • ๐Ÿ’ฒ Higher cost compared to some free alternatives.
  • ๐Ÿ“ฑ Mobile app experience may vary.

๐Ÿ“– About Harvest

Since its inception, Harvest has been a go-to solution for time tracking and invoicing, offering tools that simplify these processes while providing insightful data analytics. Its integration with various project management tools makes it a versatile choice for many businesses.

๐ŸŽฏ Whatโ€™s In It For You?

Harvest offers a seamless experience in tracking work hours, managing projects, and creating invoices. Its simple interface, coupled with powerful reporting, makes it a valuable tool for both individual freelancers and larger teams.

๐Ÿš€ How It Works

  1. Sign Up for Harvest: Visit Harvest’s website and sign up for an account. You can choose between their free plan or the Pro plan based on your needs.
  2. Set Up Your Account: After signing up, fill in your details to set up your account. This includes your business information and preferences.
  3. Create Your First Project: In your dashboard, start by creating a new project. Assign it a name, client, and set the project’s timeframe and budget.
  4. Add Tasks and Team Members: Break down your project into specific tasks. You can also add team members to the project and assign tasks to them.
  5. Start Tracking Time: Use the Harvest timer to track time spent on each task. You can do this via the web app, desktop app, or mobile app.
  6. Generate Reports: Use Harvest’s reporting features to get insights into project progress, tracked time, and budget expenditure.
  7. Invoice Clients: Convert your tracked time and expenses into invoices directly within Harvest. You can then send these invoices to your clients.
  8. Integrate with Other Tools: Connect Harvest with other tools like project management or accounting software for a more streamlined workflow.
  9. Explore Additional Features: Dive into additional features like expense tracking, timesheet approval, and more to fully leverage Harvestโ€™s capabilities.
  10. Use Harvestโ€™s Resources: Benefit from Harvestโ€™s range of guides and customer support for any help you need in getting started or making the most out of the platform.

๐Ÿ’ฒ Harvest Pricing Overview

Harvest offers two main pricing plans:

  • Free Plan: Suitable for individuals or teams just starting out. It includes limited access to Harvest’s features, allowing for tracking of time and limited invoices.
  • Pro Plan: Designed for businesses needing more robust functionality. This plan includes unlimited access to all of Harvest’s features, including time tracking, invoicing, and advanced reporting.

Both plans offer access to Harvest’s core time tracking and invoicing features, with the Pro Plan providing more comprehensive tools for larger teams or more complex projects.

๐ŸฅŠ Competition

Harvest Pros:

  • Integrated invoicing and project management.
  • Comprehensive reporting features.
  • User-friendly interface for time tracking.

Harvest Cons:

  • Limited free plan compared to Toggl Track.
  • Potentially higher cost for advanced features.

Toggl Track Pros:

  • User-friendly and simple interface.
  • Robust free version available.
  • Flexible time tracking options.

Toggl Track Cons:

  • Less focus on invoicing and project management.
  • Reporting might not be as comprehensive as Harvest.

These comparisons highlight Harvest’s strengths in invoicing and project management, while Toggl Track offers a more straightforward time tracking experience with a strong free version.

๐Ÿ“Œ Conclusion

Harvest is an essential tool for professionals seeking an effective solution for time tracking and invoicing, especially for those who value simplicity and comprehensive reporting in one platform.

“Time tracking and invoicing for those who value their time.”

InVision: Revolutionizing Digital Product Design

๐Ÿ† Our Verdict

InVision stands out as a versatile digital product design platform, perfect for teams seeking to enhance collaboration and streamline their design process. Its array of tools for prototyping, workflow management, and real-time feedback positions it as a leader in the digital design space.

โœ… Pros & โŒ Cons

Pros:

  • ๐ŸŒ Comprehensive prototyping and animation tools.
  • ๐Ÿ‘ฅ Strong focus on team collaboration and workflow management.
  • ๐Ÿ”„ Integration with various design tools and software.

Cons:

  • ๐Ÿ“ถ May require stronger internet connectivity for collaboration features.
  • ๐Ÿ–ฅ๏ธ Faced with strong competition from platform-agnostic tools like Figma.

๐Ÿ“– About InVision

Founded with the vision to empower designers, InVision has become a key player in the digital product design industry. Offering a cloud-based platform, it facilitates efficient prototyping, collaboration, and workflow management for design teams globally.

๐ŸŽฏ Whatโ€™s In It For You?

InVision offers a centralized platform for designing, prototyping, and collaborating on digital products. Its tools cater to designers, project managers, and stakeholders alike, ensuring a cohesive and efficient design process.

๐Ÿš€ How It Works

  1. Sign Up for InVision: Visit InVision’s website and sign up for an account. You can start with a free plan or choose a plan that suits your needs.
  2. Download InVision Studio (Optional): While InVision offers web-based tools, for a more integrated experience, you can download InVision Studio, their desktop application for macOS and Windows.
  3. Explore InVision Dashboard: Familiarize yourself with the InVision dashboard. This is where you can manage your projects, collaborate with your team, and access various InVision tools.
  4. Create a New Project: Start a new project by clicking the โ€˜Createโ€™ button. You can choose to start from scratch or use one of the many templates available.
  5. Design and Prototype: Use InVision Studio or the web-based platform to design your screens. Add interactions and animations to transform your static screens into clickable prototypes.
  6. Invite Collaborators: Collaborate with your team by inviting them to join your InVision workspace. You can share designs, gather feedback, and iterate rapidly.
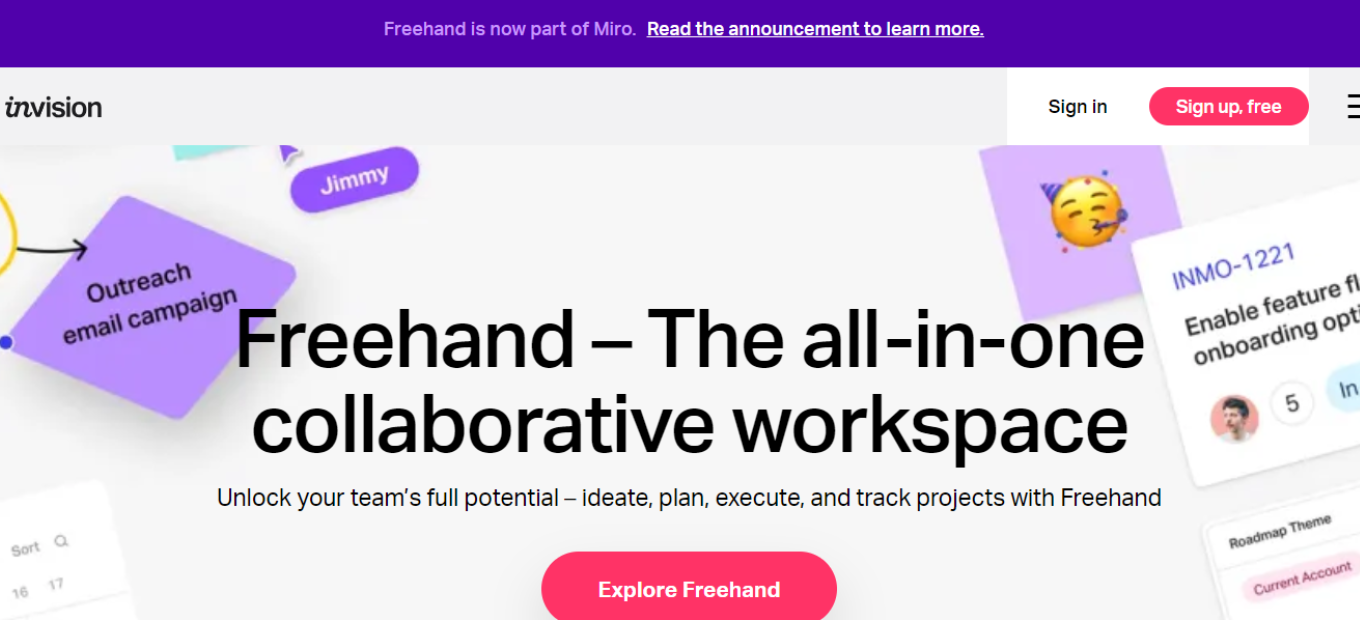
  7. Use InVisionโ€™s Freehand: Explore Freehand, a digital whiteboard, for brainstorming sessions, wireframing, or presenting ideas. It’s a great tool for collaborative real-time designing.
  8. Integrate with Other Tools: Integrate InVision with other tools like Slack, JIRA, Trello, etc., for a more streamlined workflow.
  9. Participate in the Community: Engage with InVision’s community for additional support, insights, and inspiration.
  10. Practice and Explore: The best way to learn InVision is through regular use and exploration of its features. Experiment with different tools and functionalities to enhance your design skills.

๐Ÿ’ฒ InVision Pricing Overview

InVision offers various pricing plans, each designed to cater to different user needs and team sizes. The pricing details are as follows:

  • Free Plan: Ideal for individuals and small teams just getting started. It typically includes basic features such as limited prototypes and limited access to collaboration tools.
  • Professional Plan: Targeted at professional designers and small teams. This plan often includes more advanced features like unlimited prototypes, more collaborative tools, and advanced project management features.
  • Team Plan: Designed for mid-sized teams, offering additional collaboration features and higher limits on prototypes and projects. This plan may also include enhanced team management tools.
  • Enterprise Plan: Suited for large organizations requiring comprehensive collaboration, security, and workflow features. This plan often includes advanced security measures, custom user roles, and dedicated support.
  • Education Plan: InVision offers special pricing or free access for students and educators, providing the necessary tools for educational purposes.

๐ŸฅŠ Competition

InVision Pros:

  • Comprehensive tool for prototyping and animation.
  • Strong focus on team collaboration and project management.
  • Useful digital whiteboard feature with Freehand.

InVision Cons:

  • Can be less intuitive for new users compared to Figma.
  • Limited design capabilities within the platform itself.

Figma Pros:

  • Real-time collaboration in a web-based environment.
  • User-friendly interface suitable for both beginners and professionals.
  • Extensive plugin ecosystem and community support.

Figma Cons:

  • Reliance on internet connectivity for optimal functionality.
  • May have a learning curve for users transitioning from traditional desktop applications.

These comparisons highlight InVision’s strengths in prototyping and team collaboration, while Figma excels in its user-friendly, collaborative design environment.

๐Ÿ“Œ Conclusion

InVision is an essential tool for modern digital design teams, offering comprehensive solutions for prototyping and collaboration. While facing stiff competition from tools like Figma, it continues to be a valuable asset for efficient digital product design.

“Design Better. Faster. Together.”

DocuSign: Revolutionizing Digital Document Management

Our Verdict ๐ŸŒŸ

DocuSign stands out as a transformative force in the realm of electronic signatures and document management, offering innovative solutions that cater to a digital-first business environment.

โœ… Pros & โŒ Cons

Pros:

  • Ease of Use: Intuitive interface streamlining the e-signature process.
  • Robust Security: Top-tier security and compliance measures.
  • Versatile Integration: Seamless compatibility with various platforms.
  • Global Reach: Widely accepted in international legal frameworks.

Cons:

  • Pricing Structure: Higher-tier features can be costly.
  • Feature Complexity: Certain advanced features may require a learning curve.

About DocuSign ๐Ÿ“Š

DocuSign’s electronic signature technology has become a cornerstone for businesses transitioning to digital operations, providing tools for efficient and secure online document handling.

Whatโ€™s In It For You? ๐ŸŽฏ

DocuSign is an essential tool for companies aiming to digitize their document workflows, offering solutions that span from small businesses to large enterprises.

How It Works ๐Ÿ› 

  1. Setup and Integration: Streamlined onboarding with multiple integration options.
  2. Document Lifecycle Management: Comprehensive tools for creating, sending, signing, and storing documents.
  3. Collaboration and Tracking: Features for real-time collaboration and tracking document status.

DocuSign Pricing Overview ๐Ÿ’ฐ

DocuSign offers a range of pricing tiers to accommodate various business needs:

  • Personal Plan: For individuals, providing basic e-signature capabilities.
  • Standard Plan: Geared towards small businesses, with additional features like templates.
  • Business Pro Plan: Offers advanced functionality like document analytics, bulk sending, and advanced fields for mid-sized businesses.
  • Advanced Solutions: Customized pricing for large enterprises with specific needs.

Each tier is designed to provide a different level of service, from basic e-signing to comprehensive, enterprise-grade solutions.

Competition ๐Ÿ†

In-Depth Comparison with Adobe Sign:

DocuSign Pros:

  • Ease of Use: DocuSign is known for its user-friendly interface, making it easy for users to navigate and complete the e-signature process quickly.
  • Security: It employs top-tier security measures and compliance standards, ensuring the safe handling of sensitive documents.
  • Versatile Integration: DocuSign seamlessly integrates with a wide range of platforms and business applications, making it adaptable to various workflows.
  • Global Reach: DocuSign is widely accepted internationally, providing legal validity and compliance in multiple countries.

DocuSign Cons:

  • Pricing Structure: While DocuSign offers a range of pricing plans, some of its advanced features can be costly, which may not be suitable for budget-conscious users.
  • Feature Complexity: Certain advanced features may have a learning curve for users who are new to electronic signature solutions.

Adobe Sign Pros:

  • Integration with Adobe Suite: Adobe Sign integrates seamlessly with Adobe’s extensive suite of products, offering deep integration and compatibility.
  • Document Creation: Adobe Sign provides robust tools for document creation and editing, making it a comprehensive solution for document management.
  • Brand Recognition: Adobe is a globally recognized brand, which may instill confidence in users.

Adobe Sign Cons:

  • Learning Curve: Adobe Sign’s extensive features and options can be overwhelming for new users, requiring time to fully master.
  • Pricing: Similar to DocuSign, Adobe Sign can be expensive for businesses that require full access to advanced features.

Both DocuSign and Adobe Sign are excellent electronic signature solutions, and the choice between them often depends on specific business needs, familiarity with the Adobe suite, and budget considerations.

Conclusion ๐ŸŽฌ

DocuSign represents a significant advancement in the digital transformation of businesses, providing a secure, efficient, and user-friendly platform for managing the lifecycle of documents in the modern world.

“Embrace the Future of Document Management with DocuSign.”

Xero: Streamlining Accounting for Businesses

โš–๏ธ Our Verdict on Xero

Xero stands out as a premier cloud-based accounting software, particularly favored for its user-friendly design and comprehensive set of features. It’s particularly suited for small to medium-sized businesses, offering a seamless approach to managing finances, invoicing, payroll, and more. The platform’s strong suite of integration capabilities with various third-party applications enhances its value, making it an essential tool for businesses seeking to streamline their accounting processes efficiently and effectively.

Pros & Cons

Pros:

  • ๐ŸŒ User-friendly interface, making financial management accessible and efficient.
  • ๐Ÿ”— Extensive integration options with a wide array of third-party applications.
  • ๐Ÿ’น Real-time access to financial data, offering up-to-the-minute insights.
  • ๐Ÿ’ฐ Efficient tools for invoicing and payroll management, simplifying these critical business operations.
  • ๐Ÿท๏ธ Attractive pricing plans, complemented by a free trial option for new users.

Cons:

  • ๐Ÿ“Š Limited advanced features for larger enterprises, which may require more robust solutions.
  • ๐Ÿงฉ The array of customization options can be initially overwhelming for new users.
  • ๐Ÿ’ธ Some advanced features incur additional costs, which could add up for businesses utilizing these tools.

About Xero

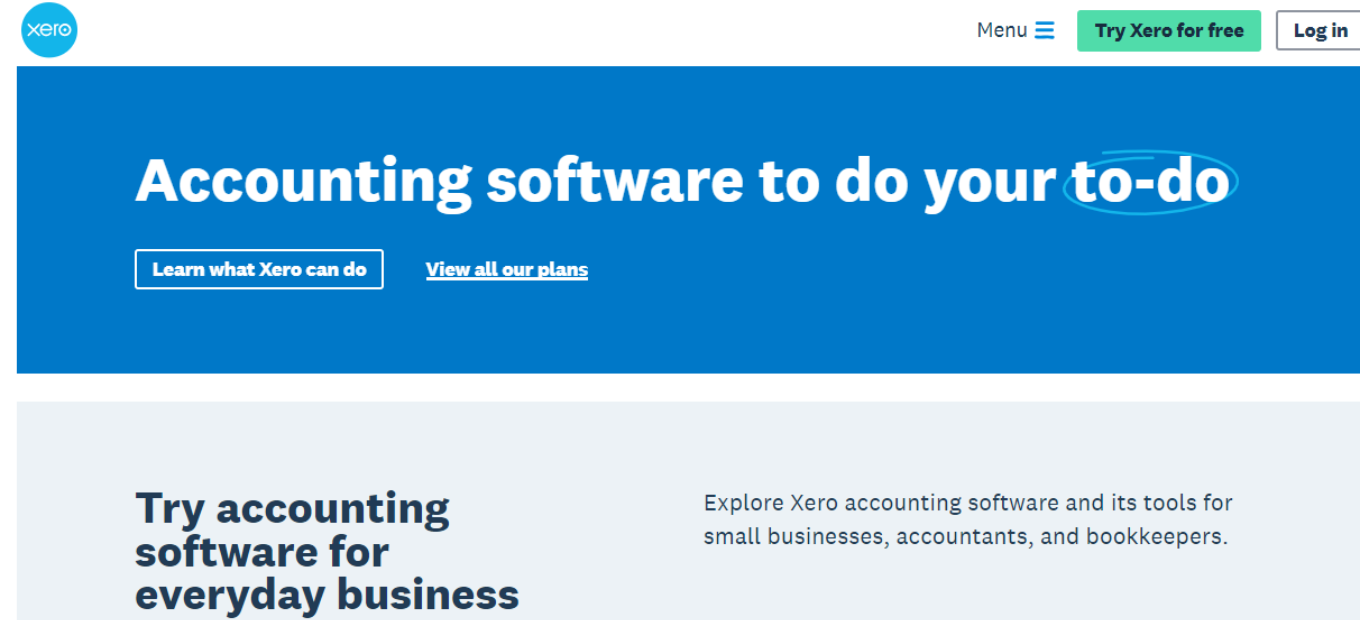
Xero, as a cutting-edge accounting software solution, redefines financial management for businesses. By integrating key accounting functions such as invoicing, payroll, and reporting, it provides a streamlined, user-friendly platform. This fosters efficient and effective financial operations, making it a valuable asset for businesses looking to simplify their accounting practices.

Whatโ€™s In It For You?

Xero is equipped with a diverse range of features designed to cater to the varying needs of businesses:

  • ๐Ÿ“ˆ Easy Invoicing: Streamlines the billing and invoicing process, making it faster and more accurate.
  • ๐Ÿ’ต Payroll Management: Simplifies the complexities of employee payments and tax filings.
  • ๐Ÿ“Š Real-Time Reporting: Delivers up-to-date financial insights, aiding in better business decision-making.

Getting Started with Xero: A Step-by-Step Guide

  1. Sign Up for Xero: Visit the Xero website and choose the ‘Sign Up’ option. Select a suitable plan based on your business needs.
  2. Set Up Your Organization: After signing up, you’ll be prompted to set up your organization in Xero. This includes entering details like your organization’s name, financial year end, and tax details.
  3. Customize Your Financial Settings: Customize settings such as chart of accounts, tracking categories, and financial year end to match your business operations.
  4. Connect Your Bank Account: Link your business bank account to Xero for automatic transaction feeds. This step is crucial for accurate and up-to-date financial records.
  5. Set Up Invoicing: Customize your invoice template with your business logo and details. This prepares you to send professional invoices to clients.
  6. Enter Opening Balances: Input the opening balances for your accounts, which is essential for a seamless transition to Xero.
  7. Add Users: If other team members need access, add them as users and set permissions according to their roles.
  8. Explore Xero’s Features: Familiarize yourself with Xero’s various features, such as payroll, expense tracking, and reporting tools.
  9. Use Xero’s Resources: Take advantage of Xeroโ€™s tutorials, guides, and customer support for a smooth onboarding experience.
  10. Regularly Update and Review: Regularly update your records and review financial reports to ensure accurate and efficient financial management.

This step-by-step guide is designed to help new users navigate the initial stages of setting up and using Xero for their business accounting needs.

Xero Pricing Plans Overview ๐ŸŒŸ๐Ÿ’ฐ

Xero offers three main pricing plans, each designed to suit different business needs while covering essential accounting features:

  1. Starter Plan – $29 USD per Month
    • Aimed at small businesses and solo entrepreneurs.
    • Includes basic features for financial management and invoicing.
  2. Standard Plan – $46 USD per Month
    • Suitable for growing businesses requiring more comprehensive accounting tools.
    • Offers additional features compared to the Starter plan.
  3. Premium Plan – $62 USD per Month
    • Best for larger businesses with more complex accounting needs.
    • Includes advanced features and capabilities.

All plans ensure:

  • ๐Ÿ”’ Safe and secure data handling.
  • ๐Ÿ”„ Easy cancellation with one month’s notice.
  • ๐Ÿ“ž 24/7 online support for assistance anytime.

These plans are designed to provide flexibility and scalability, allowing businesses to choose a package that best fits their current operations

Xero vs. QuickBooks

Xero’s strengths:

  • ๐Ÿ–ฅ๏ธ A streamlined interface that’s easy to navigate and use.
  • ๐Ÿค A wide range of integration capabilities, enhancing overall software utility.
  • ๐Ÿ’ก Affordable pricing models, particularly advantageous for small businesses.

QuickBooks’ strengths:

  • ๐ŸŒŸ Comprehensive feature set suitable for larger businesses with complex needs.
  • ๐Ÿ“Š Advanced reporting tools, providing detailed insights.
  • ๐ŸŒ Extensive user community and support, facilitating knowledge sharing and problem-solving.

Google Analytics: Navigating Data to Drive Business Growth

Overview ๐ŸŒ

Google Analytics is a powerful digital analytics tool offering in-depth insights into website and app performance. It’s designed to help businesses understand their online audience, track user interactions, and make data-driven decisions to optimize their digital strategies.

Key Features ๐Ÿ”‘

  • User Behavior Tracking: Understand how visitors interact with your website or app.
  • Real-Time Analytics: Monitor activity as it happens on your site.
  • Custom Reports: Create detailed reports tailored to specific business needs.
  • Integration Capabilities: Seamlessly integrates with other Google services and various third-party applications.

Benefits and Use Cases ๐Ÿ’ก

  • Enhanced Marketing Strategies: Use data to refine marketing campaigns for better targeting and ROI.
  • Improved User Experience: Gain insights into user behavior to enhance the website or app’s usability.
  • Data-Driven Decision Making: Make informed decisions based on comprehensive analytics data.

Starting with Google Analytics: A Step-by-Step Guide

Step 1: Create a Google Account ๐Ÿ†•

  • Account Requirement: If you don’t already have a Google account, create one at Google Accounts.
  • Sign In: Log in to your Google account to access Google Analytics.

Step 2: Sign Up for Google Analytics ๐Ÿ“ˆ

  • Visit Analytics Site: Go to the Google Analytics website.
  • Sign Up Process: Click on the ‘Sign up’ button and follow the prompts.

Step 3: Set Up Your Account and Property ๐Ÿ› ๏ธ

  • Account Setup: Enter your account name. You can use multiple properties (websites or apps) under one Google Analytics account.
  • Create Property: Add the name of your website or app, select the required reporting time zone, and currency.

Step 4: Configure Your Tracking Code ๐Ÿ–ฅ๏ธ

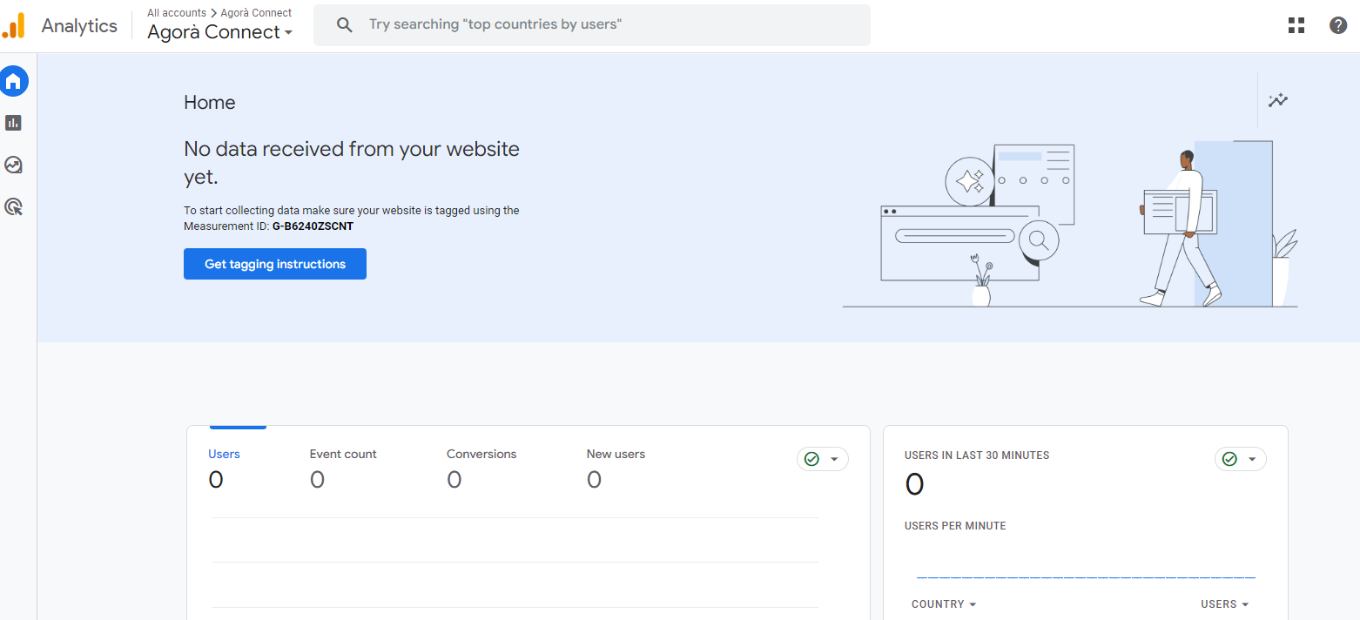
  • Get Tracking ID: After creating a property, you will receive a unique tracking ID and JavaScript tracking code.
  • Install Tracking Code: Add this code to every webpage you want to track or use a tag manager to simplify the process.

Step 5: Set Goals and Events ๐Ÿ”

  • Define Goals: In Google Analytics, set up specific goals to track conversions or other key actions on your site.
  • Set Up Events: Optionally, set up events to track interactions like button clicks or video plays.

Step 6: Configure Filters and Views ๐Ÿ“Š

  • Create Views: Set up views to segment your data (e.g., filtered views that exclude internal traffic).
  • Apply Filters: Use filters to exclude or include specific data in your reports.

Step 7: Explore Analytics Features ๐Ÿง

  • Check Real-Time Reports: Monitor activity on your site in real-time.
  • Analyze Reports: Explore various reports to understand user behavior, acquisition sources, conversion metrics, and more.

Step 8: Link to Other Google Services (Optional) ๐Ÿ”—

  • Google Ads Integration: If you use Google Ads, link your accounts for comprehensive ad performance analytics.
  • Search Console Integration: Link with Google Search Console to view search data alongside analytics data.

Step 9: Review and Act on Data Insights ๐Ÿ“‹

  • Regular Review: Regularly check your analytics for insights.
  • Make Data-Driven Decisions: Use the insights from Google Analytics to inform website improvements, marketing strategies, and other business decisions

Google Analytics is a powerful tool for understanding website or app performance. By following these steps, you’ll be well-equipped to gather valuable data insights to inform your digital strategy and enhance user experience.

Google Analytics Pricing Overview

Google Analytics (Standard) ๐Ÿ†“

  • Cost: Free
  • Features: Basic analytical tools and data collection suitable for small and medium-sized websites.
  • Limitations: Data sampling in reports, limited custom dimensions and metrics, standard data freshness.

Google Analytics 360 (Premium) ๐Ÿ’ผ

  • Cost: Starts at $150,000 per year (subject to change based on specific business needs and website traffic).
  • Advanced Features: Enhanced data collection and reporting capabilities, unsampled reports, more custom dimensions and metrics, integration with Google BigQuery, and access to advanced analysis tools.
  • Target Audience: Large enterprises with high traffic volumes and complex analytical needs.

Additional Options โœจ

  • Integration with Google Marketing Platform: Enhanced integration options available for additional cost, offering a more comprehensive suite of tools for marketing analysis and optimization.
  • Custom Solutions: Pricing and features can be customized based on specific business requirements and usage levels.

For the most current and detailed pricing information, it’s recommended to contact Google directly or visit the Google Analytics website. Pricing and offerings are subject to change and may vary based on the scale and scope of the business needs.

Google Analytics vs. Adobe Analytics: A Comparative Review

Pros of Google Analytics

Accessibility and User-Friendliness ๐ŸŒŸ

  • Ease of Use: Known for its user-friendly interface, making it accessible for beginners and experts alike.
  • Free Version Available: Offers a robust free version that’s sufficient for many small to medium-sized businesses.

Integration with Google Products ๐Ÿ”—

  • Google Ecosystem: Seamlessly integrates with other Google services like Google Ads, Search Console, and Google Tag Manager.
  • Data Integration: Easily combines data from various sources within the Google ecosystem for comprehensive analysis.

Real-Time Data and Reporting ๐Ÿ“Š

  • Real-Time Analytics: Tracks and reports website data in real-time.
  • Customizable Reports: Provides a range of customizable reporting options to suit different analytical needs.

Cons of Google Analytics

Data Sampling and Limitations ๐Ÿ“‰

  • Data Sampling: In the free version, high-traffic websites might encounter data sampling, leading to less precise data.
  • Complexity in Advanced Features: Advanced features can be complex and may require technical expertise.

Privacy Concerns and Data Ownership ๐Ÿ›ก๏ธ

  • Data Privacy: There are concerns about data privacy and how Google uses the data.
  • Data Ownership: Users donโ€™t own the data; Google has access to it.

Pros of Adobe Analytics

Advanced Data Analysis and Segmentation ๐Ÿš€

  • Deep Data Analysis: Provides more in-depth data analysis capabilities than Google Analytics.
  • Advanced Segmentation: Offers robust segmentation tools for detailed audience analysis.

Integration with Adobe Suite ๐Ÿ”

  • Adobe Ecosystem: Integrates well with other Adobe products, offering a more holistic view of marketing data across platforms.
  • Cross-Channel Data Integration: Efficiently combines data from various channels for a comprehensive understanding.

Customization and Flexibility ๐Ÿ› ๏ธ

  • Highly Customizable: Offers extensive customization options for data collection and reporting to suit enterprise-level needs.
  • Flexibility: Adaptable to a wide range of complex business requirements.

Cons of Adobe Analytics

Complexity and Learning Curve ๐Ÿค”

  • Steep Learning Curve: More complex to use than Google Analytics, with a steeper learning curve.
  • Technical Expertise Required: Generally requires more technical knowledge or resources to fully leverage its capabilities.

Higher Cost ๐Ÿ’ฒ

  • Cost Prohibitive for Small Businesses: Typically more expensive than Google Analytics, making it less accessible for smaller businesses or those with limited budgets.

Both Google Analytics and Adobe Analytics are powerful tools, but they cater to different needs and scales of operation. Google Analytics is more accessible and user-friendly, making it a great choice for small to medium-sized businesses, while Adobe Analytics offers more advanced analytical features and customization, suited for large enterprises and users already invested in the Adobe ecosystem. The choice between the two depends on the specific requirements, budget, and scale of your business.

Conclusion ๐ŸŽฏ

Google Analytics stands out as an essential tool for businesses of all sizes seeking to understand and improve their online presence. Its comprehensive analytics capabilities, combined with ease of use and integration with various platforms, make it a go-to solution for gaining valuable insights into digital performance. Whether you’re a small business or a large corporation, Google Analytics provides the data necessary to drive growth and success in the digital arena.

“Empower Your Decisions: Uncover Insights, Drive Growth with Google Analytics”

Related read: Google Analytics is built around sessions and traffic sources. When the question shifts to which customers come back and what they are worth over time, RetentionX works on the customer record instead.

Smartsheet: Streamlining Project Management for Maximum Efficiency

Overview ๐ŸŒ

Smartsheet is a dynamic work management and collaboration tool that empowers teams and organizations to plan, capture, manage, automate, and report on work at scale. Offering a flexible, no-code platform, it combines the ease of use of a spreadsheet with additional features like file sharing, Gantt charts, and automation.

Key Features ๐Ÿ”‘

  • Customizable Templates: Smartsheet offers a wide range of pre-built templates for different project needs.
  • Automation Tools: Automate repetitive tasks to enhance efficiency.
  • Integration Capabilities: Seamlessly integrates with popular apps like Microsoft Office 365, Google Workspace, and Salesforce.
  • Real-time Collaboration: Enables team members to collaborate in real-time, enhancing communication and workflow.

Benefits and Use Cases ๐Ÿ’ก

  • Improved Project Visibility: With dashboards and reporting tools, teams gain insights into project progress.
  • Increased Productivity: Automation and integration features save time and reduce manual workloads.
  • Flexible for Various Industries: From marketing to software development, Smartsheet caters to diverse project management needs.

Getting Started with Smartsheet: A Step-by-Step Guide

Step 1: Sign Up for an Account ๐Ÿ“

  • Create Your Account: Visit Smartsheet’s website and click on the “Get Started” button.
  • Account Details: Provide your email address and other required details to create your account.
  • Email Verification: Check your email inbox for a verification message from Smartsheet and follow the instructions to verify your account.

Step 2: Choose Your Plan ๐Ÿท๏ธ

  • Select a Plan: Decide between the Free, Pro, Business, or Enterprise plan based on your needs.
  • Trial Option: Consider starting with a free trial to explore the features of Smartsheet.

Step 3: Set Up Your Workspace ๐Ÿ–ฅ

  • Access Dashboard: Once logged in, you’ll be taken to your Smartsheet dashboard.
  • Explore Templates: Look through the available templates to find one that suits your project or task.
  • Create a New Sheet: Start a new sheet from scratch or modify a template to fit your needs.

Step 4: Customize Your Sheet โœ๏ธ

  • Add Columns: Define the columns you need, such as task names, deadlines, status, etc.
  • Input Data: Enter your project data into the sheet.
  • Set Up Hierarchies: Organize tasks and subtasks using the hierarchy feature for better clarity.

Step 5: Add Team Members and Collaborate ๐Ÿ‘ฅ

  • Invite Team Members: Share the sheet with your team members or collaborators via email.
  • Assign Tasks: Assign tasks to specific individuals and set up alerts or notifications.

Step 6: Explore Advanced Features ๐Ÿ”

  • Automations: Set up automated workflows for repetitive tasks.
  • Reports and Dashboards: Create reports and dashboards to get an overview of your project’s progress.
  • Integrations: Integrate Smartsheet with other tools you use, like Google Workspace or Microsoft Office.

Step 7: Manage Your Projects ๐Ÿ“…

  • Track Progress: Regularly update your sheets to reflect current project statuses.
  • Use Gantt Charts: Utilize Gantt charts for visual project planning and tracking.
  • Schedule Reviews: Conduct regular project review meetings using Smartsheet as your central reference point.

Step 8: Seek Support and Resources ๐Ÿ†˜

  • Help Center: Use Smartsheetโ€™s Help Center for tutorials, guides, and FAQs.
  • Community Forums: Join Smartsheet community forums to get insights and tips from other users.

Smartsheet is a robust platform that can enhance your project management and collaboration efficiency. By following these steps, you’ll be well on your way to mastering this powerful tool and bringing more organization and productivity to your projects and workflows.

Smartsheet Pricing Overview ๐Ÿท๏ธ

Free Plan ๐Ÿ†“

  • Access: Limited to 10 free sheets.
  • Features: Basic functionalities for individual use.
  • Best For: Small projects or individuals testing the platform.

Pro Plan ๐Ÿ’ผ

  • Pricing: $7 per user/month, billed annually.
  • Includes: Unlimited sheets, reports, and dashboards with enhanced features such as Gantt and Calendar views.
  • Ideal For: Professionals and small teams needing more comprehensive project management tools.

Business Plan ๐Ÿš€

  • Pricing: $25 per user/month, billed annually.
  • Features: Advanced capabilities like automated workflows, custom branding, and unlimited free collaborators.
  • Suitable For: Larger teams and businesses requiring extensive collaboration and integration tools.

Enterprise Plan ๐Ÿข

  • Custom Pricing: Tailored to the organization’s needs.
  • Offerings: Includes advanced security features, support, and scalability options.
  • Targeted At: Large enterprises needing a high level of customization, security, and support.

Additional Options โœจ

  • Add-ons: Additional features and services available for purchase.
  • Support: Enhanced support options for higher-tier plans.

For detailed information on each plan and to see which one best fits your needs, you can visit Smartsheet Pricing.

Smartsheet vs. Asana: A Comparative Review

Pros of Smartsheet

Versatile Functionality ๐Ÿ› ๏ธ

  • Extensive Feature Set: Offers a wide range of project management and collaboration tools, including advanced reporting and resource management.
  • Customization Options: Provides high levels of customization for sheets, reports, and dashboards to fit various project needs.

Spreadsheet-Like Interface ๐Ÿ’ป

  • Familiar Layout: Resembles a spreadsheet, making it easier for users familiar with Excel to adapt.
  • Detailed Data Management: Allows for detailed data entry and complex formulas, benefiting data-intensive projects.

Advanced Integration and Automation ๐Ÿ”„

  • Robust Integrations: Integrates seamlessly with a variety of other tools, including CRM and ERP systems.
  • Powerful Automation Features: Offers advanced automation capabilities to streamline repetitive tasks and processes.

Cons of Smartsheet

Complexity in Use ๐Ÿค”

  • Steep Learning Curve: The extensive features can be overwhelming for new users or small teams.
  • Time-Consuming Setup: Setting up sheets and reports with complex requirements can be time-consuming.

Cost Factor ๐Ÿ’ฒ

  • Higher Cost: Tends to be more expensive than some competitors, particularly for advanced features and larger teams.

Pros of Asana

User-Friendly Interface ๐ŸŒŸ

  • Intuitive Design: Known for its user-friendly and visually appealing interface, making it easy to navigate and use.
  • Task-Oriented Structure: Excellently suits task and to-do list management.

Collaboration and Communication Tools ๐Ÿ—ฃ๏ธ

  • Enhanced Team Collaboration: Offers excellent tools for team communication and collaboration, including task comments and project updates.
  • Real-Time Notifications: Keeps teams informed with real-time updates and notifications.

Flexibility and Scalability ๐Ÿ“ˆ

  • Adaptable for Various Teams: Suits a wide range of teams and project types, from simple task management to complex projects.
  • Scalable Solution: Easily scales with the growth of a team or project complexity.

Cons of Asana

Limited Data Management โš™๏ธ

  • Less Robust for Complex Data Management: Not as powerful as Smartsheet in handling complex data and lacks advanced reporting features.
  • Limited Customization for Reporting: While it offers basic reporting, it doesn’t match the depth of Smartsheet’s reporting capabilities.

Pricing for Premium Features ๐Ÿ’ณ

  • Cost for Advanced Features: Many of Asana’s more advanced features are locked behind its premium plans.

Both Smartsheet and Asana offer strong project management capabilities but cater to different needs and preferences. Smartsheet is more suitable for data-intensive projects and users who prefer a spreadsheet-like environment with robust customization and integration capabilities. On the other hand, Asana is ideal for teams prioritizing ease of use, task management, and collaboration, offering an intuitive interface and strong communication tools. The choice between the two will largely depend on the specific needs, scale, and preferences of the team or organization.

Final Thoughts and Recommendations โœจ

Smartsheet stands out as a versatile and powerful project management tool, especially for those who are accustomed to spreadsheet functionalities but require more robust project management features. It’s an excellent choice for businesses looking for a comprehensive tool to manage projects, automate workflows, and collaborate effectively.

“Flexible solutions fit your work at any scale”

Calendly: Revolutionizing Your Scheduling Experience

Overview ๐ŸŒ

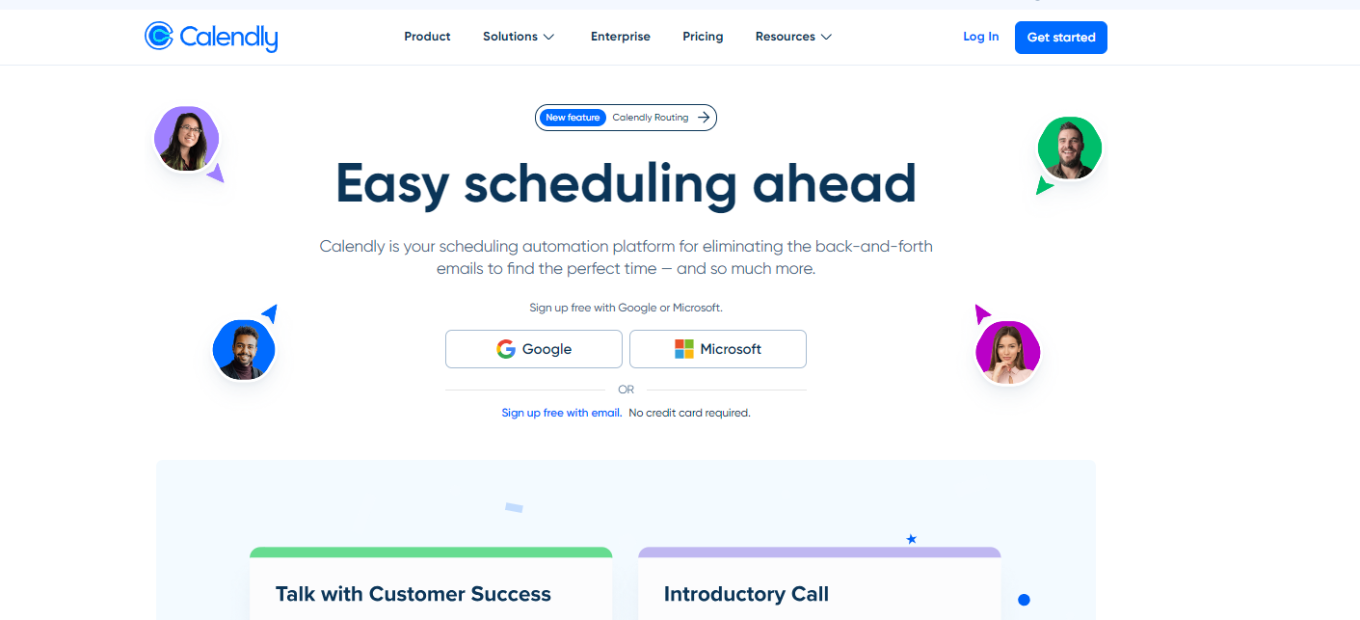
Calendly is a powerful scheduling platform designed to simplify the coordination of meetings and appointments. It effectively eliminates the tedious back-and-forth communication typically associated with arranging meetings. With its user-friendly interface and robust integration with various calendar services, Calendly offers a streamlined scheduling experience.

Key Features ๐Ÿ”‘

  • Automated Scheduling: Calendly automates the process of finding suitable meeting times by syncing with your calendar.
  • Customizable Meeting Types: Users can set up different types of meetings, from one-on-ones to group sessions.
  • Time Zone Intelligence: Calendly automatically adjusts for different time zones, ensuring global compatibility.
  • Integration with Popular Tools: The platform seamlessly integrates with tools like Google Calendar, Office 365, and Zoom.

Benefits and Use Cases ๐Ÿ’ก

  • Increased Productivity: Reduces time spent on scheduling, allowing more focus on productive tasks.
  • Flexibility: Offers flexibility in scheduling, catering to various business needs and personal preferences.
  • Improved Professionalism: Streamlines the scheduling process, presenting a professional image to clients and colleagues.

How to Get Started with Calendly

Step 1: Sign Up for an Account ๐Ÿ“

  • Create an Account: Visit the Calendly website and sign up. You can use your email address or directly sign up with your Google or Office 365 account.
  • Verification: Verify your email if required to activate your account.

Step 2: Set Up Your Calendar ๐Ÿ—“

  • Calendar Integration: Connect your preferred calendar (Google, Outlook, Office 365, or iCloud). This sync ensures Calendly knows your availability to avoid double bookings.
  • Availability Settings: Define your general availability in the Calendly settings. This schedule will apply to all your event types by default.

Step 3: Create Event Types ๐ŸŽŸ

  • Add New Event Types: Click on โ€œNew Event Typeโ€ and choose between a one-on-one or a group event.
  • Customize Event Details: Set the event name, duration, and location (in-person, phone call, or video call).
  • Advanced Options: Customize additional settings like buffer times, event color, and email notifications.

Step 4: Personalize Your Calendly Link ๐Ÿ”—

  • Customize Your Link: Personalize your Calendly URL to make it recognizable and easier to share.
  • Link Sharing: Share your Calendly link via email, social media, or embed it on your website.

Step 5: Manage Bookings ๐Ÿ“…

  • View Appointments: Check your Calendly dashboard to see upcoming meetings.
  • Reschedule or Cancel: You can reschedule or cancel appointments directly from the dashboard.

Step 6: Integrate with Other Tools ๐Ÿ”Œ

  • Connect with Other Apps: Use Calendlyโ€™s integrations with platforms like Zoom, Salesforce, or Zapier to enhance your scheduling process.
  • Automate Workflows: Set up automated workflows for added efficiency, like sending follow-up emails after a booking.

Step 7: Upgrade If Necessary ๐Ÿ’ณ

  • Evaluate Your Needs: If you need more features like automated reminders, team scheduling, or analytics, consider upgrading to a premium plan.
  • Choose a Plan: Select from Calendlyโ€™s various paid plans based on your specific requirements.

Remember, the initial setup process is crucial for ensuring a smooth and efficient use of Calendly. Taking the time to correctly set up your availability, event types, and integrations will save you time and streamline your appointment scheduling in the long run.

Calendly Pricing Overview

Basic Plan (Free) ๐Ÿ†“

  • Features: Offers essential scheduling tools suitable for individuals.
  • Advantages: Ideal for personal use or testing the platform’s capabilities.
  • Limitations: Access to basic features only.

Essentials Plan ๐Ÿ’ผ

  • Pricing: Monthly and annual subscription options available.
  • Features: Includes more advanced scheduling options and customization.
  • Suitability: Best for professionals and small teams requiring more than the basic functionalities.

Professional Plan ๐Ÿš€

  • Pricing: Available on a monthly or annual subscription basis.
  • Features: Offers extensive customization and integration capabilities.
  • Best For: Ideal for businesses and teams needing comprehensive scheduling solutions.

Teams Plan ๐Ÿ‘ฅ

  • Pricing: Monthly and annual payment options.
  • Features: Designed for collaboration within teams, offering centralized billing and admin controls.
  • Ideal For: Larger teams and organizations that require shared scheduling and administrative oversight.

Enterprise Plan ๐Ÿข

  • Features: Tailored for large organizations with specific needs.
  • Customization: Offers extensive customization and dedicated support.
  • Advantages: Best suited for large enterprises requiring a scalable and secure scheduling solution.

For detailed information on pricing and features, you can visit Calendly Pricing.

Calendly vs. Acuity Scheduling: A Comparative Analysis

Pros of Calendly

User-Friendly Interface ๐ŸŒŸ

  • Ease of Use: Calendly is known for its intuitive and clean interface, making it easy for both first-time and regular users to navigate.
  • Seamless Integration: It integrates smoothly with various calendar types and popular business tools.

Efficient Scheduling ๐Ÿ“…

  • Automated Time Zone Adjustments: Calendly automatically adjusts for different time zones, simplifying global scheduling.
  • Flexible Meeting Types: Allows customization of various meeting types, from individual appointments to group events.

Enhanced Productivity ๐Ÿš€

  • Reduced Scheduling Hassle: By automating the scheduling process, it reduces manual coordination efforts.
  • Professional Image: Streamlines the appointment setting process, presenting a polished and professional front.

Cons of Calendly

Limited Features in Free Plan ๐Ÿ“‰

  • Basic Functionality: The free version of Calendly offers limited features compared to its paid versions.
  • Restrictions on Customizations: There are fewer customization options available in the free plan.

Lack of Payment Integration ๐Ÿ’ณ

  • No Direct Payment Options: In its basic plans, Calendly lacks integration with payment gateways, a feature that can be critical for businesses charging for appointments.

Pros of Acuity Scheduling

Comprehensive Features ๐Ÿ“Š

  • Diverse Functionality: Acuity offers a wide range of features, including appointment scheduling, payment integration, and selling memberships or packages.
  • Customizable Booking Experience: Users can tailor their booking pages extensively, matching their brand and specific needs.

Payment Integration ๐Ÿ’ฐ

  • Direct Payment Processing: Acuity integrates with popular payment platforms like Stripe, PayPal, and Square, facilitating easy billing and payment collection.

Versatile Use Cases ๐Ÿ› 

  • Suitable for Various Businesses: Acuity is well-suited for service-based businesses like spas, fitness studios, and consultants who need to manage appointments and accept payments.

Cons of Acuity Scheduling

Complexity in Setup ๐Ÿค”

  • Steep Learning Curve: Some users find the setup process of Acuity Scheduling to be more complex than Calendly, especially when dealing with numerous features.
  • Time-Consuming Customization: Extensive customization options, while beneficial, can take time to set up properly.

No Free Version ๐Ÿšซ

  • Lack of a Free Plan: Acuity does not offer a free plan, which might be a barrier for individual users or small businesses just starting out.

In summary, Calendly stands out for its user-friendly interface and efficient scheduling capabilities, especially for users looking for a straightforward scheduling tool. On the other hand, Acuity Scheduling offers more comprehensive features and payment integration, making it a better fit for service-based businesses that need more robust booking and payment options.

Final Thoughts and Recommendations โœจ

Calendly stands out as a highly efficient and user-friendly scheduling tool. It’s well-suited for professionals and businesses looking to streamline their appointment setting process. Whether you’re a freelancer, a small business owner, or part of a larger organization, Calendly offers a solution to meet your scheduling needs.

“Easy scheduling ahead.”

Jira: The Ultimate Project Management Tool – A Comprehensive Review

โš–๏ธ Our Verdict on Jira

Jira, developed by Atlassian, emerges as a leading project management tool, particularly favored in software development environments. Known for its robust issue-tracking and agile project management capabilities, Jira is a top choice for teams looking for efficient workflow management and project tracking.

Pros & Cons

Pros:

  • ๐ŸŒ Extensive project management and tracking features.
  • ๐Ÿ› ๏ธ Highly customizable workflows and boards.
  • ๐Ÿ”— Seamless integration with various development tools.
  • ๐Ÿ“Š Advanced reporting and analytics capabilities.

Cons:

  • ๐Ÿ’ธ Can be more expensive than some competitors.
  • ๐Ÿงฉ Complexity increases with customization.
  • โณ Steeper learning curve for new users.

About Jira

Originally designed as an issue tracker, Jira has evolved into a comprehensive project management tool. It encompasses features for agile development, project tracking, issue tracking, and a suite of tools for software development lifecycle management.

Whatโ€™s In It For You?

Jira offers tools that support all aspects of project management and software development. Its features enable effective team collaboration, project tracking from inception to delivery, and include tools for backlog prioritization, sprint planning, and release management.

How to Get Started with Jira ๏ธ

Step 1: Sign Up for a Jira Account ๏ธ

  1. ๐ŸŒ Visit the Jira Website: Go to Atlassian’s official website.
  2. ๐Ÿ†“ Start Your Free Trial: Opt for the โ€œStart free trialโ€ option. Jira offers a 7-day free trial.
  3. ๐Ÿ“ Provide Your Details: Enter required information such as your email, create a password, and choose your Jira siteโ€™s name.

Step 2: Set Up Your Project โš™๏ธ

  1. ๐Ÿ“Š Select a Template: Choose a project template that fits your workflow (Scrum, Kanban, etc.).
  2. ๐Ÿท๏ธ Create Your Project: Name your project and add a key for easy identification.

Step 3: Add Issues to Your Project

  1. โž• Add Tasks: Create tasks, bugs, or stories using the โ€˜Createโ€™ button.
  2. ๐Ÿท๏ธ Detail Your Issues: Add descriptions, assignees, and set priorities for each issue.

Step 4: Customize Your Workflow

  1. ๐Ÿ› ๏ธ Configure Workflow: Adapt Jiraโ€™s workflow to match your teamโ€™s processes.
  2. ๐ŸŽจ Customize Boards: Tailor your Kanban or Scrum boards with custom columns and filters.

Step 5: Collaborate with Your Team

  1. ๐Ÿ‘ฅ Add Team Members: Invite team members to your Jira project.
  2. ๐Ÿ—จ๏ธ Communicate: Use Jiraโ€™s commenting and tagging features for collaboration.

Step 6: Track Project Progress

  1. ๐Ÿ“ˆ Use Dashboards: Monitor your projectโ€™s progress with Jiraโ€™s dashboards.
  2. ๐Ÿ“… Schedule Meetings: Plan sprints and retrospectives within Jira.

Step 7: Review and Adapt

  1. ๐Ÿ” Conduct Reviews: Regularly review project progress and backlog.
  2. ๐Ÿ”„ Adapt and Iterate: Make continuous improvements based on team feedback.

Pricing Plans & Support

Jira offers various pricing plans tailored to different team sizes and needs:

  1. ๐Ÿ†“ Free Plan: For small teams (up to 10 users), offering basic features.
  2. ๐Ÿ’ผ Standard Plan: Priced at $7.50/user/month, suitable for growing teams.
  3. ๐Ÿข Premium Plan: At $14.50/user/month, includes advanced features for larger teams.
  4. โญ Enterprise Plan: Custom pricing for extra-large teams, with enterprise-grade features and support.

Jira vs. Microsoft Azure DevOps

Jira Pros:

  • ๐Ÿ› ๏ธ Comprehensive project management and issue tracking.
  • ๐Ÿ“Š Advanced reporting and customizable workflows.

Jira Cons:

  • ๐Ÿ’ธ Higher cost for premium features.
  • โš™๏ธ Requires time to learn the platformโ€™s full capabilities.

Microsoft Azure DevOps Pros:

  • ๐Ÿ–ฅ๏ธ Integrated suite for software development lifecycle.
  • ๐Ÿ’ฐ Competitive pricing and integration with other Microsoft tools.

Microsoft Azure DevOps Cons:

  • ๐Ÿ“š May be overwhelming for smaller teams or non-development projects.
  • ๐Ÿงฉ Less flexible in workflow customization compared to Jira.

Conclusion

Jira stands as a comprehensive tool for project management, especially beneficial for teams engaged in software development. With its range of features, Jira is suitable for both small startups and large enterprises aiming to streamline their project processes.

โ€œEmpowering Teams to Achieve More.โ€

Todoist: Your Ultimate Task Management Companion

โš–๏ธ Our Verdict

Todoist is a web-based task management and organization tool that aids individuals and teams in organizing and tracking their tasks and projects. It offers a clean and intuitive interface, making task management simple and efficient. Todoist is renowned for its simplicity, making it a favorite for both personal and professional use.

๐Ÿ‘ Pros

  • Simplicity and Efficiency: Todoistโ€™s clean interface makes it easy to add, organize, and prioritize tasks.
  • Flexibility: Users can customize their task lists, set priorities, and add due dates.
  • Collaboration: Todoist allows team members to collaborate on tasks and projects seamlessly.
  • Integrations: Todoist supports integrations with numerous third-party apps and services.
  • Cross-Platform Accessibility: Available on iOS, Android, and web, ensuring users can manage their tasks anytime, anywhere.

๐Ÿ‘Ž Cons

  • Limited Advanced Features: Todoist is straightforward, which might be limiting for users needing advanced project management tools.
  • Premium Features: Some essential features are only available in the premium version.
  • Task Visualization: Lack of visual project tracking like Kanban boards, which are available in competitors like Trello.

๐ŸŒŸ About Todoist

Todoist was born out of the need for a simple yet effective task management tool. It focuses on helping users organize their tasks and priorities in a clean, accessible manner. With features like natural language input and priority setting, Todoist has become a go-to for millions seeking a straightforward task management solution.

๐ŸŽ Whatโ€™s In It For You?

Todoist offers a streamlined approach to task management. Users can quickly input tasks, set priorities, and due dates, and even assign tasks to others. The toolโ€™s simplicity and cross-platform accessibility make it a favorite for personal task tracking and team collaboration alike.

๐Ÿ› ๏ธ How Does It Work?

How to Start Using Todoist

1. Visit Todoistโ€™s Website

Go to todoist.com.

2. Start for Free

Click on the “Start for free” button on the homepage. You donโ€™t need to provide payment details for starting with the free plan.

3. Create an Account

You can sign up using your Google account, Apple ID, or email address. Follow the prompts to complete the registration process.

4. Add Tasks

Once your account is set up, you can start adding tasks. Type your tasks into the task field. Todoistโ€™s natural language recognition will help you quickly fill your to-do list.

5. Organize Your Tasks

Your tasks will be automatically sorted into “Today”, “Upcoming”, and custom Filter views to help you prioritize your work.

6. Create Workspaces

You can create different workspaces for personal, work, and team tasks. All these can be managed under the same roof.

7. Install Todoist App (Optional)

For easy access and to manage your tasks on the go, you can download the Todoist app on your mobile device from Google Play or the App Store.

8. Explore Features

Explore all the features Todoist has to offer, including the template gallery, productivity quiz, extension gallery, and inspiration hub to enhance your task management experience.

9. Upgrade (Optional)

If you need more advanced features, consider upgrading to one of Todoistโ€™s premium plans.

10. Get Support

If you have any questions or need assistance, visit the Help Center to find answers and tips for getting the most out of Todoist.

๐Ÿ’ฐ Pricing Plans & Support

Todoist offers various pricing plans to cater to different user needs:

1. Beginner Plan (Free)

  • Price: $0
  • Features:
    • 5 active projects
    • 5 MB file uploads
    • 3 filter views
    • 1-week activity history

2. Pro Plan

  • Price: $4 per month (billed yearly)
  • Features:
    • 300 active projects
    • 100 MB file uploads
    • 150 filter views
    • Unlimited activity history
    • Task reminders
    • Task duration (currently in beta)

3. Starter Workspace (Free for Teams)

  • Price: $0
  • Features:
    • A team workspace with 5 active projects
    • Unlimited collaborators

4. Business Workspace

  • Price: $6 per member/month (billed yearly)
  • Features:
    • 500 active projects
    • Admin and member roles
    • Unlimited collaborators
    • Every member gets the Pro plan for free

Features Comparison

  • File Uploads: 5 MB for the free plans and 100 MB for the Pro and Business plans.
  • Activity History: 1 week for the free plans and unlimited for the Pro and Business plans.
  • Filter Views: Limited for the free plan, extensive for the Pro plan, and per your plan for the team workspaces.
  • Collaborators per Project: Limited for the free and Pro plans and extensive for the team workspaces.

You can start for free and then upgrade as you grow. The plans are designed to be flexible to accommodate both individual users and teams. For more detailed information, you can visit their pricing page.

๐Ÿ“ The Competition

Trello – trello.com

  • ๐Ÿ‘ Visual Interface: Trelloโ€™s Kanban boards offer a visual task tracking experience.
  • ๐Ÿ‘Ž Complexity: Can become complex for larger projects or teams.