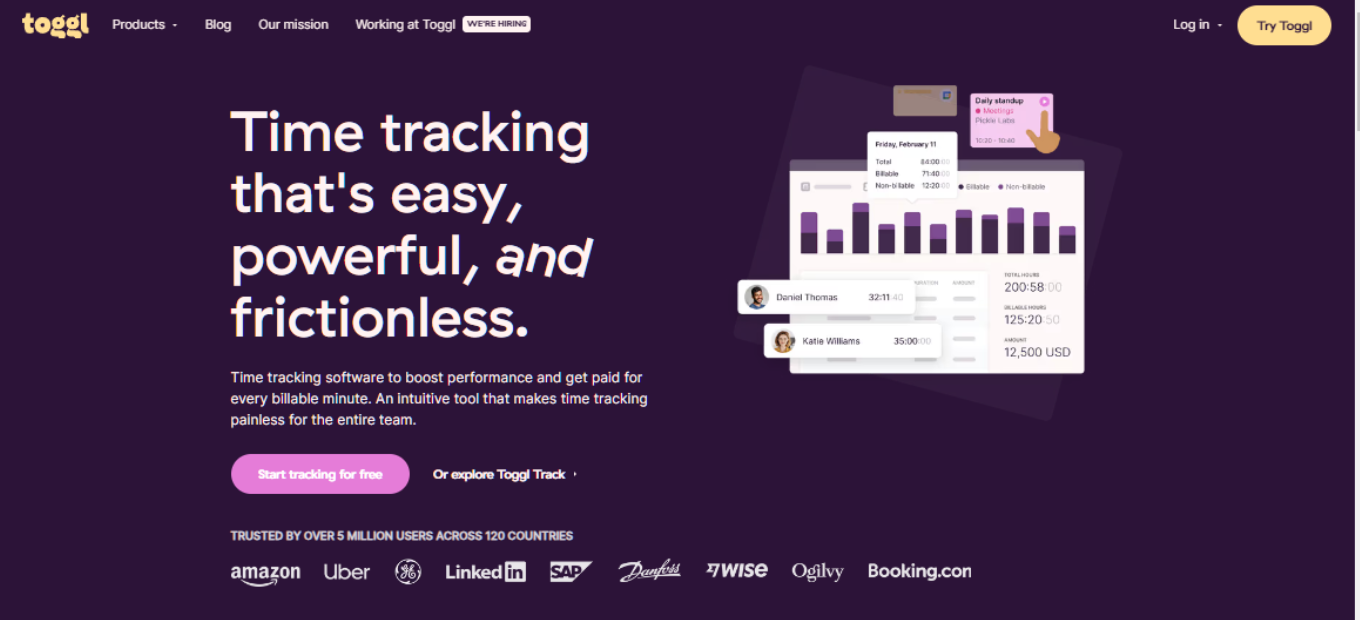
Toggl: Your Ultimate Time Tracking and Productivity Companion

βš–οΈ Our Verdict

Toggl is a robust time tracking and productivity tool that caters to individuals, teams, and businesses aiming to optimize their time management and enhance productivity. With its intuitive interface, detailed reporting, and a variety of features, Toggl stands as a comprehensive solution for tracking time, managing tasks, and analyzing productivity data.

πŸ‘ Pros

  • User-Friendly Interface: Toggl’s clean and intuitive design ensures a seamless user experience.
  • Detailed Reporting: Offers in-depth insights into time spent on tasks and projects.
  • Versatility: Suitable for freelancers, teams, and businesses.
  • Integration: Seamlessly integrates with various third-party apps and tools.
  • Cross-Platform Accessibility: Available on web, desktop, and mobile platforms.

πŸ‘Ž Cons

  • Limited Features in Free Plan: Advanced features are reserved for paid plans.
  • Learning Curve: Might take some time to explore and utilize all features effectively.
  • Customization: Could offer more options for personalization.

🌟 About Toggl

Toggl was conceived with the vision of offering a simplified yet powerful time tracking solution. It has evolved to provide not just time tracking, but also detailed reporting and insights to help users optimize their time and productivity. With features like one-click timers, detailed reports, and team management tools, Toggl has become a favorite among freelancers, teams, and businesses alike.

🎁 What’s In It For You?

Toggl’s intuitive interface and detailed reporting tools offer users insights into their productivity patterns, helping them make informed decisions to optimize their time and output. With features tailored to various needs, Toggl is a versatile tool that adapts to different working styles and requirements.

πŸ› οΈ How Does It Work?

Step 1: Visit the Toggl Website

  • Open your web browser and go to the Toggl website by entering the URL: https://toggl.com/.

Step 2: Sign Up for an Account

  • On the Toggl homepage, you will find a “Sign Up for Free” button. Click on it to begin the registration process.

Step 3: Create Your Toggl Account

  • You will be asked to provide some basic information to create your Toggl account. This typically includes your name, email address, and password. Fill out the required fields.

Step 4: Verify Your Email

  • After completing the registration form, Toggl may send a verification email to the address you provided. Check your email inbox and follow the instructions to verify your email address.

Step 5: Log In to Your Toggl Account

  • Once your email is verified, return to the Toggl website and click on the “Log In” button. Enter your email and password to access your Toggl account.

Step 6: Set Up Your Workspace

  • When you first log in, you’ll be prompted to set up your workspace. This involves creating your first workspace, which is like a project or company name. You can name it something relevant to your work.

Step 7: Start Tracking Time

  • With your workspace set up, you can start tracking time on tasks and projects. Here’s how:
    • Click the “+ New” button to create a new task or project.
    • Enter a name for the task or project.
    • Click the “Start” button to begin tracking time.
    • When you’re done, click “Stop” to stop the timer.
    • You can add descriptions and tags to your time entries for better organization.

Step 8: Explore Toggl Features

  • Take some time to explore Toggl’s features, including:
    • Reports: Toggl provides detailed reports on how you’re spending your time.
    • Projects: Organize your tasks and time entries into projects.
    • Teams: If you’re working with others, you can invite team members to collaborate.
    • Integrations: Toggl integrates with various tools like calendars and project management apps for seamless workflow.

Step 9: Install Toggl Desktop or Mobile App (Optional)

  • If you want to track time on your desktop or mobile device, you can download and install the Toggl desktop app or mobile app for iOS and Android. These apps provide a convenient way to track time on the go.

Step 10: Upgrade Your Plan (Optional)

  • Depending on your needs, you can consider upgrading to a paid plan like Toggl Premium or Toggl Enterprise to access advanced features and capabilities.

Step 11: Explore Toggl Resources

  • Toggl offers resources like tutorials, guides, and a knowledge base to help you make the most of the tool. You can access these resources on their website.

That’s it! You’ve successfully started using Toggl to track your time and manage your tasks. Remember to regularly track your time entries to gain insights into your productivity and manage your projects efficiently.

πŸ’° Pricing Plans & Support

Pricing Plans

1. Team Plan ($8 per user per month, billed annually or $9 per user per month, billed monthly):

  • Plan and track team projects
  • Team timelines
  • Project timelines and boards
  • Timeline sharing
  • Recurring tasks
  • Multi-assign tasks
  • Task attachments (100MB per file)
  • In-app and email notifications
  • Public holidays
  • Time tracking with Toggl Track integration
  • Project progress overview

2. Business Plan ($13.35 per user per month, billed annually or $15 per user per month, billed monthly):

  • All features in the Team plan
  • Availability overview
  • Time off
  • Workspace guests
  • Data exports
  • Timeline compact view
  • Project board compact view
  • Single Sign-On (SSO)
  • Priority support

Features

  • Team Timelines: A clear overview of everyone’s work to stay on top of the team’s workload.
  • Project Timelines and Boards: Plan and track projects with simple, drag-and-drop interfaces.
  • Timeline Sharing: Share plans with external stakeholders through a publicly shareable, read-only link.
  • Recurring Tasks: Create repeating tasks that occur daily, weekly, monthly, or annually.
  • Multi-assign Tasks: Add multiple assignees to a task for collaborative work.
  • Task Attachments: Share large files with a generous upload limit of 100MB per file.
  • Public Holidays: Automatically add public holidays to your timelines.
  • Toggl Track Integration: Sync Clients and Projects to reduce double work and track time spent on tasks.

Trial Offer

A free 14-day trial is available, with no credit card required. Users get access to all the Team plan features during the trial period.

For more detailed information, you can visit their pricing page.

πŸ“ The Competition

Harvest

Pros: User-friendly, detailed invoicing, integration with various tools.

Cons: Limited features in the free plan, less intuitive reporting compared to Toggl.
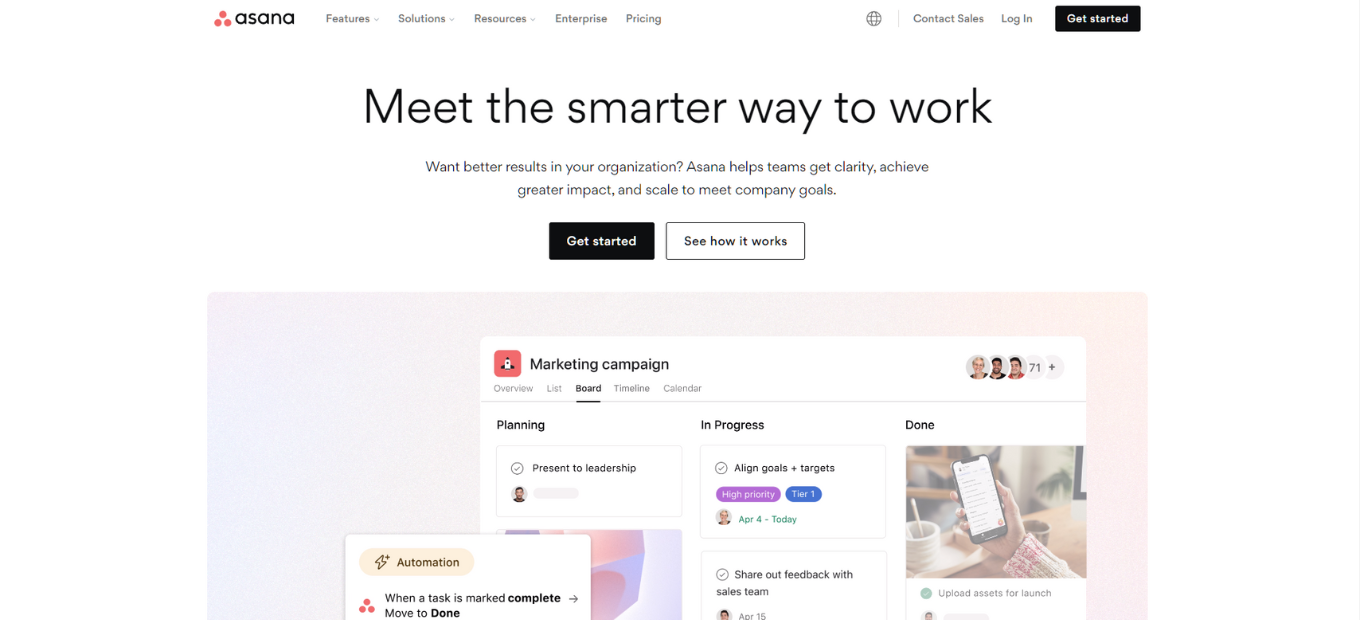
Asana: Elevate Your Team’s Project Management Experience – Startup Stack

βš–οΈ Our Verdict

Asana is a comprehensive project management tool designed to help teams orchestrate their work, from daily tasks to strategic initiatives. With Asana, you can connect all your work in one place and bring teams together, anywhere. From lists to boards, to calendars and gantt charts, organize work your way.

πŸ‘ Pros

  • Comprehensive Features: Offers detailed project planning and tracking features.
  • Customization: Allows for personalized project views and workflows.
  • Integration: Seamlessly integrates with a variety of third-party applications.
  • Collaboration: Facilitates real-time collaboration and communication among team members.

πŸ‘Ž Cons

  • Complexity: Can be overwhelming for new users due to its range of features.
  • Pricing: The free version is limited, and premium features come at a cost.

🌟 About Asana

Asana was born out of the need to improve team collaboration and productivity. It provides teams with a clear, visual, and accessible platform to manage projects, tasks, and deadlines. With a focus on simplicity and efficiency, Asana has become a favorite for teams looking to streamline their workflows and achieve more.

🎁 What’s In It For You?

  • Visual Project Management: Easily organize and prioritize tasks and projects.
  • Real-Time Collaboration: Work together effortlessly, no matter where your team is located.
  • Integrations: Connect with popular apps to automate and enhance your workflows.

πŸ” How Does It Work?


To start using Asana, follow these step-by-step instructions:

1. Sign Up:

  • Go to Asana’s website.
  • Click on the “Get Started” button on the top right corner of the homepage.
  • Enter your email address to sign up, or you can sign up with your Google account.

2. Confirm Your Email:

  • Check your email inbox for a confirmation email from Asana.
  • Click on the confirmation link in the email to verify your email address.

3. Create Your Account:

  • Fill in your name and create a password.
  • Click on the “Sign Up” button.

4. Set Up Your Team:

  • Enter your team name.
  • You can also invite team members by entering their email addresses.
  • Click on the “Continue” button.

5. Create Your First Project:

  • Choose a project template or start from scratch.
  • Name your project and add a description if needed.
  • Click on the “Create Project” button.

6. Add Tasks:

  • Click on the β€œ+” button or β€œAdd Task”.
  • Enter the task name and details.
  • Assign the task to a team member and set a due date if needed.

7. Organize Tasks:

  • Create sections to organize tasks.
  • Use drag and drop to move tasks between sections.

8. Track Progress:

  • Use the timeline, calendar, or board view to track task and project progress.
  • Update task status and add comments as needed.

9. Explore Features:

  • Explore additional features like integrations, workload, goals, etc., depending on your chosen plan.

10. Mobile App:

  • Download the Asana mobile app from the App Store or Google Play to manage tasks and projects on the go.

Note:

  • If you need more advanced features, consider upgrading to a Premium, Business, or Enterprise plan as per your organizational needs.

Now, you’re all set to use Asana for managing your tasks and projects efficiently!

πŸ’Έ Pricing Plans & Support

The Asana Pricing page outlines the different plans offered by Asana, including their features and pricing. Here’s a summary:

1. Basic Plan:

  • Price: Free forever.
  • Features:
    • Unlimited tasks, projects, messages, and activity log.
    • File storage up to 100MB per file.
    • Collaboration with up to 15 teammates.
    • List, board, and calendar view projects.
    • Assignee and due dates, project overview, and brief.
    • iOS and Android mobile apps.
    • Time tracking with integrations and over 100 free integrations with other apps.

2. Premium Plan:

  • Price: Billed per user, per month, annually or monthly.
  • Features:
    • Everything in Basic, plus timeline, workflow builder, unlimited dashboards.
    • Reporting across unlimited projects, advanced search, and custom fields.
    • Unlimited free guests, forms, rules, start dates and times, task templates, milestones.
    • Admin console, private teams, and projects.

3. Business Plan:

  • Price: Billed per user, per month, annually or monthly.
  • Features:
    • Everything in Premium, plus portfolios, goals, workload.
    • Custom rules builder, forms branching & customization, approvals, proofing.
    • Lock custom fields, advanced reporting, time tracking.
    • Advanced integrations with Salesforce, Adobe Creative Cloud, Tableau, Power BI.

4. Enterprise Plan:

  • Custom Pricing: Contact sales for pricing.
  • Features:
    • Advanced admin and security features.
    • Bundles for flexible, fast, and efficient processes across teams.

Additional Information:

  • Nonprofits: 50% off for eligible nonprofit organizations.
  • Payment: Major credit cards, bank transfer, or check for annual subscriptions over 20 members. PayPal and SEPA payment also available.
  • Basic: Free with limited features, ideal for small teams or personal use.
  • Premium & Business: Paid plans offering advanced features and support.

πŸ“ The Competition:

Trello

  • Pros: Intuitive design, easy to use, and offers visual task management.
  • Cons: Limited advanced features, basic reporting, and analytics.

monday.com: Your Ultimate Work Operating System – Startup Stack

βš–οΈ Our Verdict

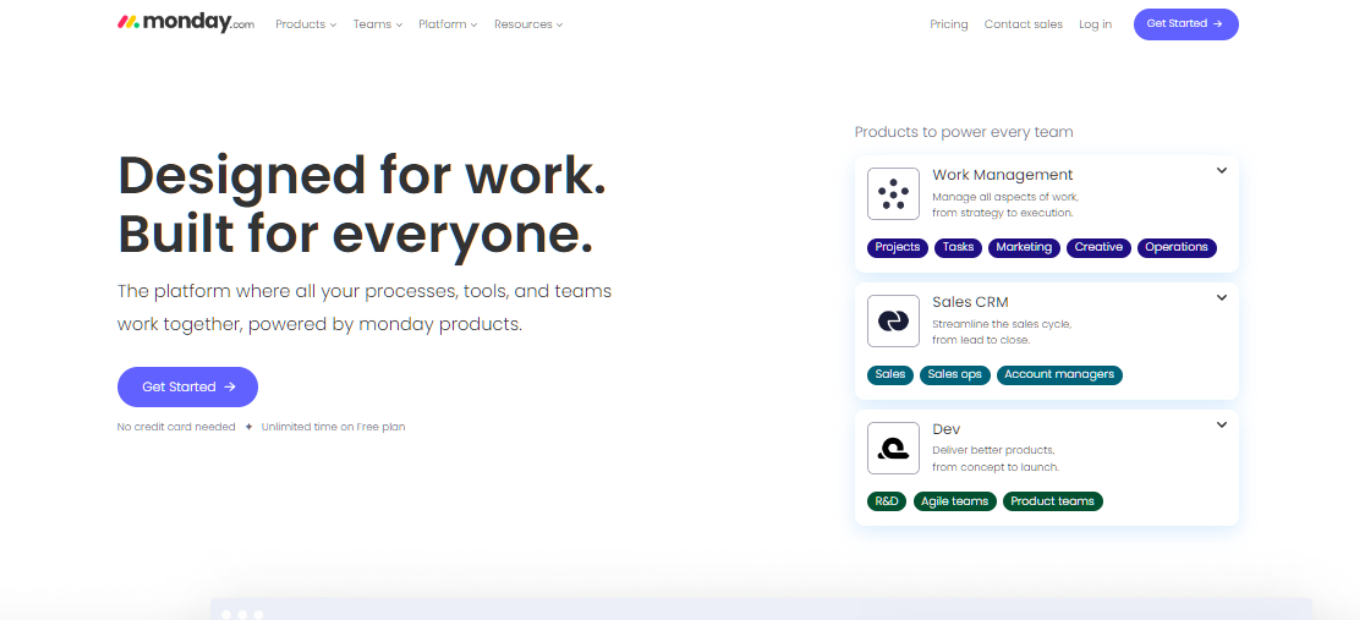
monday.com is a comprehensive work operating system that empowers teams to run projects and workflows with confidence. It’s a simple yet intuitive tool that enables teams to manage work, meet deadlines, and build a culture of transparency. The versatility of monday.com makes it a popular choice for diverse teams, offering a multitude of templates and integrations.

πŸ‘ Pros

  • Versatile Templates: monday.com offers a variety of templates to cater to different industries and use cases.
  • Intuitive Interface: The platform is user-friendly, making it easy for teams to adopt.
  • Automation and Integrations: Enhance productivity with built-in automation and numerous integrations.
  • Customizable Workflows: Adapt and customize workflows to fit your team’s specific needs.
  • Real-Time Collaboration: Enables teams to collaborate in real-time, ensuring everyone is on the same page.

πŸ‘Ž Cons

  • Pricing: Can be expensive for smaller teams or startups.
  • Complexity: With a range of features, it can be overwhelming for new users.
  • Learning Curve: Requires time to explore and understand all features and capabilities.

🌟 About monday.com

monday.com originated with the aim to create a universal solution to foster team collaboration and boost productivity. It’s not just a project management tool but a comprehensive work OS where teams can create their workflows from scratch or choose from a variety of templates. With a focus on transparency and collaboration, monday.com is trusted by over 100,000 organizations worldwide.

🎁 What’s In It For You?

  • Visual Project Management: Easily visualize your team’s work, track progress and manage projects.
  • Collaboration: Collaborate in real-time, with instant updates and notifications.
  • Integrations: Connect with popular tools like Slack, Google Drive, and Zoom.
  • Security: Top-tier security protocols to protect your data.

πŸ› οΈ How Does It Work?

1. Sign Up

  • Visit: Go to monday.com.
  • Register: Click on “Get Started” and enter your email address or sign up with Google, Slack, or Apple ID.

2. Verification

  • Email Verification: Check your email for a verification message and click on the link to verify your email address.

3. Set Up Your Account

  • Company Information: Enter your company’s name and your role.
  • Team Members: Invite team members by entering their email addresses.

4. Choose a Template or Create a Board

  • Templates: monday.com offers a variety of templates. Choose one that suits your needs or start from scratch.

5. Customize Your Board

  • Add Items: Click on β€˜New Item’ to add tasks or projects.
  • Columns: Customize columns to include due dates, statuses, assignees, and more.

6. Invite Team Members to Your Board

  • Invite: Click on β€˜Invite to Board’ on the top right and enter the email addresses of team members you want to add.

7. Explore Integrations and Automations

  • Integrations: Click on β€˜Integrate’ to connect with other apps like Slack, Google Drive, etc.
  • Automations: Set up automations to automate repetitive tasks.

8. Update and Track Progress

  • Status Updates: Click on the status column to update the progress of tasks.
  • Timeline View: Switch to timeline or calendar view to visualize deadlines and timelines.

9. Explore Additional Features

  • Dashboards: Create dashboards to get an overview of your projects and tasks.
  • Docs: Use monday.com Docs for collaborative documentation.

10. Seek Assistance

  • Help Center: Visit the help center for tutorials, guides, and support.

11. Mobile App

  • Download: Get the monday.com mobile app for iOS or Android to manage your tasks on the go.

12. Explore Advanced Features (Optional)

  • Upgrade: Consider upgrading to a paid plan for additional features, integrations, and support.

Sign up, choose a template or create your workflow from scratch, invite your team, and start collaborating. The platform’s flexibility allows it to cater to any work, from simple tasks to complex projects.

πŸ’° Pricing Plans & Support

Plans

  1. Free Plan ($0 forever)
    • Up to 2 seats
    • Up to 3 boards
    • Unlimited docs
    • 200+ templates
    • 8 column types
    • iOS and Android apps
  2. Basic Plan ($8/seat/month, billed annually)
    • Includes everything in Free, plus:
    • Unlimited free viewers
    • Unlimited items
    • 5 GB file storage
    • Prioritized customer support
    • Dashboard based on 1 board
  3. Standard Plan ($10/seat/month, billed annually)
    • Includes everything in Basic, plus:
    • Timeline & Gantt views
    • Calendar view
    • Guest access
    • Automations (250 actions per month)
    • Integrations (250 actions per month)
    • Dashboard that combines up to 5 boards
  4. Pro Plan ($19/seat/month, billed annually)
    • Includes everything in Standard, plus:
    • Private boards and docs
    • Chart view
    • Time tracking
    • Formula column
    • Dependency column
    • Automations (25,000 actions per month)
    • Integrations (25,000 actions per month)
    • Dashboard that combines up to 10 boards
  5. Enterprise Plan (Contact for pricing)
    • Includes everything in Pro, plus:
    • Enterprise-scale Automations & Integrations
    • Enterprise-grade security & governance
    • Advanced reporting & analytics
    • Multi-level permissions
    • Tailored onboarding
    • Premium support
    • Dashboard that combines up to 50 boards

Features

  • Free Plan: Ideal for individuals with basic needs, including up to 3 boards, unlimited docs, and mobile app access.
  • Basic Plan: Suitable for team management with additional features like unlimited items and viewers, and increased file storage.
  • Standard Plan: Offers enhanced collaboration tools, including timeline and calendar views, guest access, and limited automations and integrations.
  • Pro Plan: Designed for complex workflows, offering private boards, advanced views, increased automations and integrations, and additional column types.
  • Enterprise Plan: Tailored for large organizations, offering advanced security, reporting, and support features, along with extensive automations and integrations.

Additional Information

  • Discounts: An 18% discount is offered for annual billing.
  • Free Trial: A 14-day free trial is available for the Pro plan.
  • Refunds: Partial refunds are available for yearly subscriptions cancelled within 30 days.

monday.com offers a free trial, and various pricing plans tailored to fit the size and needs of any team, from startups to enterprises.

πŸ“ The Competition

Trello

Compared to Trello, monday.com offers more advanced features, including time tracking, automation, and a broader range of integrations. However, Trello is known for its simplicity and ease of use.

Google Workspace: Your Comprehensive Solution for Collaboration and Productivity

βš–οΈ Our Verdict

Google Workspace is a comprehensive suite of cloud-based productivity and collaboration tools, including Gmail, Docs, Drive, and Calendar. It empowers teams to collaborate in real-time, streamline communication, and enhance productivity with a range of intuitive tools and features.

πŸ‘ Pros

  • Seamless Integration: All tools are interconnected, ensuring smooth navigation and workflow.
  • Real-Time Collaboration: Multiple users can work on the same document simultaneously.
  • Security: Enhanced security features ensure data protection and privacy.
  • Accessibility: Access your work from any device, anywhere, anytime.

πŸ‘Ž Cons

  • Pricing: Can be expensive for small businesses.
  • Complexity: A wide range of features that can be overwhelming for new users.

🌟 About Google Workspace

Google Workspace was designed to bring together the best of Google’s cloud-based tools to transform how teams work. It offers a seamless, integrated experience that enables real-time collaboration, efficient communication, and enhanced productivity, all secured with best-in-class infrastructure and built-in security features.

🎁 What’s In It For You?

  • Integrated Experience: Enjoy the synergy of Gmail, Docs, Drive, Calendar, and more.
  • Smart AI: Leverage Google’s AI to work faster and smarter.
  • Flexible Plans: Choose a plan that fits your business size and needs.

πŸ› οΈ How Does It Work?

  1. Sign Up: Create a Google Workspace account.
  1. Collaborate: Use Docs, Sheets, and Slides to collaborate in real-time.
  2. Communicate: Connect with your team via Gmail, Meet, and Chat.
  3. Store: Safely store your files in Drive.

πŸ’Έ Pricing Plans & Support

Google Workspace offers a 14-day free trial and various pricing plans tailored to meet the needs of individuals, small businesses, and enterprises. Every plan includes applications like Gmail, Drive, Meet, Calendar, Chat, Jamboard, Docs, Sheets, Slides, Keep, Sites, and Forms.

1. Business Starter ($6/user/month)

  • Custom and secure business email
  • 100 participant video meetings
  • 30 GB pooled storage per user
  • Security and management controls
  • Standard Support

2. Business Standard ($12/user/month)

  • Custom and secure business email
  • 150 participant video meetings + recording
  • 2 TB pooled storage per user
  • Security and management controls
  • Standard Support (paid upgrade to Enhanced Support)

3. Business Plus ($18/user/month)

  • Custom and secure business email + eDiscovery, retention
  • 500 participant video meetings + recording, attendance tracking
  • 5 TB pooled storage per user
  • Enhanced security and management controls, including Vault and advanced endpoint management
  • Standard Support (paid upgrade to Enhanced Support)

4. Enterprise (Contact sales for pricing)

  • Custom and secure business email + eDiscovery, retention, S/MIME encryption
  • 1000 participant video meetings + recording, attendance tracking, noise cancellation, in-domain live streaming
  • 5 TB pooled storage per user, with the ability to request more
  • Advanced security, management, and compliance controls, including Vault, DLP, data regions, and enterprise endpoint management
  • Enhanced Support (paid upgrade to Premium Support)

Business Starter, Business Standard, and Business Plus plans can be purchased for a maximum of 300 users. There is no minimum or maximum user limit for Enterprise plans.

Additional Information

Google Workspace provides flexible pooled storage per user that is shared across the organization. Users can learn more about obtaining additional storage for their organization via the Help Center.

πŸ“ The Competition

Microsoft Office 365office.com

  • Pros: Comprehensive toolset, robust security, offline productivity.
  • Cons: Can be expensive, complex interface.

Notion: Redefining Productivity – The All-In-One Tool for Seamless Organization and Collaboration

βš–οΈ Our Verdict

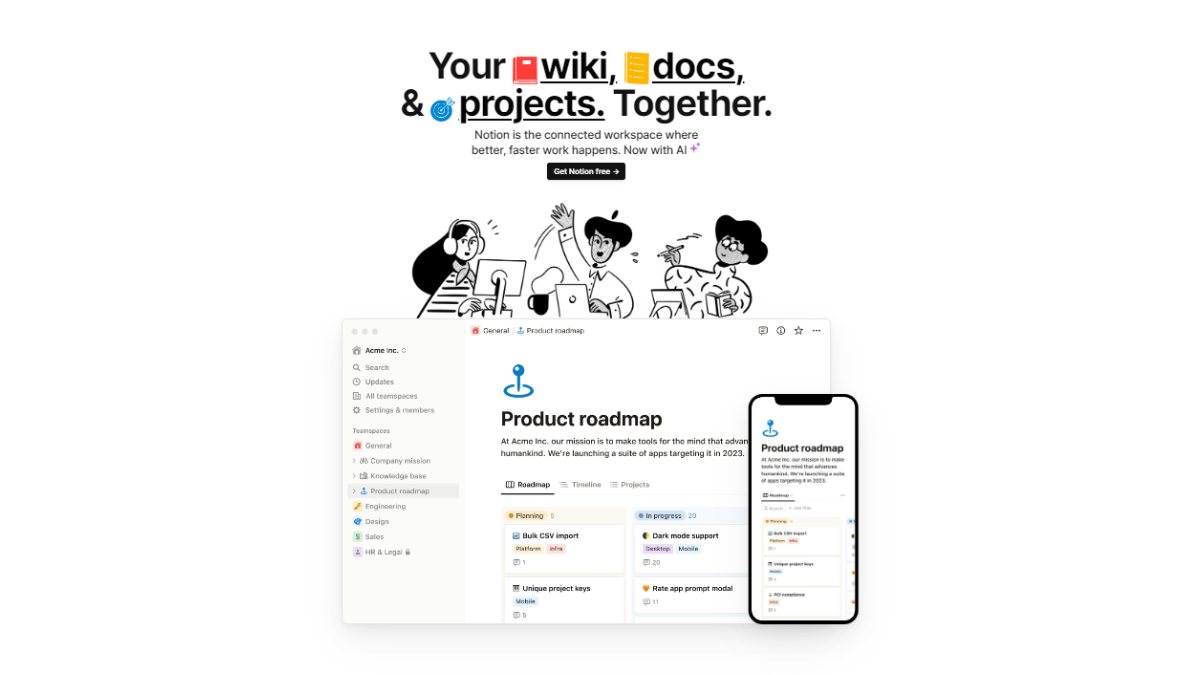
Notion is a versatile all-in-one tool that redefines the way you organize, collaborate, and share information. As a powerful productivity application, Notion combines the functionalities of note-taking apps, task managers, wikis, and project management tools into a unified platform. Its intuitive and user-friendly interface allows individuals and teams to create, customize, and manage a wide range of content seamlessly.

At its core, Notion is a digital workspace where users can create and organize documents known as “pages.” These pages can contain a variety of content types, including text, images, checklists, tables, calendars, files, and more. Users have the freedom to structure these pages as they see fit, enabling them to design workflows, plan projects, and manage tasks in a way that suits their unique needs.

πŸ‘ ProsπŸ‘Ž Cons
πŸ‘ Cross-Platform Availability: Notion is accessible on various devices and platforms, including desktop (Windows and macOS), mobile (iOS and Android), and web browsers.

πŸ‘ Intuitive Interface: The user-friendly interface makes it easy to create, organize, and edit content.

πŸ‘ Powerful Database Functionality: Notion’s database feature allows users to create structured content and turn the platform into a dynamic data management tool.

πŸ‘Third-Party Integrations: Notion supports integrations with other popular tools and services like Google Drive, Slack, Trello, and more, enhancing its capabilities and extending its usefulness.

πŸ‘ Versatility and Customization: Notion’s flexibility allows users to adapt the platform to their specific needs.

πŸ‘ All-In-One Solution: With Notion, you can consolidate multiple tools into a single platform.

πŸ‘ Real-Time Collaboration: Notion excels in team collaboration. Multiple users can work on the same page simultaneously, enabling seamless real-time editing, commenting, and task assignment.
πŸ‘Ž Steeper Learning Curve: Despite its user-friendly interface, Notion’s extensive functionality can be overwhelming for new users.

πŸ‘Ž Limited Formatting Options: Notion offers a decent set of formatting tools, but it may not be as feature-rich as some specialized word processing apps.

πŸ‘Ž Syncing and Performance Issues: While Notion provides offline access, some users have experienced occasional syncing problems between devices.

πŸ‘Ž Pricing Tiers: Notion’s free plan has certain limitations on the number of blocks (content elements) that can be created.

πŸ‘Ž Mobile App Limitations: While the mobile apps are functional, they may not offer the same level of usability and features as the desktop version, leading to a less optimal experience for some users.

πŸ‘Ž Privacy and Data Ownership Concerns: Notion stores user data on its servers, which may raise privacy and data ownership concerns for organizations and individuals handling sensitive information.

🌟 About Notion

Notion was founded by Ivan Zhao, a former designer at Inkling, in 2013. The idea for Notion came about as Zhao sought to create a tool that seamlessly combined note-taking, task management, and knowledge organization into a unified platform. He wanted to design a flexible workspace that could cater to various needs and be customizable by its users.

In 2013, Notion started as a side project for Zhao, but it gained traction and positive feedback from early users. The platform officially launched in March 2016 as a private beta. Notion’s early focus was on individual users, offering a clean and intuitive interface for note-taking and content organization.

Over time, Notion steadily expanded its features, introducing the ability to create databases, boards, and a range of templates to suit different use cases. This shift allowed it to become more than just a note-taking app and transformed it into an all-in-one workspace.

🎁 What’s In It For You?

Notion helps users in several ways, offering a wide range of features and functionalities to enhance productivity, organization, and collaboration. Here are some key ways Notion assists its users:

  1. All-In-One Workspace: Notion combines note-taking, task management, project planning, and knowledge organization into a single platform. This eliminates the need to switch between multiple apps, streamlining the user’s digital workspace and reducing clutter.
  2. Note-Taking and Content Organization: Notion allows users to create rich and structured notes with various content elements like text, images, checklists, tables, and more. Users can organize these notes into hierarchies, making it easy to manage and retrieve information effectively.
  3. Task and Project Management: Users can create task lists, to-do items, and kanban-style boards to manage individual tasks or entire projects. With due dates, reminders, and status tracking, Notion empowers users to stay on top of their tasks and collaborate with teammates effectively.
  4. Customization and Templates: Notion offers a high degree of customization, allowing users to create their templates or modify existing ones to suit their specific needs. This flexibility makes Notion adaptable for various use cases, from personal organization to team collaboration.
  5. Real-Time Collaboration: Notion’s real-time collaboration features enable seamless teamwork. Multiple users can collaborate on the same page simultaneously, making it easy to brainstorm, edit, and discuss ideas together.
  6. Knowledge Base Creation: With its powerful database functionality, Notion can be used to create and manage comprehensive knowledge bases. This feature is particularly useful for documenting processes, procedures, and company information for easy reference and onboarding.
  7. Cross-Platform Accessibility: Notion is accessible across devices and platforms, including desktop computers, mobile devices, and web browsers. Users can access their data from anywhere, and offline access ensures productivity even without an internet connection.
  8. Third-Party Integrations: Notion supports integrations with various tools and services, including Google Drive, Dropbox, Slack, and more. This enhances its capabilities and allows users to connect their existing workflows with Notion seamlessly.
  9. Personal Organization and Goal Setting: Notion can be used for personal productivity and goal tracking, helping users stay organized, set targets, and monitor progress.
  10. Team Collaboration and Communication: Notion facilitates team collaboration by providing a centralized platform where team members can communicate, share ideas, and work together on projects.

Overall, Notion’s versatility, user-friendly interface, and robust features make it a valuable tool for individuals, teams, and businesses, empowering users to boost productivity, streamline workflows, and effectively manage information and projects.

πŸ–₯️ How Does It Work?

To use Notion effectively, follow these general steps:

Step 1: Sign Up and Log In

  • Visit the Notion website at https://www.notion.so/.
  • Click on “Sign Up” to create a new account. You can use your email address or sign up with your Google account.
  • Once signed up, log in with your credentials.

Step 2: Create a Workspace

  • After logging in, you’ll be prompted to create a workspace. You can create a personal workspace or join an existing team workspace.

Step 3: Create Your First Page

  • Inside your workspace, click the “+ New” button to create a new page.
  • Choose the type of page you want to create (e.g., notes, to-do list, database).
  • Give your page a title and start adding content by typing or using the formatting tools.

Step 4: Organize Content with Blocks

  • Notion’s content is organized into blocks, which are individual units of information. Blocks can be text, images, headings, to-do lists, tables, and more.
  • To create a new block, press “/” or click on the “+” icon, then select the block type you want to add.

Step 5: Customize Your Workspace

  • You can customize your workspace’s appearance by changing the cover image, colors, and icons.
  • Click on the “…” icon next to the workspace name and select “Workspace settings” to access customization options.

Step 6: Create a Database (Optional)

  • To create a structured database, click on “+ New” and choose “Database.”
  • Define the properties or columns for your database (e.g., Name, Status, Due Date).
  • Start adding entries to the database by filling in the information for each item.

Step 7: Collaborate with Others

  • To collaborate with team members or invite others to your workspace, click on “Share” at the top-right corner of the page.
  • Enter the email addresses of the people you want to invite, and choose the appropriate permission level (edit or view-only).

Step 8: Use Templates (Optional)

  • Notion offers a variety of templates for different use cases. To access templates, click on “+ New” and choose “From Template.”
  • Browse the templates and select the one that suits your needs. Notion provides templates for meeting notes, project management, personal journals, and more.

Step 9: Sync Across Devices

  • Download the Notion app on your mobile device (iOS or Android) or use the desktop app (Windows or macOS).
  • Log in to your account to sync your data across devices.

Step 10: Explore and Experiment

  • Notion is a versatile tool, so take the time to explore its features and experiment with different page structures and workflows.
  • If you encounter any questions or need help, Notion’s support and community forums can provide valuable resources.

πŸ’² Pricing Plans & Support

Notion offered a tiered pricing model with free and paid subscription plans.

πŸ’Ž Free

  • The free plan of Notion is suitable for individual users or small teams who want to explore the basic features of the platform.
  • With the free plan, you can create unlimited pages and add up to 5 guests to collaborate with you on your workspace.
  • Note that some advanced features, like version history, offline access, and priority customer support, are not available in the free plan.

πŸ’Ž Personal Plan:

  • Notion’s Personal plan is a paid subscription designed for individual users who want access to additional features and customization options.
  • The Personal plan is typically billed on a monthly or annual basis.
  • Pricing may vary depending on your location and currency.

πŸ’Ž Team Plan:

  • The Team plan is designed for small to medium-sized teams or businesses looking for more robust collaboration features and administrative controls.
  • The Team plan allows you to add more members to your workspace and collaborate with your team seamlessly.
  • Pricing is usually per member per month or billed annually.

πŸ’Ž Enterprise Plan:

  • Notion’s Enterprise plan is intended for larger organizations and provides additional security, administrative controls, and custom solutions tailored to the organization’s needs.
  • For the Enterprise plan, you typically need to contact Notion’s sales team to get a customized quote based on your organization’s requirements.

It’s important to note that Notion’s pricing may change over time, and they may introduce new plans or modify existing ones. To get the most accurate and up-to-date pricing information, I recommend visiting the official Notion website or contacting their support team directly.


πŸ“ The Competition

πŸ‘ ProsπŸ‘Ž Cons
πŸ‘ Versatility: Notion is more versatile than Evernote, offering a broader range of features and functionalities.

πŸ‘ Customization: Notion provides a high level of customization, allowing users to design their workspace and pages according to their specific needs.

πŸ‘ Database Functionality: Notion’s powerful database feature enables users to create structured databases with relational properties, making it suitable for creating complex data-driven systems and knowledge bases.

πŸ‘ Collaboration: While both Notion and Evernote offer collaboration features, Notion’s real-time collaboration capabilities are more robust.

πŸ‘ Integrations: Notion supports integrations with various tools and services, enhancing its functionality and allowing users to connect their existing workflows with ease.
πŸ‘Ž Learning Curve: Notion’s extensive functionality may result in a steeper learning curve for new users compared to Evernote, which focuses primarily on note-taking.


πŸ‘Ž Syncing and Performance: Notion’s syncing and performance can be occasionally slower or less reliable, especially when dealing with large databases or complex pages.

πŸ‘Ž Pricing: Notion’s pricing can be a disadvantage for some users.

πŸ‘Ž Note-Taking Focus: Evernote’s primary focus on note-taking and organization might be more appealing to users who want a dedicated, straightforward solution without the need for advanced features found in Notion.

“Remember Everything”

Local-first alternative: Notion keeps everything in the cloud. If you would rather hold your notes as Markdown files on your own disk and work offline, Boostnote is the developer-focused option.

Related read: Notion bundles docs, databases and a wiki into one cloud workspace. If you just want a lighter notebook that keeps plain Markdown on your own machine and highlights code blocks, Boostnote is the developer-first take.

Trello: Your Ultimate Project Management Companion

βš–οΈ Our Verdict

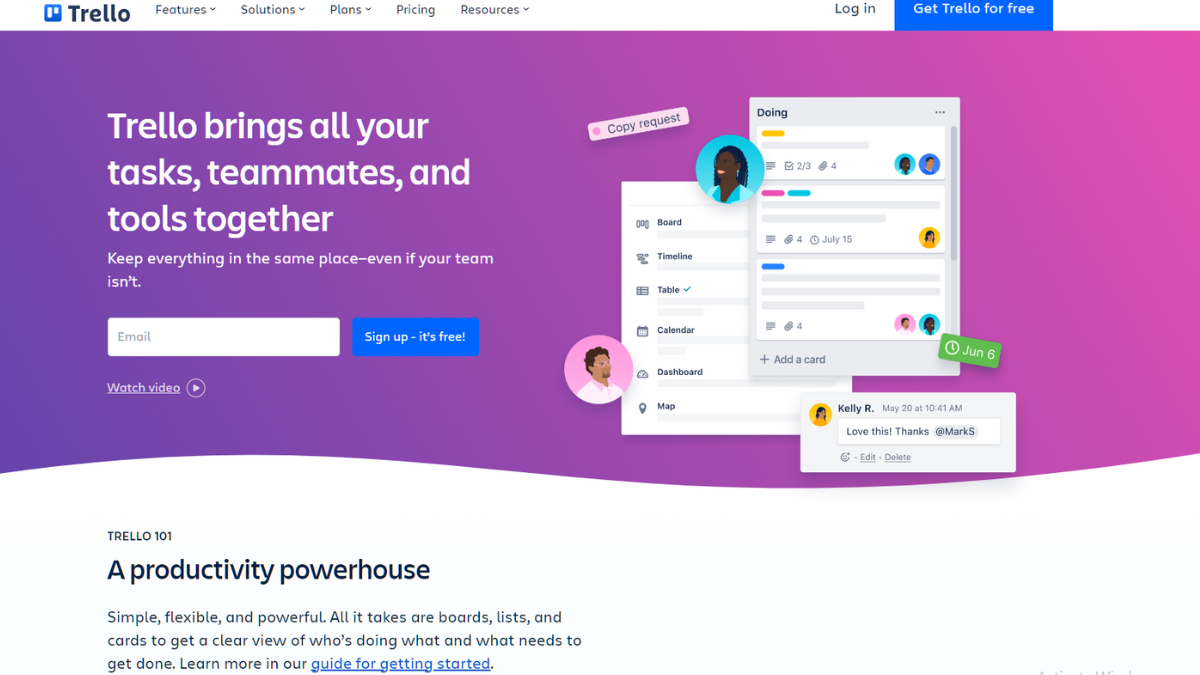
Trello is a web-based project management and collaboration tool that helps individuals and teams organize and track their tasks and projects. It provides a visual and intuitive interface that uses boards, lists, and cards to represent projects and tasks. Trello follows a Kanban-style approach, making it easy to visualize workflows and progress.

Overall, Trello provides a flexible and visual approach to project management, making it suitable for individuals, small teams, and large organizations looking for a simple yet effective tool to manage their projects, tasks, and collaborations.

πŸ‘ ProsπŸ‘Ž Cons
πŸ‘ Intuitive Visual Interface: Trello’s visual interface with boards, lists, and cards makes it easy to understand and use.

πŸ‘ Flexibility and Customization: Trello allows users to adapt the tool to their specific needs.

πŸ‘ Collaboration and Communication: Trello facilitates collaboration by allowing team members to work together on boards and cards.

πŸ‘ Integrations: Trello integrates with various third-party tools and services, such as Google Drive, Slack, and GitHub.

πŸ‘ Mobile Apps and Accessibility: Trello offers mobile apps for iOS and Android devices, allowing users to access and manage their tasks on the go.
πŸ‘Ž Lack of Advanced Project Management Features: Trello’s simplicity and ease of use may be limited for users who require more advanced project management features.

πŸ‘Ž Learning Curve for Complex Workflows: While Trello is easy to understand and get started with, it may have a learning curve for complex or large-scale projects.

πŸ‘Ž Limited Reporting and Analytics: Trello’s reporting and analytics capabilities are relatively basic.

πŸ‘Ž Storage Limitations in Free Version: The free version of Trello has storage limitations, including a limit on the number and size of file attachments.

πŸ‘Ž Pricing Structure: Trello offers both free and paid plans, with additional features available in the paid versions (Trello Business Class and Trello Enterprise). Some users may find the pricing structure, especially for teams or organizations, to be a disadvantage compared to other project management tools.

🌟 About Trello

The idea behind Trello stemmed from the desire to develop a tool that simplifies project management and enhances collaboration for teams.

The concept of Trello was inspired by Kanban, a lean manufacturing methodology that focuses on visualizing work and workflow. The founders wanted to apply this concept to digital project management, providing a visual and intuitive platform for organizing tasks and projects.

Over the years, Trello has continued to evolve and improve its features. It introduced various enhancements such as integrations with other tools, advanced automation through “Power-Ups,” and additional collaboration capabilities. Trello also expanded its platform by offering mobile apps for iOS and Android, allowing users to access and manage their tasks on the go.

🎁 What’s In It For You?

Trello’s visual interface allows users to create boards, lists, and cards, enabling them to visually organize and prioritize their tasks and projects. This visual approach helps users get a clear overview of their workload, progress, and upcoming deadlines.

Offers flexibility and customization options to adapt to different workflows and project requirements. Users can create custom boards, lists, and cards, add labels, due dates, attachments, checklists, and more. This flexibility allows users to tailor Trello to their specific needs and preferences.

Trello’s user-friendly interface and intuitive design make it easy for users to get started and navigate the platform. The simplicity of the tool allows users to quickly adopt and incorporate Trello into their daily routines without the need for extensive training.

πŸ–₯️ How Does It Work?

To use Trello effectively, follow these general steps:

  1. Sign up and create an account: Visit the Trello website or download the Trello mobile app and create a new account using your email address or other preferred sign-up methods.
  2. Create a board: Once logged in, create a new board for your project or area of focus. Give it a name and customize the background if desired.
  3. Add lists: Inside your board, create lists that represent stages or categories of your project. For example, you could have lists like “To Do,” “In Progress,” and “Completed.”
  4. Create cards: Within each list, create cards for specific tasks or items. Add a title and any necessary details to the card, such as due dates, descriptions, or attachments.
  5. Customize cards: Enhance your cards by adding labels, due dates, attachments, checklists, or comments. These elements help provide more context, organization, and progress tracking.
  6. Organize and move cards: Arrange your cards within the lists based on their current status or priority. You can drag and drop cards to move them between lists or rearrange their order.
  7. Collaborate with others: Invite team members to join your board, assign them specific cards or tasks, and encourage collaboration through comments and @mentions. This allows everyone to work together and stay updated on progress.
  8. Use additional features: Explore additional features like power-ups (integrations with other tools), automation with Butler, and advanced settings to further customize and streamline your workflow.
  9. Access Trello on mobile devices: Install the Trello mobile app on your iOS or Android device to access and manage your boards, lists, and cards on the go. Stay connected and update your tasks from anywhere.
  10. Explore Trello resources: Familiarize yourself with Trello’s help center, guides, and community forums to discover tips, best practices, and answers to common questions.

Remember, these steps provide a general overview of using Trello. The specific use and workflow may vary depending on your project requirements and preferences. Trello offers a user-friendly interface, so feel free to explore and experiment to find the best approach that suits your needs.

πŸ’² Pricing Plans & Support

Trello provides amazing pricing that lets you build and publish your dream app!

πŸ’Ž Free

Trello offers a free plan that provides basic features and functionality, including unlimited boards, lists, and cards. It is suitable for individuals or small teams with simple project management requirements.

πŸ’Ž Trello Business Class

This is the paid plan designed for teams and businesses. It offers advanced features and additional capabilities beyond the free plan. Some key features of Trello Business Class include unlimited power-ups (integrations), advanced checklists, customizable board backgrounds, priority support, and more.

πŸ’Ž Trello Enterprise

Trello Enterprise is the highest-tier plan offered by Trello. It is designed for larger organizations with extensive project management needs and requires a minimum of 20 users. Trello Enterprise offers enhanced security features, additional administrative controls, advanced integrations, and dedicated customer support.

πŸ“ The Competition

πŸ‘ ProsπŸ‘Ž Cons
πŸ‘ Simplicity and Ease of Use: Trello is known for its intuitive and user-friendly interface, making it easy for individuals and teams to get started quickly. .

πŸ‘ Visual Organization: Trello’s visual interface with boards, lists, and cards provides a clear and visual representation of tasks and projects.

πŸ‘ Flexibility and Customization: Trello offers a high degree of flexibility and customization.

πŸ‘ Collaboration and Communication: Trello provides collaboration features that allow team members to work together seamlessly.

πŸ‘ Integration Ecosystem: While both Trello and Asana offer integrations with other tools, Trello has a broader range of available integrations.
πŸ‘Ž Advanced Project Management Features: Asana offers more comprehensive project management features compared to Trello.

πŸ‘Ž Workflow Automation: Asana offers a more sophisticated automation feature called “Rules,” which allows users to automate repetitive tasks and create custom workflows.

πŸ‘Ž Reporting and Analytics: Asana provides more extensive reporting and analytics capabilities, enabling users to track project progress, monitor team productivity, and generate detailed reports.

πŸ‘Ž Pricing Structure: Asana’s pricing structure may be more favorable for larger teams or organizations compared to Trello.

“Trello. Organize anything, together.”

Evernote: A Note-Taking and Organization Platform

βš–οΈ Our Verdict

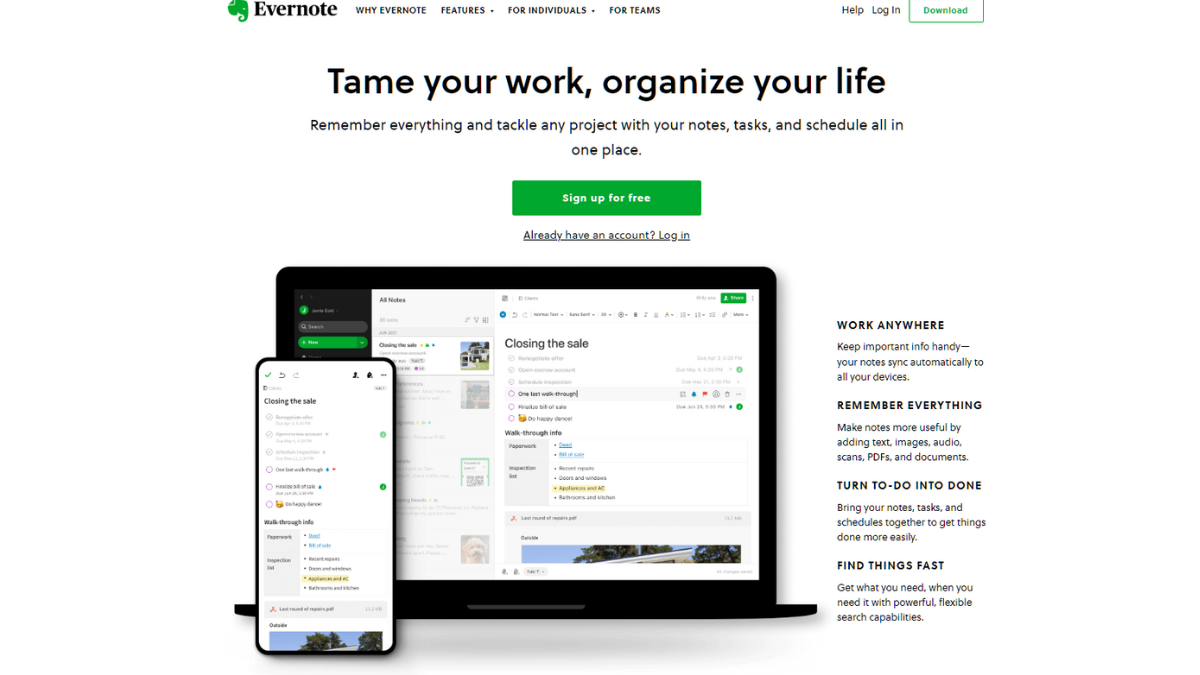
Evernote is a highly versatile note-taking and organization platform that offers a range of features to help users capture, organize, and access their notes and information.

Overall, Evernote is a powerful and widely-used note-taking and organization platform. It is well-suited for individuals, teams, and professionals who want a comprehensive and flexible solution for capturing and managing their notes and information.

πŸ‘ ProsπŸ‘Ž Cons
πŸ‘ Versatile Note-Taking: Evernote allows users to create and organize various types of notes, including text, images, audio recordings, and even handwritten notes.

πŸ‘ Cross-Platform Support: Evernote is available on multiple platforms, including web, desktop, and mobile devices.

πŸ‘ Collaboration and Sharing: Evernote allows users to collaborate on notes and projects, making it suitable for teamwork and sharing information.

πŸ‘ Integrations and Extensions: Evernote integrates with various third-party apps and services, extending its functionality.
πŸ‘Ž Pricing Tiers: Evernote offers free and paid subscription plans. While the free plan provides basic features, advanced functionalities, such as offline access, larger uploads, and enhanced collaboration, require a paid subscription. Some users may find the premium pricing to be a drawback.

πŸ‘Ž Learning Curve: Evernote’s extensive feature set and customization options may result in a learning curve for new users. It can take time to fully explore and utilize all the capabilities of the platform.

πŸ‘Ž Formatting Limitations: Occasionally, the formatting options in Evernote can be limited compared to dedicated word processors or text editors. Users requiring advanced formatting features may find this aspect restrictive.

🌟 About Evernote

Evernote is a popular note-taking and organization platform that was founded by Stepan Pachikov and Phil Libin in 2004.Β Β 

Evernote gained popularity and grew its user base rapidly, attracting millions of users worldwide. The company secured funding through several rounds of investments, enabling further development and expansion.

Evernote continues to be a popular note-taking platform, with millions of users relying on it for their productivity needs. It remains an essential tool for individuals, professionals, and teams seeking a comprehensive and flexible solution for capturing and organizing information.

🎁 What’s In It For You? 

Evernote offers powerful search functionality, allowing users to find specific notes or information quickly. The platform also provides tools for organizing and structuring notes, including notebooks, tags, and stacks. These features enable users to maintain an organized digital workspace.

Evernote facilitates collaboration by allowing users to share individual notes or entire notebooks with others. This feature is beneficial for teams working on projects or for individuals who want to share information with colleagues, friends, or family members. Users can give others permission to view or edit shared notes, enhancing productivity and collaboration.

Overall, Evernote provides a versatile and flexible platform for note-taking, organization, and productivity. Its features and accessibility make it a helpful tool for individuals, professionals, and teams who want to capture, organize, and access information efficiently across multiple devices.

πŸ–₯️ How Does It Work?

To use Evernote effectively, follow these steps:

  1. Create an Evernote Account: Visit the Evernote website or download the Evernote app on your device. Sign up for a new account by providing the required information.
  2. Install Evernote: Install the Evernote app on all the devices you plan to use, such as your computer, smartphone, or tablet. Evernote is available for various platforms, including Windows, macOS, iOS, and Android.
  3. Create and Organize Notes:
    • Create a New Note: Open Evernote and click on the “New Note” button. You can start typing, paste content, attach files, or even record audio directly into the note.
    • Formatting Options: Use the formatting options provided to customize your notes. You can change the font, add bullet points, create checklists, and more.
    • Add Attachments: Evernote allows you to attach files, images, or even PDFs to your notes. Click on the paperclip icon to add attachments.
    • Organize with Notebooks and Tags: Create notebooks to group related notes together. You can also use tags to add additional labels to your notes, making it easier to find them later.
  4. Sync and Access Notes:
    • Sync Across Devices: Evernote automatically syncs your notes across all devices linked to your account. Ensure that you have an internet connection for changes to sync.
    • Access Notes Offline: Evernote provides offline access to your most recent notes on mobile devices. Make sure you open Evernote while connected to the internet to ensure your notes are available offline.
  5. Search and Find Notes:
    • Use the Search Bar: Evernote has a powerful search feature that allows you to find specific notes or information quickly. Simply enter your search terms in the search bar at the top of the app.
    • Utilize Filters: Evernote offers filters like tags, notebooks, and dates to narrow down your search results and find notes more efficiently.
  6. Collaborate and Share:
    • Share Notes: Evernote enables you to share individual notes or entire notebooks with others. Click on the “Share” button and enter the email addresses of the people you want to share with. You can specify whether they can view or edit the notes.
    • Work Chat: Evernote’s Work Chat feature allows you to communicate and collaborate with others directly within the app. You can share notes, discuss ideas, and assign tasks.
  7. Web Clipping and Integration:
    • Web Clipping: Evernote provides browser extensions that allow you to clip web content directly into your Evernote account. Install the Evernote Web Clipper extension and use it to save articles, web pages, and more.
    • Integrations: Explore Evernote’s integrations with other applications and services. Connect Evernote to your email client, project management tool, scanning app, or other productivity tools to streamline your workflow.
  8. Set Reminders and Notifications:
    • Reminders: Evernote lets you set reminders for specific notes or tasks. Click on the alarm clock icon in a note to set a reminder with a specific date and time.
    • Notifications: Evernote can send you notifications for reminders or when someone shares a note with you. Configure your notification settings in the Evernote app preferences.

Remember to explore Evernote’s features and experiment with different ways of organizing and utilizing the platform to suit your specific needs.

πŸ“ The Competition

πŸ‘ ProsπŸ‘Ž Cons
πŸ‘ Evernote is available on various platforms, including Windows, macOS, iOS, Android, and the web.

πŸ‘ Evernote’s interface and design prioritize a straightforward note-taking experience.

πŸ‘Evernote has powerful search functionality, allowing users to search for specific words or phrases within their notes. It also supports searching within attachments, including images and PDFs.
πŸ‘Ž Evernote has a more limited set of formatting options compared to OneNote.

πŸ‘Ž Evernote’s user interface can vary across different platforms, which may lead to a slightly inconsistent user experience.

πŸ‘Ž Evernote’s free version has storage limitations, typically with a monthly upload limit and a maximum amount of total storage.

“Remember everything.”

Developer-focused alternative: Evernote is built for clipping and search. If you want code-block syntax highlighting and offline-first storage instead, Boost Note is the open-source pick.

GitHub: A Web-Based Platform for Software Development

βš–οΈ Our Verdict

GitHub provides robust version control capabilities through Git, a distributed version control system. It allows developers to track changes, collaborate on projects, and easily manage code repositories. The version control features make it easy to revert to previous versions, track contributions, and manage branches for different features or experiments.

Enables collaboration among developers and teams. It offers features such as pull requests, code reviews, and issue tracking, which facilitate communication, feedback, and seamless integration of changes. It encourages community involvement and allows for open-source collaboration on public repositories.

πŸ‘ ProsπŸ‘Ž Cons
πŸ‘ Version Control: GitHub provides a powerful and reliable version control system through Git. It allows for easy tracking of changes, branch management, and the ability to revert to previous versions when needed.

πŸ‘ Collaboration and Community: GitHub facilitates collaboration among developers and teams.

πŸ‘ Hosting and Availability: GitHub provides cloud-based hosting for code repositories, eliminating the need for developers to manage their own infrastructure.

πŸ‘ Integration and Extensibility: GitHub supports numerous integrations and extensions with other development tools and services.

πŸ‘ Documentation and Project Management: GitHub offers features for managing project documentation, including wikis and README files.
πŸ‘Ž Learning Curve: Git and GitHub have a learning curve, especially for beginners who are new to version control systems.

πŸ‘Ž Limited Private Repositories: GitHub’s free plan limits the number of private repositories that can be created.

πŸ‘Ž Security Concerns: Although GitHub has robust security measures in place, the nature of hosting code on a cloud platform raises concerns for some organizations.

πŸ‘Ž Limited Offline Functionality: GitHub’s primary functionality relies on an online environment, which limits certain features when working offline.

🌟 About GitHub

GitHub was founded in April 2008 by Chris Wanstrath, Tom Preston-Werner, and PJ Hyett. The platform was developed as a way to simplify and enhance the collaborative process for developers working on open-source projects. The founders recognized the need for a more efficient and accessible version control system that could facilitate code sharing and collaboration among developers worldwide.

GitHub was built on top of Git, a distributed version control system created by Linus Torvalds, the creator of Linux. Git had already gained popularity among developers for its speed, scalability, and flexibility. By leveraging Git’s capabilities, GitHub aimed to provide an intuitive and user-friendly interface that made it easier for developers to collaborate on code and manage their projects.

GoRetro is the result of this vision, offering a range of features and tools that help development teams streamline their workflows, make data-driven decisions, and enhance their overall agile process. 

Over time, GitHub expanded its offerings to cater to the needs of individual developers, small teams, and large enterprises. It introduced features like GitHub Pages (for hosting static websites), GitHub Actions (for automating workflows), and GitHub Enterprise (a self-hosted version of GitHub for enterprise use).

🎁 What’s In It For You? 

Today, GitHub remains one of the most influential platforms in the software development industry. It has become a go-to place for developers to collaborate, share code, and build communities around open-source projects. With its user-friendly interface, powerful version control capabilities, and emphasis on social collaboration, GitHub has significantly impacted the way software is developed and shared worldwide.

The platform quickly gained traction within the developer community, and its popularity soared as it became a hub for open-source projects. GitHub’s success can be attributed to several factors:

Social Features: GitHub introduced social features like following other developers, starring repositories, and contributing through pull requests. These features fostered a sense of community and made it easier to discover interesting projects and connect with other developers.

Collaboration Tools: GitHub’s pull request feature, along with code review and issue tracking capabilities, streamlined the collaborative process. It allowed developers to propose changes, review code, and discuss issues within the context of the codebase, enabling efficient collaboration and feedback loops.

Open-Source Emphasis: GitHub placed a strong emphasis on open-source projects. It provided a platform where developers could host their open-source code, making it accessible to others for contribution and collaboration. This helped GitHub become a central hub for the open-source community.

πŸ–₯️ How Does It Work?

Getting started with GitHub involves a few key steps. Here’s a general guide to help you get started:

  1. Create a GitHub Account: Visit the GitHub website (github.com) and sign up for a free account. Provide the required information, including your username, email address, and password.
  2. Set Up Git: Install Git on your local machine if you haven’t already. Git is the version control system that GitHub is built upon. You can download Git from the official website (git-scm.com) and follow the installation instructions for your operating system.
  3. Create a Repository: Once you’re logged in to GitHub, you can create a new repository by clicking on the “New” button on the main page or the “+” sign in the navigation bar. Give your repository a name, add an optional description, choose whether it will be public or private, and initialize it with a README file (optional but recommended).
  4. Clone the Repository: To work with the repository locally on your machine, you need to clone it. Click on the green “Code” button on your repository’s page and copy the repository’s URL. Open a terminal or command prompt on your machine, navigate to the directory where you want to store your local copy of the repository, and run the command git clone <repository URL>.
  5. Make Changes and Commit: With the repository cloned, you can start making changes to the code or files. Use your preferred code editor or IDE to modify files or create new ones. After making changes, stage the files you want to commit using the command git add <file name> or git add . to stage all changes. Then, commit your changes using the command git commit -m "commit message".
  6. Push Changes to GitHub: Once you’ve committed your changes locally, you can push them to the GitHub repository. Run the command git push origin <branch name> to push your changes to the default branch (often named “master” or “main”). If you’re working on a different branch, specify the branch name instead.
  7. Branching and Pull Requests (Optional): If you’re working on a collaborative project or want to isolate your work, you can create a new branch. Use the command git checkout -b <branch name> to create and switch to a new branch. After making changes on the branch, you can create a pull request on GitHub to propose your changes for review and merging.

These steps provide a basic overview of getting started with GitHub. As you become more familiar with the platform, you can explore additional features like issue tracking, project management tools, and collaboration features.

GitHub provides extensive documentation and guides on their website (docs.github.com), which offer more detailed instructions on various Git and GitHub operations. It’s a valuable resource to explore as you delve deeper into the platform. Additionally, there are numerous tutorials and resources available online to help you learn and navigate GitHub effectively.

πŸ’² Pricing Plans & Support

The pricing plans are as follows:

πŸ’ŽFree Plan

GitHub offers a free plan that provides essential features for individual developers and small projects. With the free plan, you get unlimited public repositories, unlimited collaborators, and basic project management tools. However, private repositories are limited to three collaborators. This plan is suitable for open-source projects or personal development.

πŸ’ŽTeam Plan

The Team plan is designed for teams and offers additional collaboration and project management features. It includes all the features of the free plan, but private repositories have unlimited collaborators. The Team plan also provides access controls, code review tools, and project management capabilities. The pricing for the Team plan is based on the number of users in the organization.

πŸ’ŽEnterprise Cloud and Enterprise Server

GitHub offers enterprise-level plans for organizations with larger teams and more complex needs.

Enterprise Cloud: This plan provides a cloud-hosted solution with advanced security features, compliance controls, and scalable infrastructure. It offers enhanced administration features, centralized billing, and priority support. The pricing for Enterprise Cloud is based on the number of users.

Enterprise Server: The Enterprise Server plan allows organizations to host GitHub on their own infrastructure or private cloud. It provides the same features as the Enterprise Cloud plan but gives organizations more control over their deployment and security. The pricing for Enterprise Server is based on a per-user annual subscription.

It’s important to note that pricing plans and features may have changed since my knowledge cutoff date in September 2021. I recommend visiting the official GitHub pricing page (github.com/pricing) for the most up-to-date information on pricing plans, features, and any additional offerings or discounts that may be available.

πŸ“ The Competition

πŸ‘ ProsπŸ‘Ž Cons
πŸ‘ GitHub has a larger and more established community of developers and open-source projects.

πŸ‘ GitHub has a wide range of integrations and plugins available, allowing seamless integration with various third-party tools, services, and workflows.
πŸ‘Ž GitLab provides a comprehensive DevOps platform that includes not only version control but also built-in continuous integration/continuous deployment (CI/CD) pipelines, container registry, monitoring, and more.

“Where the world builds software.”

24me: Keep new year’s resolutions & get organized

βš–οΈ Our Verdict

While there are other options for organization software that strives to deliver a full scheduling and task-setting function, the 24me personal assistant app appears to remain steady where many similar products fall short. It looks more than competent to assist you in scheduling your day-to-day chores, both professionally and personally, making it suited for everybody.

The free iPhone software 24me is half task manager, and part personal assistant, and can help you remember friends’ birthdays, arrange activities, and keep track of your to-do list.

All-in-all, it’s an easy-to-use, accessible, and important application for task management on a day-to-day basis.

πŸ‘ ProsπŸ‘Ž Cons
πŸ‘ Smart personal assistant
πŸ‘ Includes notes, task management, and calendar
πŸ‘ Connects to contacts, social media apps, TaskRabbit, Check, and other tools for personal information

πŸ‘Ž Automation is not as powerful as other apps
πŸ‘Ž Busy interface
πŸ‘Ž Cannot add multiple tags to a single task

🌟 About 24me

24me is an intelligent personal assistant. It’s an award-winning software that assists countless individuals across the world in boosting their efficiency. Furthermore, it’s a simple-to-use but extremely powerful tool that consolidates everything linked to your schedule: calendar, notes, to-do list, and private accounts. 24me frees up your time for the things that are most important in your life.

The application 24me keeps you organized by combining components like task management, scheduling, and bill reminder services into a little interface. 24me integrates with other applications and services you currently use, such as credit card accounts and social media, to offer the info you need to stay on top of your life. It’s a strong program that aspires to accomplish a lot, and once you understand how it works, it tackles a variety of jobs with ease.

🎁 What’s In It For You?

Your notes, tasks, events, and accounts will be synced and appear in your calendar in this application. 24me offers an easy and organized way to go about your day. With that, 24me is a single place where you can manage everything about your daily life. 

Additionally, 24me integrates with popular applications such as Google Calendar, Outlook, Yahoo, Apple, and more! 24me doesn’t require you to put usernames and such; you just need to log in and it will be automatically set up for you. 

24me lets you utilize different views like the day view, month view, and list view, allowing you to choose what’s best for you. Furthermore, 24me automatically completes tasks and errands. With a single click, you can send gifts, pay bills, post greetings, text, email, etc. 

24me also works well with other users as it allows you to share events, tasks, notes, and reminders with your friends and family. Lastly, this application lets you efficiently keep track of your schedule with smart alerts. This will save you time and keep you up to date no matter how busy your schedule is.

πŸ–₯️ How Does It Work?

  1. The calendar screen shows 3 views. Select one that fits you best.
  1. The day view shows all events, tasks, and lists for the day. Swipe on the days bar to move the day.
  1. Add an item by clicking the plus button below the screen.
  1. Name the item and choose its type. Click add once done.
  1. You can complete tasks such as sending gifts, booking, calling, etc. with just a tap.
  1. Capture your ideas using the notes section. You can add pictures and videos as part of your notes.
  1. The notifications center shows you pending alerts including past reminders.

πŸ’² Pricing Plans & Support

24me is packed with amazing features that boost your productivity. It includes a calendar, lists, notes, and notifications all in a single application. As amazing as it gets, 24me is currently free to use. Now you can accomplish more from your time by using 24me!

πŸ“ The Competition

πŸ‘ ProsπŸ‘Ž Cons
πŸ‘ Easy and light to use management software
πŸ‘ Powerful features
πŸ‘ Collaboration features
πŸ‘Ž Has bugs and errors
πŸ‘Ž Complex features for easy tasks

Keep new year’s resolutions & get organized with 24me.

Flutin 2.0: Professional multistreaming platform with Free-flow Studio

βš–οΈ Our Verdict

Flutin is a video streaming software that lets you stream live shows, organize events, and promote pre-recorded clips from a common platform. Advertisers, gamers, influencers, fitness instructors, and artists are the most likely to utilize it. The software has a consolidated dashboard that allows users to obtain real-time information about their live performance across numerous social media networks regarding views, reactions, shares, and likes.

With that, Flutin empowers artists and creators, and there’s no greater reason to continue the content flowing than the possibility of earning money. 

In conclusion, it’s an essential, all-in-one, and simple application for creators to stream across multiple platforms.

πŸ‘ ProsπŸ‘Ž Cons
πŸ‘ Stream in multiple platforms at once
πŸ‘ Easy integration with major platforms
πŸ‘ Monetization features
πŸ‘ Custom branding
πŸ‘Ž Some platforms not supported
πŸ‘Ž Delay in live session
πŸ‘Ž Outdated UI

🌟 About Flutin

Flutin Live is a web-based live broadcasting technology that allows you to seamlessly host and monetize live shows over several social media networks. With so many excellent social media platforms to select from, there’s no reason to limit yourself to just one. Flutin Live enables you to stream on numerous networks at the same time, including Facebook, YouTube, Twitch, and Instagram. 

Flutin offers live streaming solutions and beneficial features for the majority of use cases relevant to various sorts of streamers. Furthermore, choose from a number of live-streaming options such as guest invites, customized branding, screen sharing, and more to produce an engaging and thrilling show.

🎁 What’s In It For You?

Flutin’s key features allow you to conduct event planning, social media marketing, viewer analytics, event management, multistreaming, and much more. This application enables you to stream on different platforms at the same time with built-in scheduling.Β  Additionally, this tool lets businesses enhance the SEO effectiveness of live sessions by assigning keywords and descriptions to each streaming destination. To attract viewers, marketers may use the program to get a shareable link for live broadcasts and disseminate it across several platforms.

Furthermore, this tool offers multiple methods to monetize your stream. It lets you cash in with ticketed events, accept virtual gifts, and paid special requests. Flutin enables you to integrate with a variety of third-party programs, including Instagram, LinkedIn, YouTube, Telegram, Xsplit, Zapier, Steam, and others. Creators may instantly modify stream content by adding event names, inviting participants, and adding final captions using the tool.

πŸ–₯️ How Does It Work?

  1. Click the β€˜Go live now’ button to start streaming or create a new event to schedule your stream. 
  1. Fill in the basic details of your event.
  1. After filling up the details, click save.
  1. Review and edit other settings for your event.
  1. Choose the broadcast channels.
  1. Save your event as a draft or publish it right away.
  1. Invite friends and followers to your event.
  1. Click the β€˜Start live event’ button to start streaming.

πŸ’² Pricing Plans & Support

Flutin offers excellent streaming solutions to different types of creators. Choose the plan that suit your needs!

πŸ’Ž Free – $0/Month

This essential plan is free!

γ€° 10 hours streaming

γ€° 2 channels

γ€° 1 RTMP channel

γ€° 480 stream quality

γ€° 20% commission on revenue

γ€° 2 guest invites

πŸ’Ž Basic – $15/Month

This essential plan is only $15 per month!

γ€° 100 hours streaming

γ€° 7 channels

γ€° 2 Instagram channels

γ€° 3 RTMP channels

γ€° Up to 25 hours pre-recorded scheduling

γ€° 12 GB storage

γ€° 720 stream quality

γ€° 10% commission on revenue

γ€° 4 guest invites

γ€° Screen share

πŸ’Ž Advance – $39/month

This essential plan is only $39 per month!

γ€° 300 hours streaming

γ€° 20 channels

γ€° 6 Instagram channels

γ€° 8 RTMP channels

γ€° Up to 100 hours pre-recorded scheduling

γ€° 30 GB storage

γ€° 1080 stream quality

γ€° 5% commission on revenue

γ€° 10 guest invites

γ€° Web embedding

γ€° Screen share

γ€° White labeling

πŸ’Ž Agency – $79/month

This essential plan is only $79 per month!

γ€° Unlimited hours streaming

γ€° Unlimited channels

γ€° 15 Instagram channels

γ€° 20 RTMP channels

γ€° Up to 300 hours pre-recorded scheduling

γ€° 80 GB storage

γ€° 1080 stream quality

γ€° 0% commission on revenue

γ€° 10 guest invites

γ€° Web embedding

γ€° Screen share

γ€° 5 sub accounts

γ€° White labelling

πŸ“ The Competition

πŸ‘ ProsπŸ‘Ž Cons
πŸ‘ Stream to multiple platforms at once
πŸ‘ Metrics and video embed features
πŸ‘ View chats from different platforms
πŸ‘Ž Limited features on free plan
πŸ‘Ž Occasional disconnect from server

Professional multistreaming platform with Free-flow Studio with Flutin!